Checkerboard Cookies

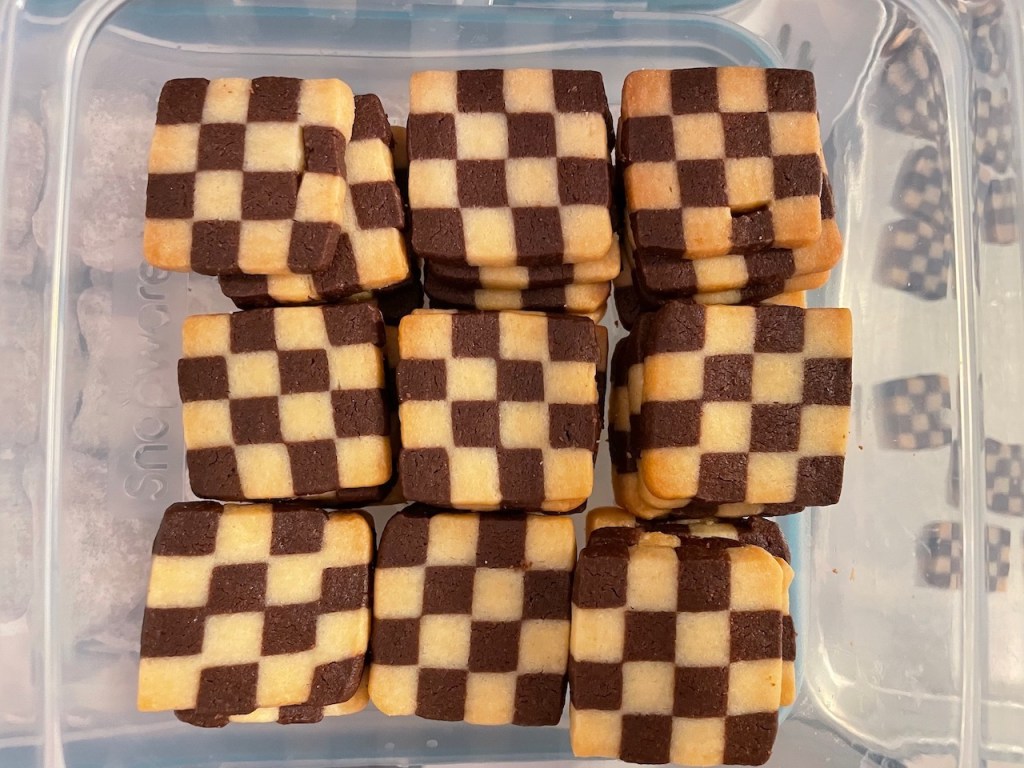
I’m getting a very late start on Christmas Cookies, and I’ll post more about them later, but I wanted to post about this year’s addition to the rotation: Checkerboard Cookies! I don’t mess with the cookie lineup lightly, but these are a complete winner and have permanently replaced the previous Zebra Icebox Cookies (from Jann Johnson’s The Art of the Cookie).

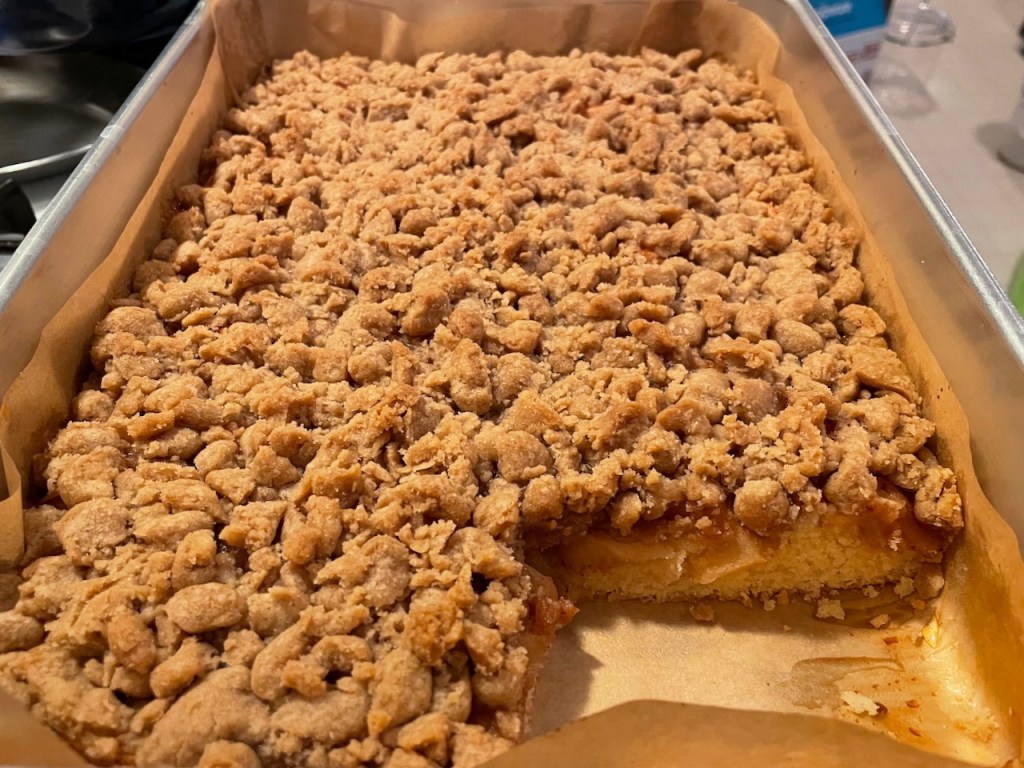
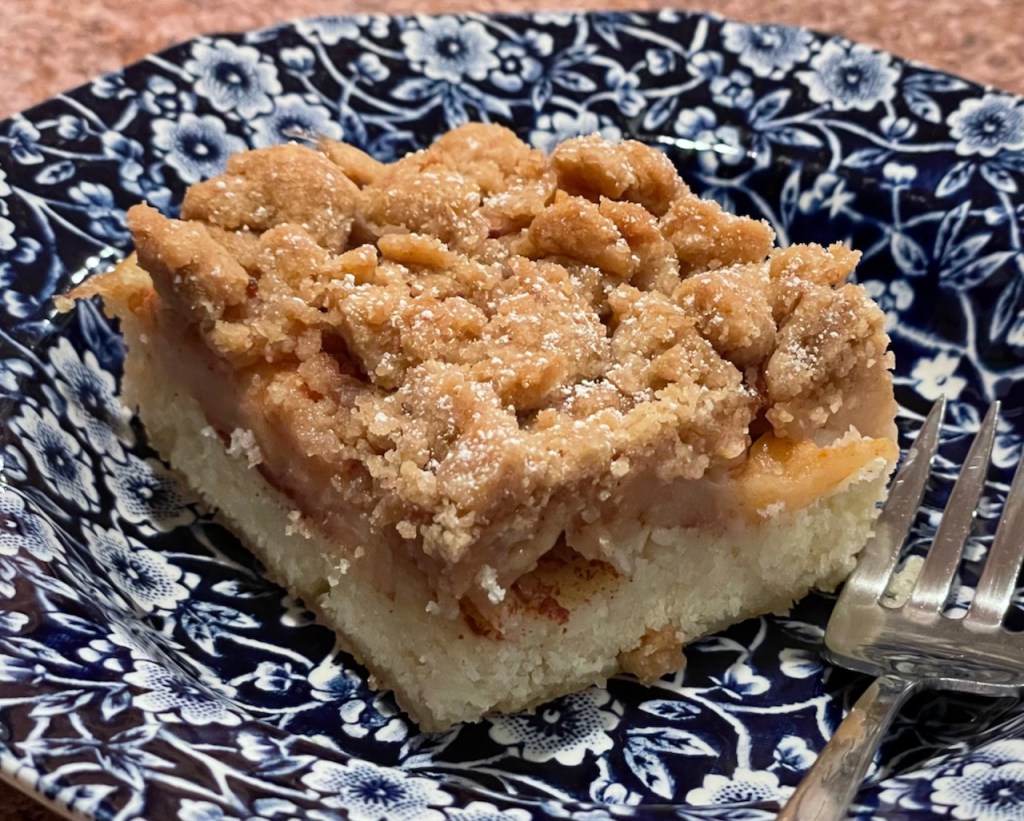
I have had good luck with Smitten Kitchen’s Apple Crumb Cake recipe, so when I read this cookie article, I knew I wanted to give it a try. Also, her photos are great!

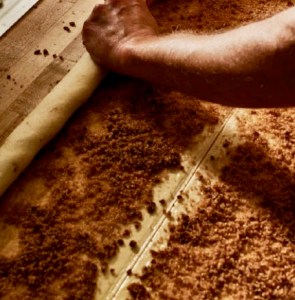
I decided to make a double batch, and you gotta love a cookie project that involves starting with a pencil and paper to work out the math of doubling the recipe. It was complicated by the very smart twist in the recipe to hold back some of the flour so that after the dough is divided in half (to make the chocolate part by adding cocoa powder) the vanilla part gets an analogous addition of flour — so that the consistencies remain the same. (The issue of unequal consistencies was the biggest flaw in the Zebra cookie recipe, btw.)

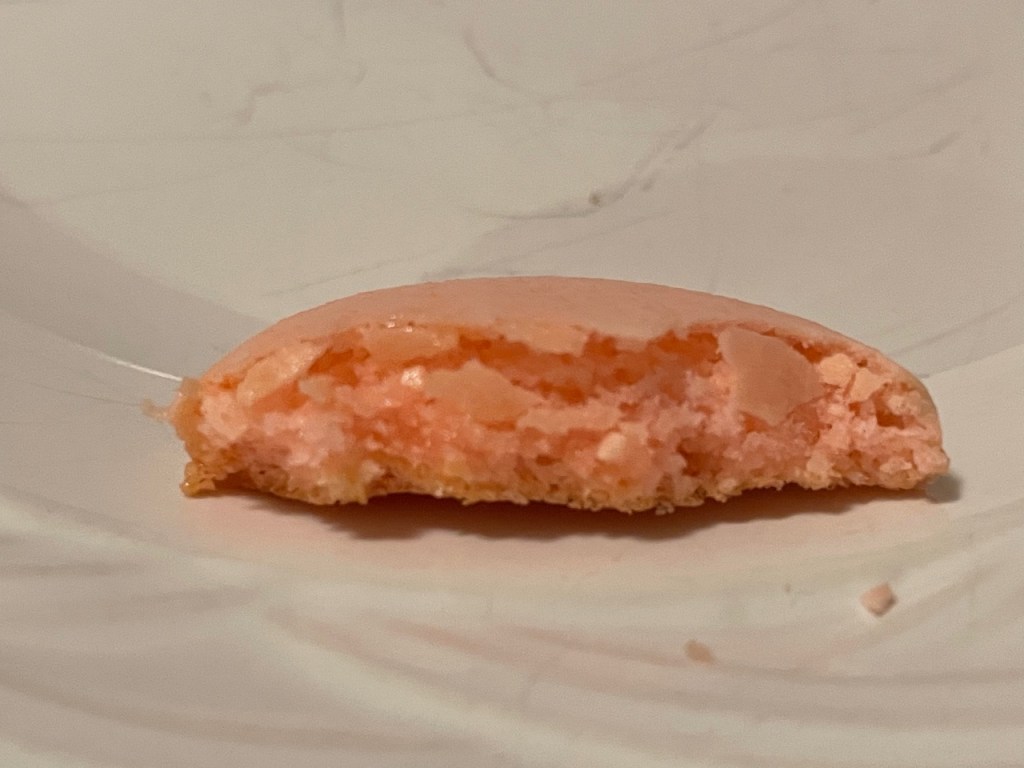
Having worked it all out (answer: 2C of flour for the vanilla, 1½C of flour + ½C of cocoa powder for the chocolate) it was a relatively simple dough to make. The recipe describes this as a “sable” cookie, which includes a raw egg yolk. Also, this recipe uses both granulated and confectioner’s sugar, which I’m guessing contributes to the lovely, fine-grained, melt-in-your-mouth texture. These really are lovely-looking and lovely-tasting cookies!

Rainbow Wreaths

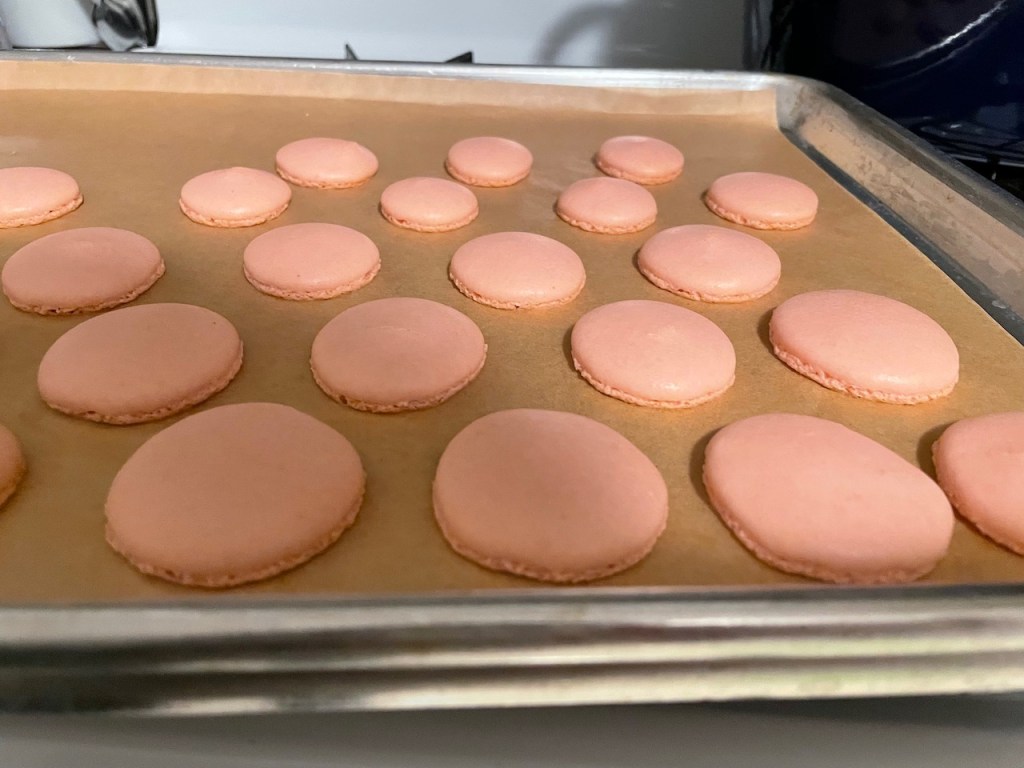
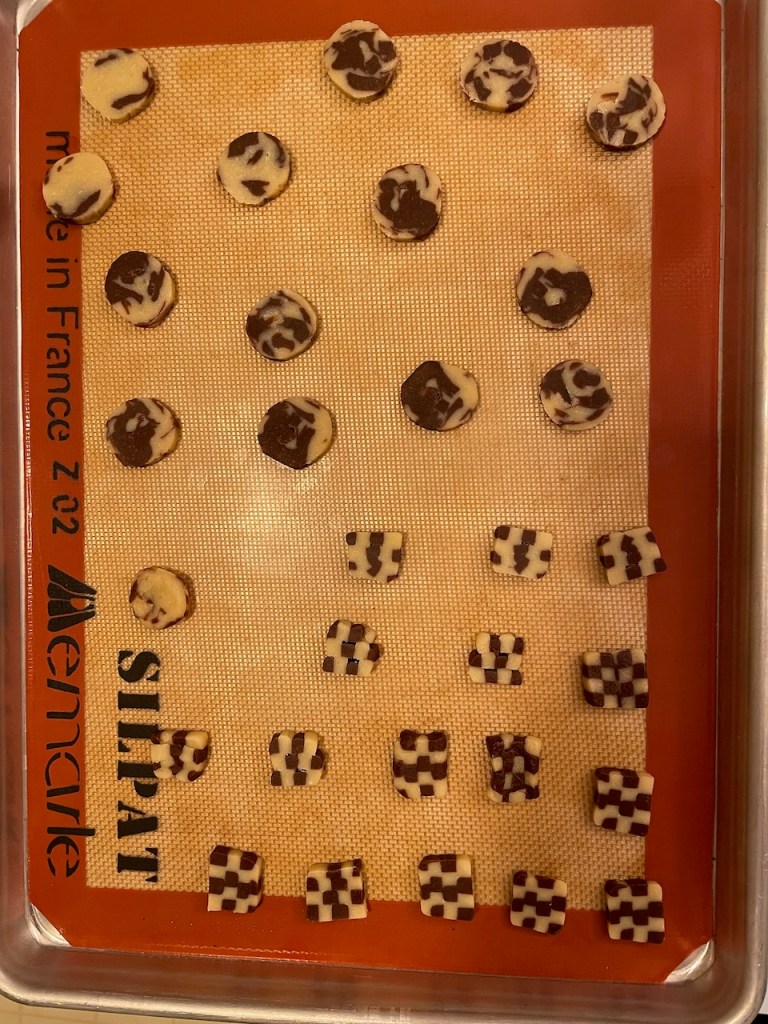
I have to confess that I described these to my sister as “fussy”, but she’s right that anyone who spends the hours that I do making these (→) diabolical cuties (using a lab-quality balance to make them consistent in size; 3.4g each, if you’re curious) has no right to call any cookie “fussy”. I mean, really. I think what I meant, rather than “fussy”, was: “I have no earthly clue what I’m doing with these”. One illustration of this statement: My ratio of “presentable” checkerboard cookies to ones that are “just for the cook” was about 2:1, so there’s definite room for improvement!

I tried to form the checkerboards in two rounds, and there were big improvements between rounds 1 and 2, so this seems like something I can get more comfortable with over time. Basically, there couldn’t be a more perfect addition to the Ikeda Christmas Cookie lineup: A delicious and beautiful cookie that requires maniacal and compulsive perfectionism to get just right — and takes a lifetime to master. Uh huh. Guilty as charged.

Apple Crumb Cake: Third Time’s the Charm

This was my third go at this cake, but this time I decided to completely follow the Smitten Kitchen recipe. I’d been gravitating in this direction, so it made sense. The first attempt was made using the Milk Street Plum Cake recipe, but altered to work for apples. The second attempt tried to walk a middle ground between the two recipes. Those were fine, but this is better. As the Smitten Kitchen description says, the cake has a wonderful crumb-to-cake ration (essentially 1:1), and this makes all the difference.

The only significant change that I had to make to the recipe was to scale it up for a 9″ x 13″ pan rather than 9″ square. This meant increasing everything by ~50%. Of course, I didn’t want to deal with 1½ eggs, so I used the biggest egg I could find in my fridge, and upped the sour cream by a few grams to add some extra moisture.

The other change I made was to invoke Milk Street’s recommendation to freeze the crumb topping before applying it to the cake. The idea is that this helps to make the topping be “pebbly” rather than melting in and/or being more granular or sandy. Smitten Kitchen said just to squeeze the topping into blobs, and I wonder if that would have worked just as well. The freezing method adds extra work, because it’s fussy to have to break apart the frozen topping into various pebble sizes and scatter them about the cake. Next time I want to try comparing the two methods.

I also baked this in a parchment-lined metal 9″ x 13″ pan rather than the Pyrex I had used the previous times. The metal pan had the major downside of not letting me see how the bottom was doing, but I think the cake baked more evenly, overall. The doneness check in the recipe is to make sure the apples don’t have any more crisp spots. But, because of my history of overbaking this cake (and everything), I worried about what was going on “below decks”. I did bake at the recipe’s advised 325°F for 60 minutes, which is what it took to get all the apples to be soft, but for the final 10 minutes I put the cake on the AirBake cookie sheet to protect the bottom.

As soon as I took the cake out of the oven, I removed a corner piece to check for doneness, and it was perfect. There was just a bit of browning on the bottom and sides, the cake was light and fluffy, and the apples were nice and soft. I’m not sure how one is supposed to do this without taking a chunk out of the cake, but at least this worked! (And, yes, I proceeded to eat quite a large corner of the cake… as you can see above 😬)

Overall, this cake was a big success and I’m very happy with it (I don’t think I’ve ever written these words before!). My only complaint is that it took me several hours to make, though it seems like it should be easy to throw together (I mean, it’s just cake, apples,and a topping). I know I tend to be a rather slow baker, but this felt especially time-consuming.

I used up some of the lovely apples that I got in October at Shelburne Farm. I included some Winesap, Macoun, and Pink Lady apples. I didn’t love any of these as eating apples, so I think the cake was just the right use for them.

French Macarons (Rookie Attempt!)

I had some leftover egg whites, so I decided to try something I’ve had my eye on for a while: French Macarons. It’s another one of those things, like choux pastry, that the Great British Baking Show makes you want to try. The contestants on that show knock these out like they’re nothing!

I liked this recipe from Preppy Kitchen, and followed it completely. I appreciated all the supporting advice, photos, and video. I also appreciated having a chance to break out my carefully curated piping kit (this tip set, these tips for the range of sizes, these bags, these couplers), which I basically haven’t used since I acquired it all during the pandemic (because of the eclair project). I was only piping one thing, so I didn’t use a coupler, and I was happy to have the larger plain tube tips that I bought. I’m definitely a piping bag noob, but I could tell as I went that it was a technique/familiarity thing, and it did get easier and better as I went.

I am also not an expert at what the final result is supposed to look, taste, and feel like, but I did achieve the necessary fringe-y “foot”, and for the most part I think I avoided the big gap/bubble at the top. I flavored these with a little almond extract and colored them a pale pink. I opted not to take it to the buttercream filling sandwich step. These seemed quite sweet enough already. I already had red food coloring on had because of my Christmas Cookie Candy Canes (see header photo), so pink is what we got.

Oh, also: The almond flour that I bought was the Whole Foods brand. It seemed to be less finely ground than was ideal for this, but in the end I think it was OK. I did follow the instructions to put the flour through a fine mesh sieve, but this was actually quite difficult to do. In the end I gave up on forcing about 1/4 cup of it through. I dumped that last pile of flour out of the sieve (saved for some other use, I guess?) and put some more flour through the sieve to yield the right amount. Anyway, it took a long time.

My last thought on this rookie attempt: There’s something that feels weird about going through all the steps to yield stiffly whipped egg whites only to then deflate them almost entirely. Getting to the point where I could even draw the “figure 8” with the egg+flour+sugar batter took quite a bit of deflating. Since the “feet” on my macarons were not very high, I’m guessing I over-did the macaronage, but honestly, I have no idea. More investigation and experimentation needed!

I saw this recipe for lemon macarons that looked very interesting. Maybe next time?

Lemon Cheesecake

(The crust isn’t as thick is it looks here… there was a bit of raised edge at the sides.)

This lovely recipe comes from Cook’s Illustrated, and I’ve made it one time before, probably way back when the recipe came out (May/June 2003). It was nice to give it another go after a mere… 18 years (!). This isn’t really the season for lemon-y things, but I have a fridge full of lemons and this felt like reason enough. (I bought all the lemons because I had a fallback plan of making a lemon meringue pie for Thanksgiving.)

I had to mess with this a little, and have some improvements/notes that I’d like to remember for next time (which really shouldn’t wait another 18 years):

  • The recipe is for a 9″ springform, but I only have 8″ and 10″, so I used the 8″ and made a little baby cheesecake in a small pyrex dish to use the extra stuff that I didn’t need (you can just see the baby cheesecake in one of the photos above). I covered the base of the springform pan with parchment and crimped it on with the springform sides. The idea is that this will allow me to lift the finished product off of the springform base to put it on a cutting board for serving. It doesn’t seem like it’s ever a good idea to slice on the springform pan’s base, right? I can report that this did work well, so I think I’ll go with this approach, in general.
  • I feel like this recipe lays things out in a particularly difficult-to-read way, making it much more time-consuming and challenging than it needed to be. For instance, the instructions are written in long paragraphs (a paragraph for the crust, a paragraph for making and baking the filling, a paragraph for the curd) rather than in a more step-by-step layout. I kept losing my place in the long paragraphs and having to read each paragraph over again to make sure I was working from the right step. The paragraph for the filling was especially unwieldy. I will lay this recipe out myself in a more user-friendly way before making this again!
  • It was annoying to have to use the food processor for two successive steps that required cleaning in-between. That’s a huge time-sink, and is actually somewhat dangerous because washing (and then drying) the food processor blade is, well, you know. I wonder if it matters if there’s a little bit of trace animal cracker crumbs in the machine when blitzing the lemon zest with the sugar. I also considered for a moment whether blitzing the zest was even necessary, but I do think that it’s better not to have stringy zest in the cheesecake filling. Next time I’ll just try to scrape out the processor well and just use it for the next step without cleaning.
  • When making the curd, the lemon juice can be heated in the microwave (rather then on the stovetop). This adds another thing to clean, but pouring from pyrex is way easier than pouring from a saucepan. I did overheat the juice a little, which then caused a tiny bit of cooked egg. I should have just waited for it to cool off some before combining with the eggs. I was impatient. The curd gets sieved at the end, so it was fine, but it was also avoidable.
  • There’s chatter in the recipe’s comments about the instructions to wrap the springform pan with foil before putting the whole thing in a water bath. The issue is that the foil leaks, resulting in a water-logged cookie crust. I expected mine to have this problem, but it came out fine. The various solutions offered online include: better/bigger/stronger foil, roasting bags or slow-cooker liners, putting the springform into a cake pan and then into the water bath, buying some sort of silicone product to replace the foil, or using a cake pan rather than a springform pan (requires flipping the cake out of the pan). Normally, I’d reject a plan that involves implementing a triple-pan bottom (springform pan inside a cake pan inside a roasting pan), but in this case there’s no need to cook the base; the cheesecake is in the oven only to cook the filling. So, maybe this is the best solution — without having to buy anything? Anyway, I did order heavy-duty and wider foil for next time.

This cheesecake was deliciously rich, but also somehow light. It made us feel as if it weren’t as calorie-laden as it actually is. it’s a bit of a project, but well worth it!

Tartine Morning Buns (take 2)

I went for another round of Tartine Morning Buns this weekend, again using the Joanne Chang croissant dough. Here’s what I changed this time:

  • I used a different muffin pan that pushes the buns closer together (I wanted the square-ish shape that the Tartine ones have). It’s a behind-the-scenes benefit that this pan, in addition to being sturdy and inexpensive, is far easier to clean because it doesn’t have any seams (yay!).
  • The recipe calls for melting a stick of butter (8 Tablespoons) to brush on the pastry before spreading the filling and rolling up the spiral. As I noted in my prior post, I think the recipe omits the instruction to put some of the melted butter into the filling mix (sugar, cinnamon, orange zest). So, I went ahead and put half of the melted butter into the filling. I also swapped out a quarter of the white sugar for dark brown sugar and amped up the cinnamon a wee bit. The result was a darker filling, resembling wet sand, and matching better the photo from the recipe (in prior post).
  • The Tartine recipe calls for too much filling for the amount of croissant dough that I’m making, so I cut everything by about 30%.
  • I reduced the oven temperature to 375°F from 400°F, and did some relatively active (read = fussy) foil tenting to try to stave off burning the tops.

Overall, this batch was an improvement over my first attempt. It was good to not have the burnt tops, but I definitely haven’t solved this. The issue is that I tried too hard to darken the bottoms. What I mean is: I left the buns in the oven too long (yes, shocking) because I was concerned about the bottoms being somewhat pale last time. However, the lower heat plus the extended bake time caused the melted sugar that intentionally pools in each muffin well to go too far in the cooking process, producing a little bit of chewy candy at the bottom of each bun. Ick.

One of the people I enjoyed these with said, “but, what’s the downside of having chewy candy on the bottom?”. She makes an excellent point, but I think even she agreed that it wasn’t quite the right texture for this particular bun. 🙂 My thinking for next time is to go back to 400°F, but very loosely tent the tops for the last 10-15 minutes to avoid burning, and take the buns out as soon as the tops are well done (“bien cuit”).

i think I’m getting better at the croissant dough part. It just felt easier, and the lamination in this batch just seemed more consistent and flakier.

I also made changes to the icing. I again started with a half portion of this recipe, but I reduced the vanilla further in half and I chose the heavy cream option (rather than milk or half-and-half). I was much happier with this result and feel like this is now my preferred morning bun icing.

Just in case anyone is wondering: These buns are incredibly yummy! Yes, there are things I want to tweak in order to optimize them, but that’s just how I roll (🙄 🤣). Much enjoyment was experienced, too!

Tartine Bakery Morning Buns

Question:   What do you get when you cross a croissant with a cinnamon roll?

Answer:   A Morning Bun!

Other acceptable (also right) answers:

  • A rather messier kitchen
  • Contentedly pudgier than you were before

I tried an experiment last week with adding sugar and cinnamon to the Joanne Chang croissant butter block. This was successful in only one way: They tasted great. In every other way, they were a failure. It was basically impossible to contain the butter/sugar for the lamination turns, Stuff was bursting out all over the place. Also, the sugar massively leaked out during baking, so the croissants were basically stewing in syrup on the baking sheet. Not that this is necessarily a bad thing, but the croissants weren’t pretty, and they didn’t retain enough sugar to be the sweet treat I had imagined.

So then I googled “laminated cinnamon rolls” and found myself staring, mouth agape, at another Chad Robertson recipe (found via this article and shown in this video). His morning bun recipe is in their book “Tartine: A Classic Revisited“, which I found available as a Prime Reading title on Kindle (free for Prime members). I had not been familiar with the term “morning bun” before this, but apparently it’s “not a big thing on the East Coast.” Well, it should be!

I used Joanne’s croissant dough and then Chad’s morning bun recipe from there. The only other changes I made were:

  • I didn’t have oranges to zest, so I put 1.5 teaspoons of Penzey’s orange extract in the filling. It’s amazing how nicely the orange flavor boosts these, even though it’s not evident that that’s what’s in there.

I need to note that after 35 minutes (well before the morning bun recipe’s 45 minute baking time) the tops were overdone and the bottoms weren’t quite done enough. Eating them, though, the textures felt right, so I wasn’t too far off the mark. I suspect that the bottoms didn’t brown as well because the muffin pan needed to be placed on a sheet pan to collect the anticipated overflow of butter, cinnamon, and sugar. Next time, I think it would help to shield the tops with a piece of loosely placed foil after maybe 15 minutes. Another possible step is to reduce the 400°F oven temperature to 375°F.

Another note is that in the video of Chad linked above and in the photo provided in the recipe itself (shown here), his filling looks totally different from the one I got from following the recipe. I checked it three times, and I’m reasonably sure that the recipe has an error. It says that the filling has only white sugar, cinnamon, and orange zest. No moisture. I substituted orange extract for the zest, but that wasn’t much moisture and the result was a pale brown sandy mixture. It was wonderful, but I noticed afterwards that the video and photo show a darker brown and lumpier mixture.

I think that the recipe omits stirring in melted butter and/or including some brown sugar. Melted butter is on the ingredient list, but is only called for as a brushed-on layer before spreading out the sugar/cinnamon filling. The large amount of melted butter is reasonable for spreading, as his croissant recipe yields a massive amount of dough (nearly 1,000g of flour compared with 410g in Joanne’s recipe) rolled out to a very large 1/4″ x 10″ x 32″ rectangle. But, I suspect that some of the listed melted butter amount was meant to be combined with the sugar and cinnamon. I did check for book errata and found one, but not this one.

So, next time I will put some melted butter into the filling until it looks like his photo.