
This lovely recipe comes from Cook’s Illustrated, and I’ve made it one time before, probably way back when the recipe came out (May/June 2003). It was nice to give it another go after a mere… 18 years (!). This isn’t really the season for lemon-y things, but I have a fridge full of lemons and this felt like reason enough. (I bought all the lemons because I had a fallback plan of making a lemon meringue pie for Thanksgiving.)
I had to mess with this a little, and have some improvements/notes that I’d like to remember for next time (which really shouldn’t wait another 18 years):
- The recipe is for a 9″ springform, but I only have 8″ and 10″, so I used the 8″ and made a little baby cheesecake in a small pyrex dish to use the extra stuff that I didn’t need (you can just see the baby cheesecake in one of the photos above). I covered the base of the springform pan with parchment and crimped it on with the springform sides. The idea is that this will allow me to lift the finished product off of the springform base to put it on a cutting board for serving. It doesn’t seem like it’s ever a good idea to slice on the springform pan’s base, right? I can report that this did work well, so I think I’ll go with this approach, in general.
- I feel like this recipe lays things out in a particularly difficult-to-read way, making it much more time-consuming and challenging than it needed to be. For instance, the instructions are written in long paragraphs (a paragraph for the crust, a paragraph for making and baking the filling, a paragraph for the curd) rather than in a more step-by-step layout. I kept losing my place in the long paragraphs and having to read each paragraph over again to make sure I was working from the right step. The paragraph for the filling was especially unwieldy. I will lay this recipe out myself in a more user-friendly way before making this again!
- It was annoying to have to use the food processor for two successive steps that required cleaning in-between. That’s a huge time-sink, and is actually somewhat dangerous because washing (and then drying) the food processor blade is, well, you know. I wonder if it matters if there’s a little bit of trace animal cracker crumbs in the machine when blitzing the lemon zest with the sugar. I also considered for a moment whether blitzing the zest was even necessary, but I do think that it’s better not to have stringy zest in the cheesecake filling. Next time I’ll just try to scrape out the processor well and just use it for the next step without cleaning.
- When making the curd, the lemon juice can be heated in the microwave (rather then on the stovetop). This adds another thing to clean, but pouring from pyrex is way easier than pouring from a saucepan. I did overheat the juice a little, which then caused a tiny bit of cooked egg. I should have just waited for it to cool off some before combining with the eggs. I was impatient. The curd gets sieved at the end, so it was fine, but it was also avoidable.
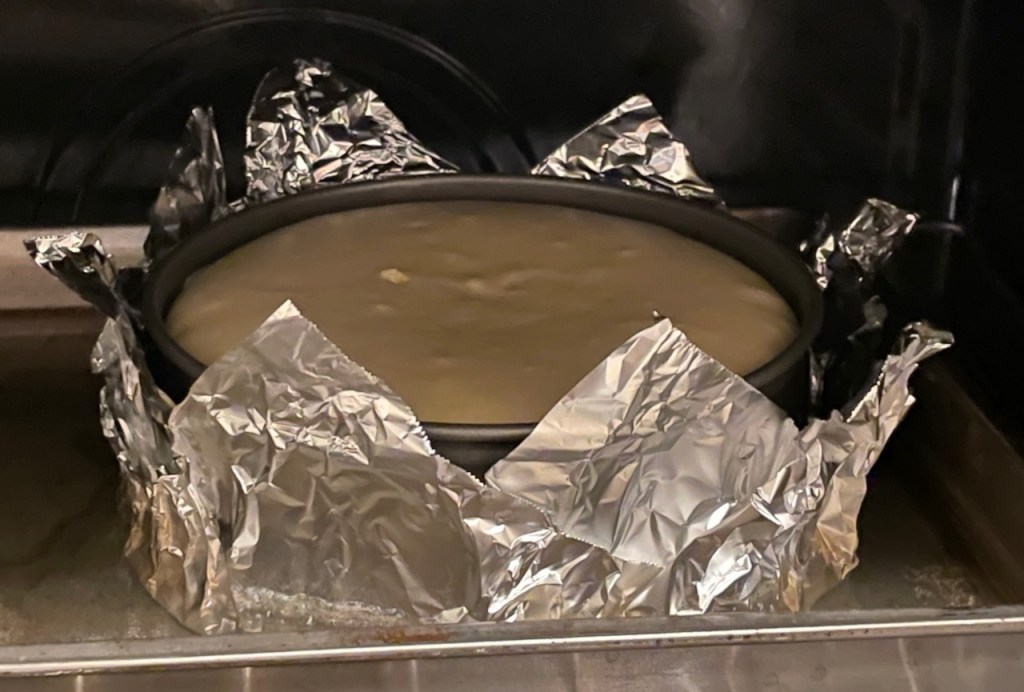
- There’s chatter in the recipe’s comments about the instructions to wrap the springform pan with foil before putting the whole thing in a water bath. The issue is that the foil leaks, resulting in a water-logged cookie crust. I expected mine to have this problem, but it came out fine. The various solutions offered online include: better/bigger/stronger foil, roasting bags or slow-cooker liners, putting the springform into a cake pan and then into the water bath, buying some sort of silicone product to replace the foil, or using a cake pan rather than a springform pan (requires flipping the cake out of the pan). Normally, I’d reject a plan that involves implementing a triple-pan bottom (springform pan inside a cake pan inside a roasting pan), but in this case there’s no need to cook the base; the cheesecake is in the oven only to cook the filling. So, maybe this is the best solution — without having to buy anything? Anyway, I did order heavy-duty and wider foil for next time.
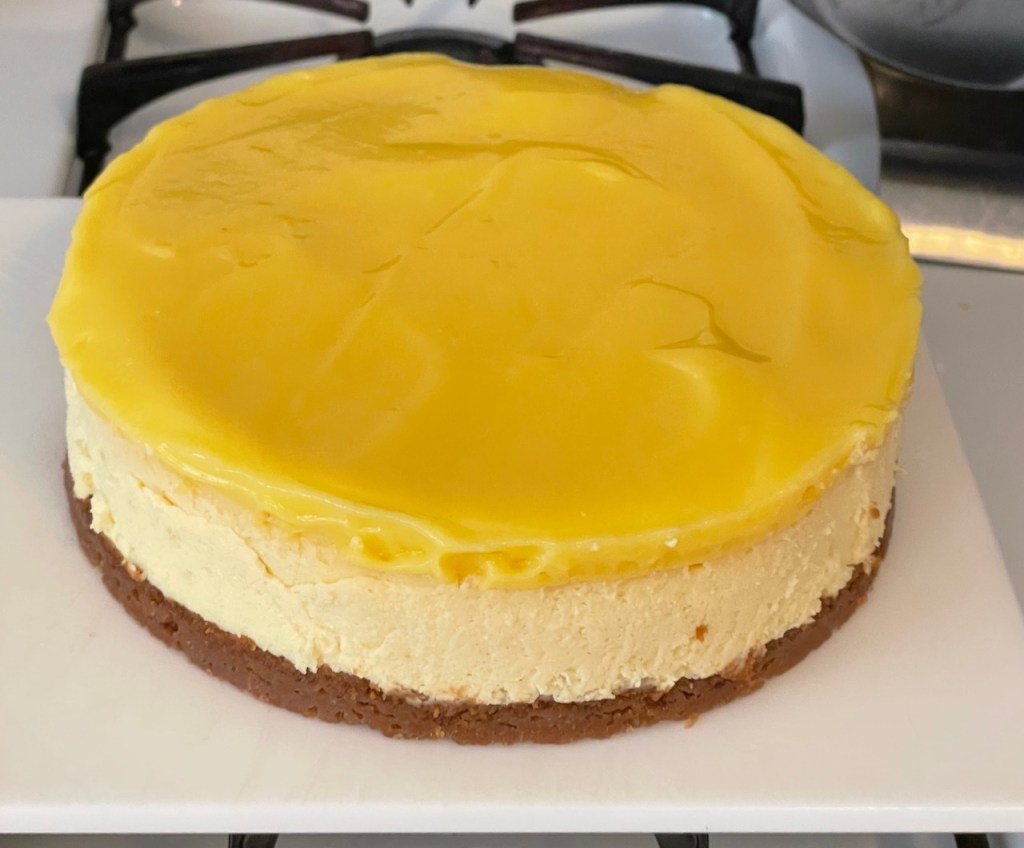
This cheesecake was deliciously rich, but also somehow light. It made us feel as if it weren’t as calorie-laden as it actually is. it’s a bit of a project, but well worth it!
