-
I love baking. A big part of that enjoyment is the analysis and thinking about what I’ve made and how it could be done differently and better. Of course, I love eating what I produce, too, but really I like to learn how to make things better and better.
Some people think that this analysis takes away from the enjoyment of the effort and product, but for me the analysis is part of the enjoyment and takes away nothing. Yes, I’m thinking about ways that something can be better, but for me this is a positive and hopeful process, and in no way is it negative or discouraging.
I can happily scarf down a croissant (or two!) while making a long mental list of all the things I want to try to do better with the next batch. Most people will want to just enjoy the croissants without the analysis. A very few people might want to think about these things with me. This blog is for us.
-
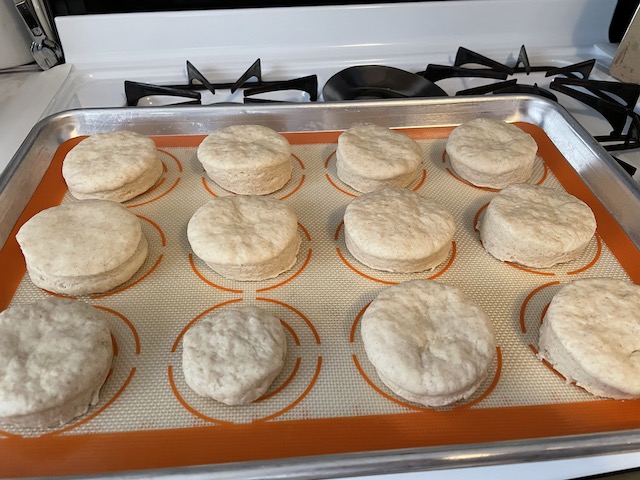
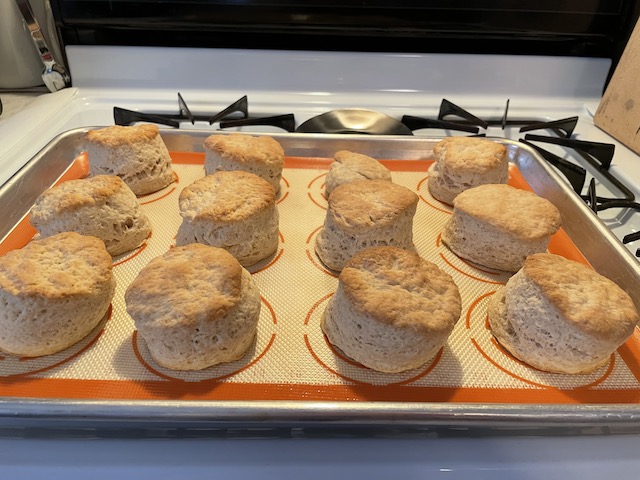
I previously mentioned my initial attempt at these sourdough butter biscuits, but wanted to dedicate a post to them, and I just baked a double batch this morning. They’re that good, and very easy.
The Leavenly website is a goldmine of useful information, and I’ve always had great results from her recipes that use sourdough discards. For this biscuit recipe, the starter doesn’t have time to really offer anything other than great flavor, but that’s definitely a welcome contribution!
While visiting friends in L.A. recently, I enjoyed reading much of Kenji Lopez-Alt’s beautifully written and photographed book, The Food Lab, in which he offers a couple of (non-sourdough) biscuit recipe versions: Basically, one that’s more flaky (and more work) and one that’s more tender (and has more fat in the form of cream). I’ll get to his recipes eventually, but for now I’m obsessed with the sourdough version from Leavenly.
These do involve work, in that there’s some folding (or mild lamination), but it’s really easy lamination, since the dough doesn’t have to remain perfectly lined up or rectangular, and the dough is very easy to work with.
I happen to be someone who likes Bisquick, so my idea of a great biscuit kinda starts from the tender, salty, wonderful biscuits you get from following the recipe on the back of the box. Even at this moment, there are some Bisquick shortcakes in my freezer, just waiting for my next purchase of fresh strawberries and fancy heavy cream.
-
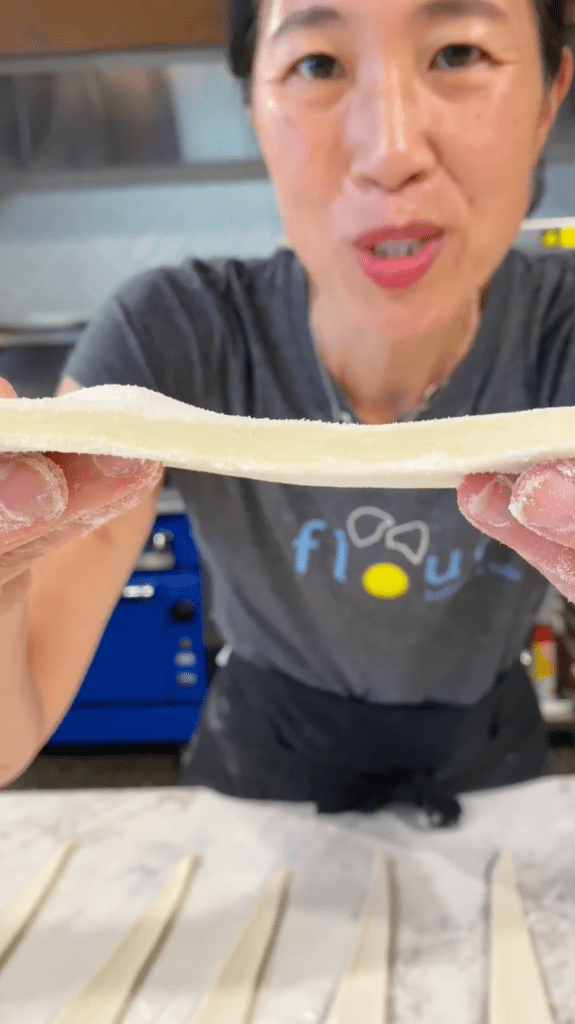
While perusing the Flour Bakery website, I found out that, during the lockdown stage of the pandemic, Joanne Chang produced a bake-at-home instagram series (look for the “Flour❤️ Wk#” videos on her instagram feed). Included in the weekly series was an episode on croissants, including her recipe! I found the series on her instagram account, and here is the video episode showing the wonderful Ms. Chang, herself, making beautiful croissants.
I have been following her recipe for croissants rather exclusively, but seeing her do it really helps to answer some questions I’ve had, and reassures me that I’m going in the right direction. It’s also comforting to know that the problems I have making these roll out into rectangles isn’t just me. (BTW, their secret: Just cut off the parts that make it not square!).
I’ve also been wondering alot lately about the final shaping and whether I’m forming mine correctly. I haven’t been getting the fat, round, super-puffy results that she gets, and I wondered whether it had to do with my technique. I also struggle with butter leakage during baking.
My conclusion from watching her video is that it isn’t about how I form the final croissant; it’s about how they rise. I haven’t figured out the best way to let the formed croissants rise to optimize loftiness without letting the butter get too soft. I’m thinking the answer is a cooler environment than I’ve been using, but for a much longer amount of time. She suggests a room temperature of 78°F for 2-2½ hours, but this hasn’t been working for me.
Maybe it’s my yeast, or the humidity level, or something. But, I suspect I’ll have better luck with a cooler rise for a longer period of time. I think that will be my next experiment, anyway.
One other minor thing to mention: The recipe on the website (on this page, search for “croissant”) differs slightly from the recipes in her first cookbook and in Pastry Love — this version uses a bit of cake flour (as opposed to a bit of bread flour, or a bit of spelt flour), and this version puts a bit of butter into the dough itself (Pasty Love doesn’t do this). I’m guessing none of these variations makes a big difference.
Also, Joanne Chang’s instagram account has wonderful pastry photos!
If you’re wondering what I’ve been baking lately, mostly just a rotation of my usual things… sourdough loaves, sourdough pita, and a mini-obsession with oatmeal-cherry cookies, which I’ll post about soon.
-
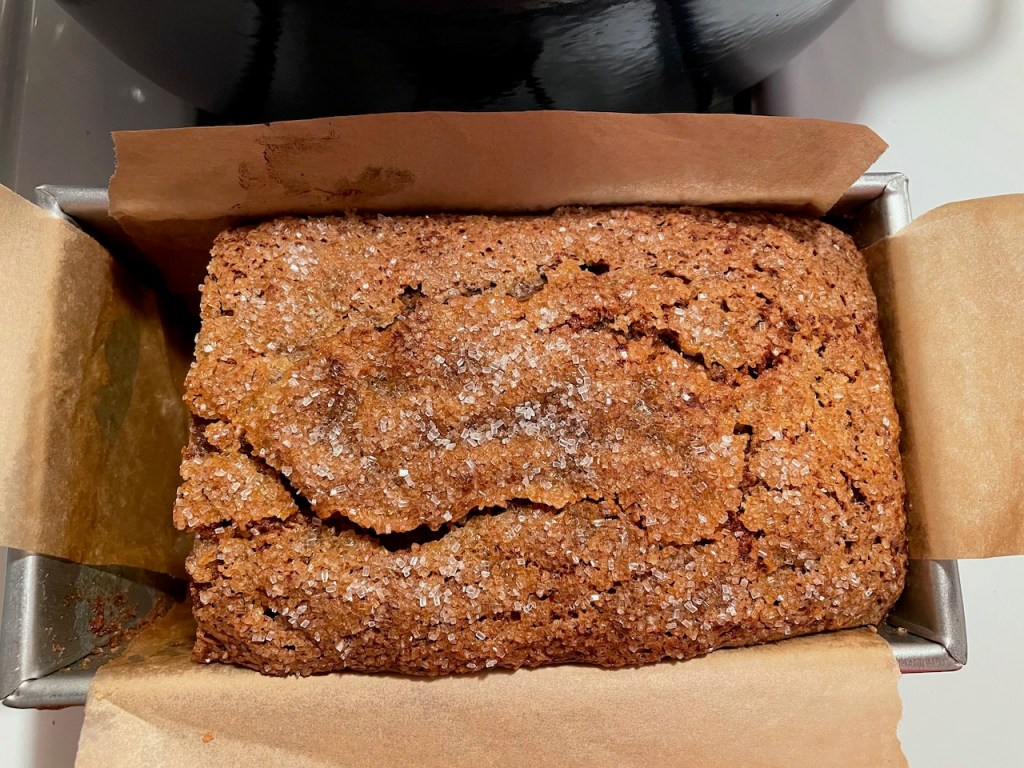
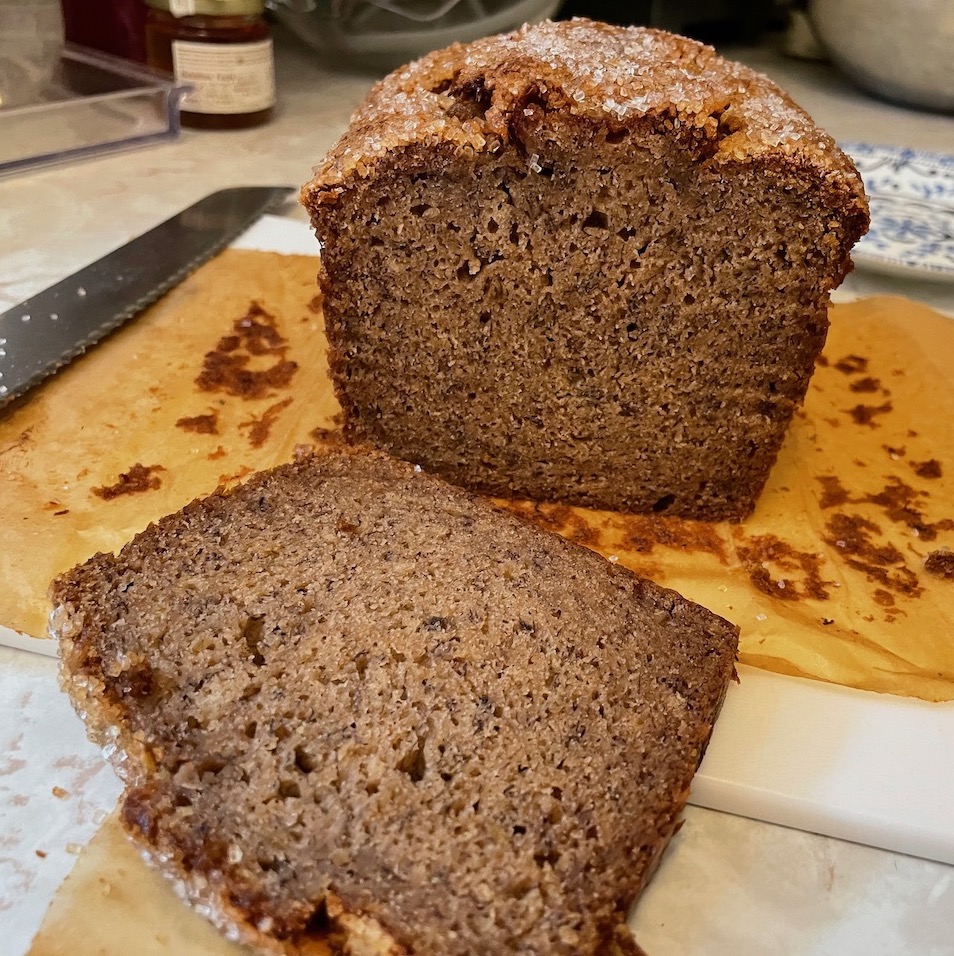
When I wrote this previous post about Dad’s Banana Bread (and the messed-up grocery order), I hinted at my intention to make this recipe from Smitten Kitchen: Ultimate Banana Bread. Because I already had the requisite 510g of mashed banana in the freezer, I only had to thaw it and was good to go.
This is a completely different banana bread, at a different scale, and is wonderful. This version is moister, darker, and sweeter. More leaning towards cake than bread, but still less sweet than a typical cake. I thought I’d miss the walnuts, and almost added them off-recipe. I think it wouldn’t be bad to throw some in, but I think I agree with the recipe… this is really nice without the nuts, maybe because of the leaning-towards-cake thing.
The headnote in the recipe makes a point of the loaf pan size. The author describes a specific size (9″x5″ at the top and 8″x4″ at the bottom) and volume capacity (6-cups) to get a loaf with a nice dome that grows beyond the pan. But, I suspect her measurements were taken to the outsides of a pan with a rolled edge, because the pan I have that came the closest is a half-inch shorter in each dimension (8½”x4½” at the top and 7½”x3½” at the bottom, measured from inside edge to inside edge*), yet came out to the exact right capacity (key recipe information: The batter “should come to just over ½-inch from the top rim”).
Normally, I just try to make sure my pans have at least as much volume capacity as a recipe calls for with whatever pan size they specify, and approximately the same shape. I don’t usually worry that much if my pan varies somewhat from the recipe. But, this recipe seemed specific for a reason, so I went with the closest thing I had. I think this wouldn’t have worked quite as nicely with the longer, thinner loaf pan that I have, and I like the loaf shape for this recipe.
The recipe insists on two tablespoons of turbinado sugar to contribute to the nice, crunchy top, but for me it was too much. I used sparking sugar (because I like the crunch of the big crystals), and next time I will cut this in half to one tablespoon, or just enough to sprinkle over the whole top. [Chris reports that she doesn’t think there was too much sugar on top!]
I still have one more 510g bag of mashed banana in the freezer, so the gift of the mis-delivered groceries keeps on giving!
*footnote: I wrote – and then decided to spare you from – a several-paragraphs geeky digression about pan dimensions. The bottom line is that pan dimension should be measured on the inside, because that’s where the baked product will be. Thick pan walls or rolled edges shouldn’t increase a pan’s baking capacity, right? But, of course, no normal person or company measures this way (I am, if not patently obvious to you by now, not normal). Smitten Kitchen already charmed me by providing both the dimensions at the top of the pan and the dimensions at the bottom, which very few recipe authors bother to do, so I forgive her the inside vs. outside measurement thing. ❤️☺️
-

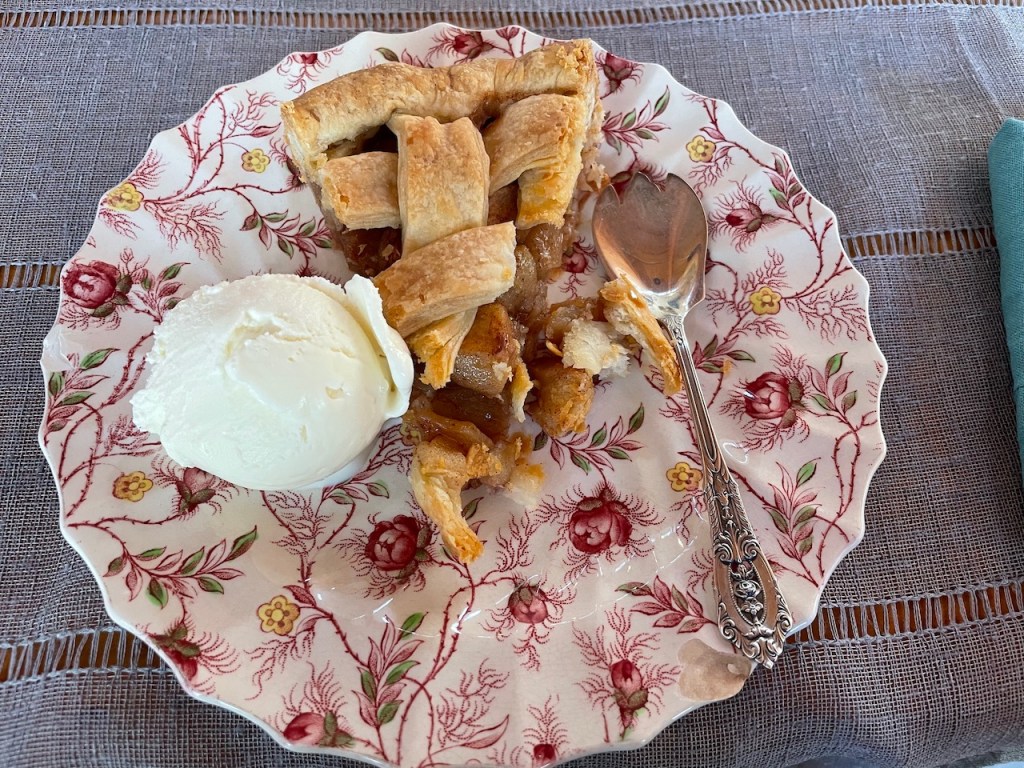
I’m very happy with my pie crust, which combines the ingredients of the New York Times All-Butter Pie Crust with Joanne Chang’s Pâte Brisée technique. Her technique has an important step called “fraisage”, which she describes well in the Atlantic article linked above (she doesn’t use the word in the article, but she does in her cookbooks; it’s the step where you smear the shaggy dough on the counter). Here’s a 15-year-old video in which she very clearly explains and demonstrates the technique. It’s basically fool-proof. I love that the flavor is buttery, and that it has the flakiness of a shortening crust (but without the shortening).
I had the great privilege of baking this apple pie for George’s 94th birthday. George is a wonderful person, and the dad of my dear friend Teresa. What an honor to be part of this auspicious occasion with these people whom I love dearly.
-
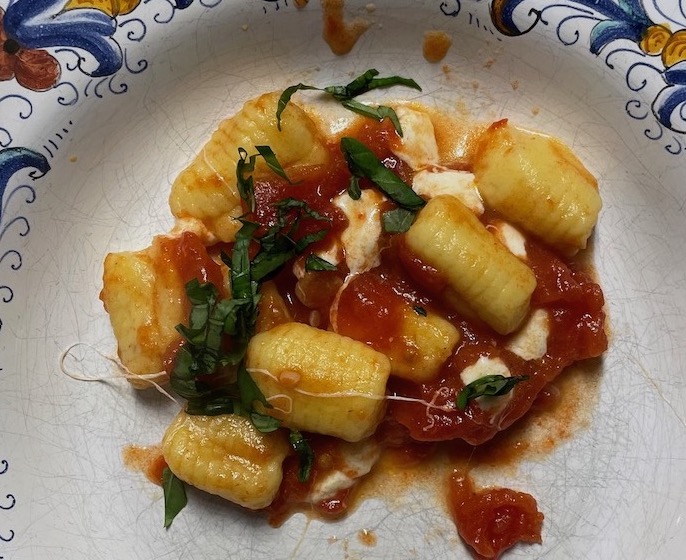

Another really fun online class with King Arthur Baking Company, courtesy of Christine and Mike!
This time, it was potato gnocchi with a simple tomato sauce, mozzarella, and basil. Their blog post here has basically the same gnocchi recipe, but the recipe in class used just egg yolks rather than whole eggs. Chris also made a lovely roasted red pepper pesto, shown as my next-day leftovers on the right.
Mike did the work of making the mashed potatoes in advance. So, the recipe itself was very easy. Chris has a gnocchi board, which produced the lovely, finely-ridged gnocchi you can see in the left-hand photo. I used a fork, and the result (which isn’t obvious, but is just visible in the right-hand photo) was gnocchi with fewer, deeper ridges.
We were happy to have the teacher demonstrate the technique of forming the gnocchi. Photos and words wouldn’t be enough information. Their blog post has a video, but it’s broken, so I found this video that matches our instructor’s technique, using a gnocchi board. The technique is the same with a fork. The part that’s hard to describe with words is that you have to kinda “schmear” the dough piece along the board as opposed to just rolling it. The schmear creates the ridges, but also causes the piece to kinda roll on itself, creating a concave, curled shape. It’s not log-shaped, concave and somewhat curled.
We had some trouble with the gnocchi sticking to themselves and the parchment, causing their nice shape to collapse before being cooked. Following the instructions of the teacher, we held back some of the flour to avoid making dry gnocchi, but we wished we had used recipe’s the full flour amount, theorizing that a slightly drier dough would have allowed the gnocchi to hold more of their shape and ridges.
It’s also a fair bit of work to form each piece (“gnoccho”? “gnocche”?), sort of like forming fussy cookies (who would do that?!?). We enjoyed imagining the Italian grandmas making these very quickly and beautifully in their kitchens while gossiping together.
-
First try, March 15, with sleepy sourdough I have been feeling, in general, that I prefer the flavor of bread made with sourdough over that made with yeast. So, I’ve been experimenting with replacing yeast with sourdough in some recipes, and here are a couple of attempts.
The basic idea for both attempts is to make half of the King Artur pita recipe from the class I took last week with Chris and Mike, but replace the yeast with a couple of tablespoons of sourdough starter. The rising time was extended as long as was necessary to get the dough to double. Everything else was the same as the recipe.
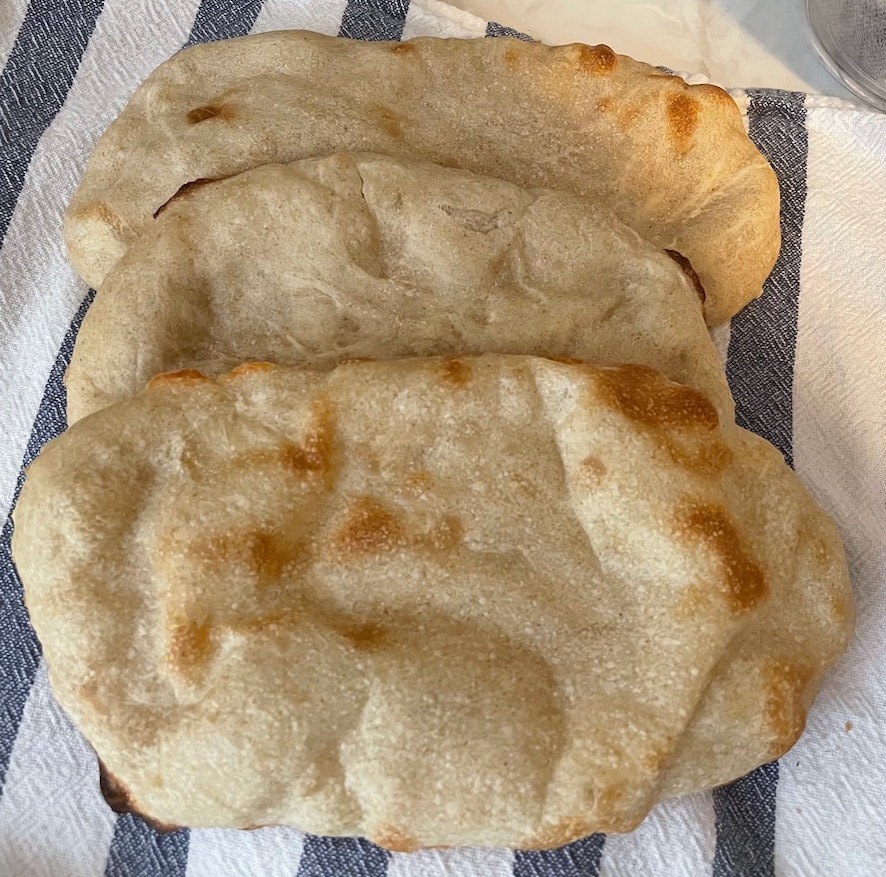
The first set was challenged primarily (I think) by the fact that my sourdough starter hadn’t been used in at least three months, so it was pretty “sleepy”. I left the dough to rise for 12 hours, and it did rise, but I didn’t get the impressive pillowy puffing-up that we got with the yeast version. It had air bubbles, but not one big pillowy pocket. It was soft, airy, and wonderful, and did have much more flavor than the yeast variety.
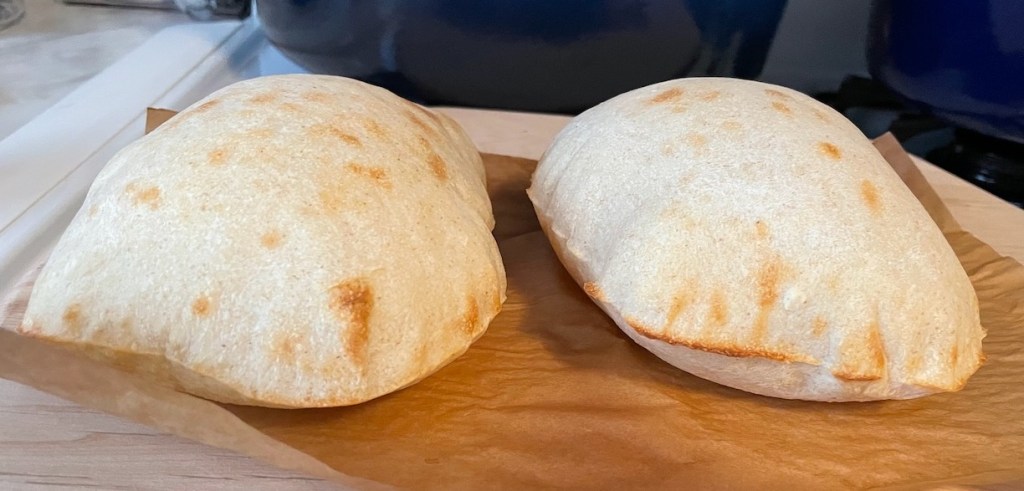
Second try, March 23 Then I tried again a week later and got the pillowy result I was hoping for!
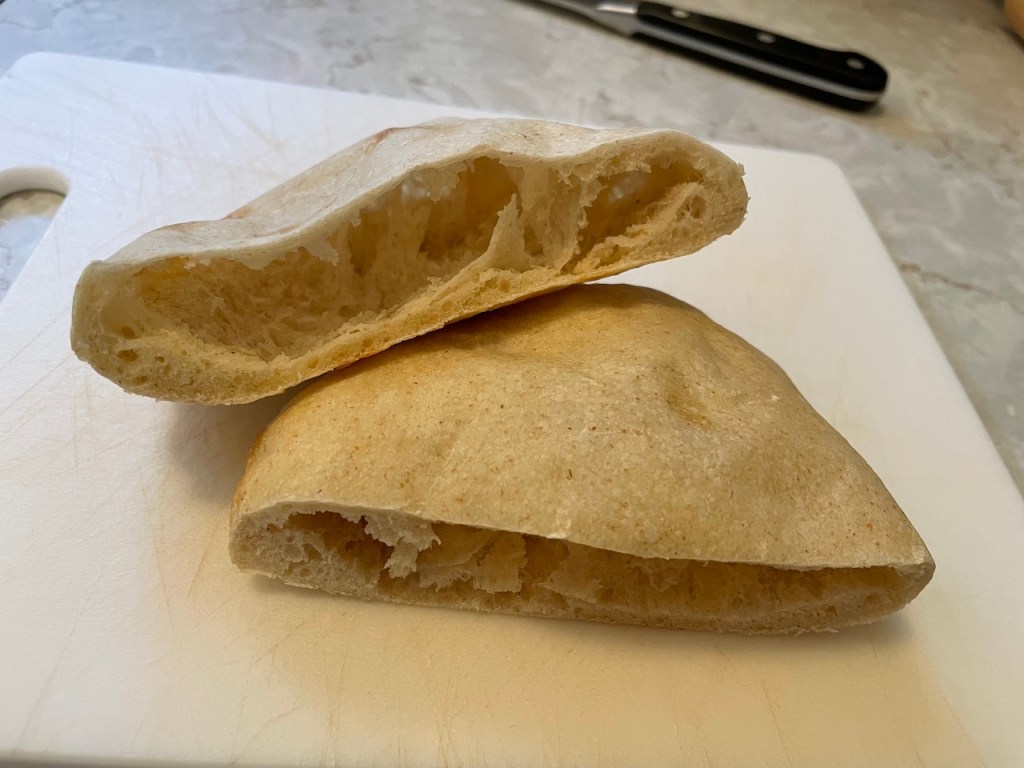
This time, I let the dough rise for 6 hours (I think?). The only difficulty I had was that the big air pocket inside didn’t happen evenly between the top and bottom layers of the pita. You can kinda see it in the photo on the right side… the top layer is thin and the bottom layer is thicker. Some research on the interwebs seems to hint that this could be because of a temperature differential between the top and bottom (baking stone) in the oven. I dunno, maybe?
Last thoughts on these:
- Because i feed my sourdough starter with 50% whole wheat flour and 50% white bread flour, I wonder if part of what I prefer about sourdough bread flavor is the whole wheat (in addition to the flavor that the sourdough itself provides). In this recipe, the sourdough starter was just two tablespoons, but you can see that the color of the resulting bread shows some flecks of whole wheat.
- This recipe really is easy, and the results really are better than store-bought. But, I have to put in a plug for the pita from Cafe Barada. I don’t know for sure that they make it themselves, but I think so. It’s wonderful, and during the pandemic they were selling it in large quantities as a grocery item. Anytime I order their hoummos (which is the best hoummos I’ve had, anywhere, ever) I always buy extra pita.
-
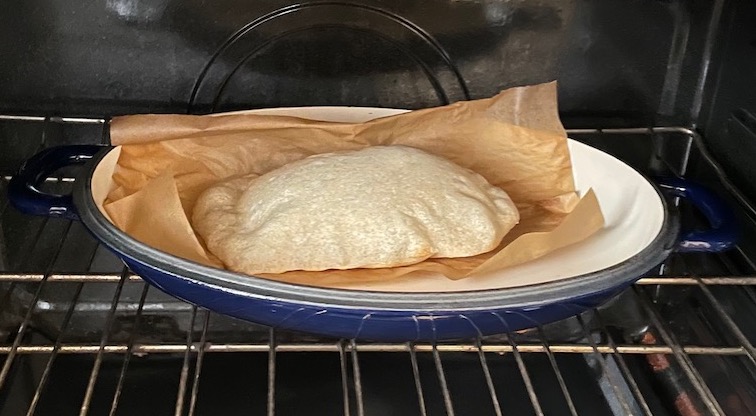
I got to take another online baking class with Christine and Mike, and it was really fun and yielded much yumminess! The basic recipe was similar to this one, but without the “dough improver” (what’s up with that?) and replacing the sugar with honey. The same dough was used for both the pita and the man’oushe.
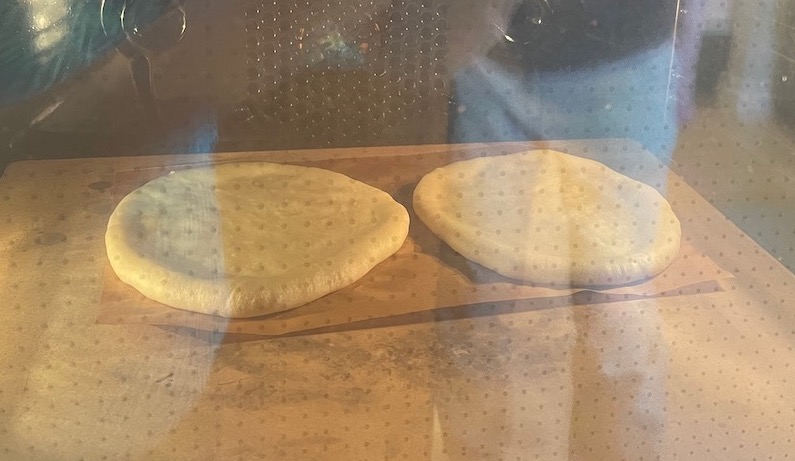
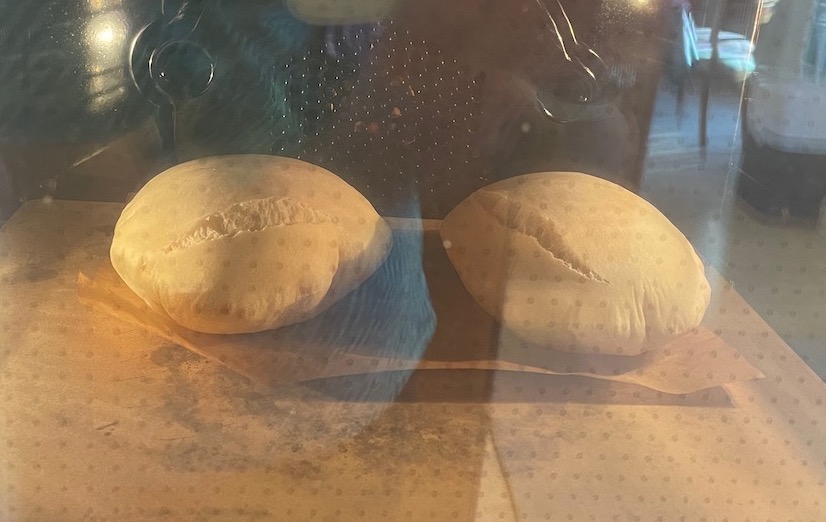
The difference was only whether the dough is baked plain (and allowed to pillow) or baked with toppings, like a Lebanese pizza. You can see in the first two photos above that the pita is popped onto the baking stone completely flat, then it puffs up in the hot oven (500°F) — like magic! It’s really fun to watch that happen.
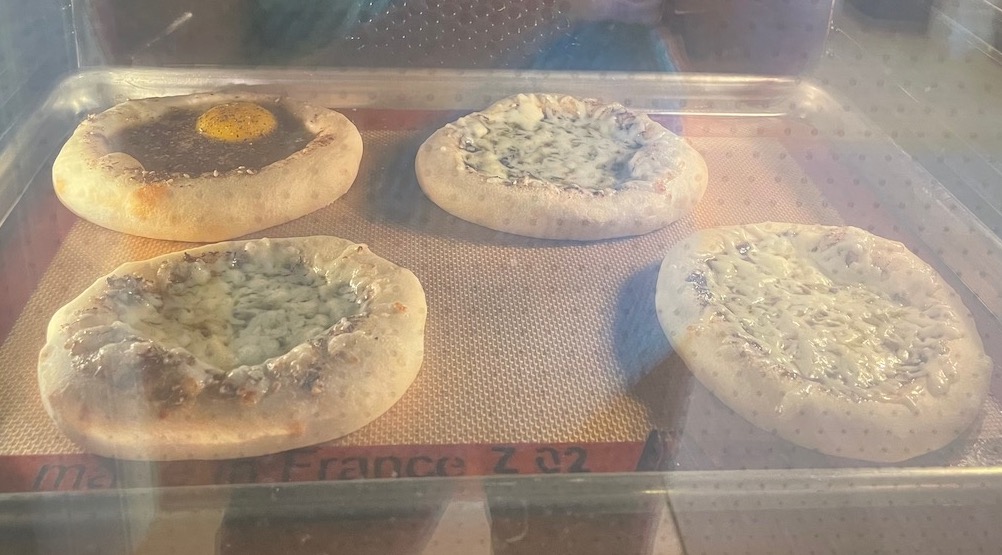
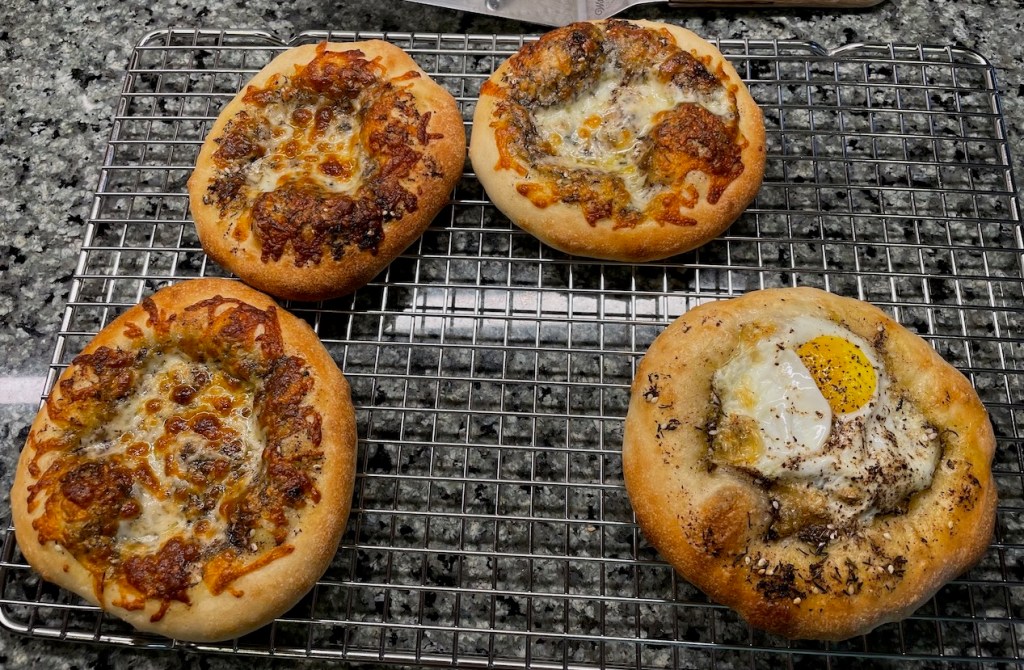
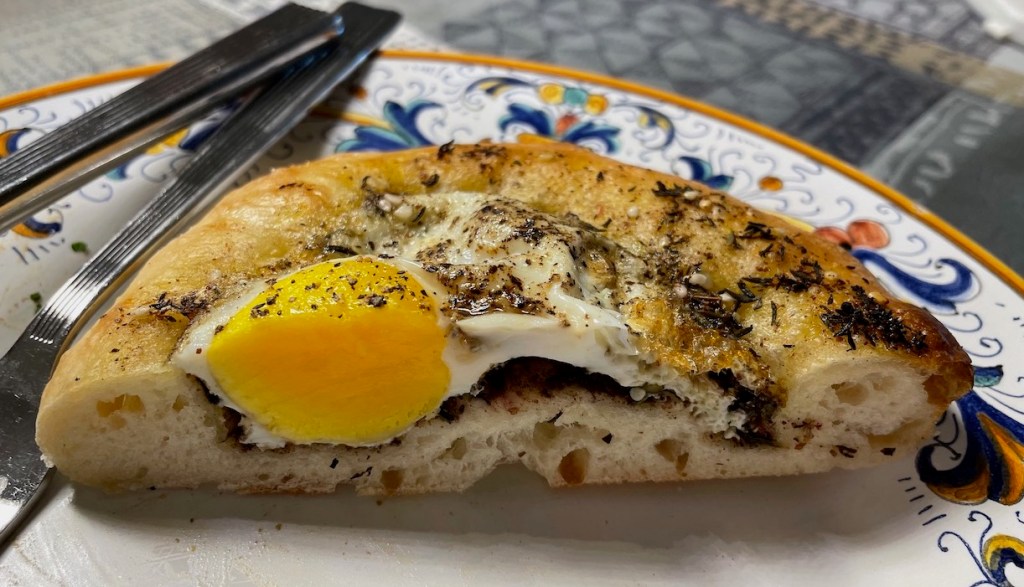
For the man’oushe, the dough is also rolled flat, but it is then topped with za’atar mixed with olive oil, and whatever additional toppings you like. The class recipe suggested mozzarella cheese and also an egg, so you can see both options in the photos.

A beautiful meal (pitas under the purple towel)! Chris and Mike made a lovely ground pork dish and carrot salad (I think both from an Ana Sortun cookbook), and it all went perfectly with the freshly-baked pita bread. All of the results were amazingly yummy. As Chris said: It makes one never want to buy another pita in the grocery store. The recipe is very easy and very fast. She has a point!
Also, I went out the next day to buy a robust amount of za’atar from Penzey’s.
Final thoughts: I’m so grateful to be able to join in for these classes! And, I want to try making the pita with sourdough. Watch this space…
-

King Arthur’s recipe photo This is one of those recipes that comes across my inbox and is just irresistible. First, there’s the photo. I mean, isn’t it amazing? I see something like this and I am just dying to learn how to make it. You can see photos of mine below. It doesn’t look quite as “woolly” as the original, but it’s pretty close!
The name is because the loaf should look like a skein of yarn. I think I made my “yarn strands” too thin (this will surprise absolutely no-one who has been reading this blog), so the result was a loaf with less definition in the yarn effect.
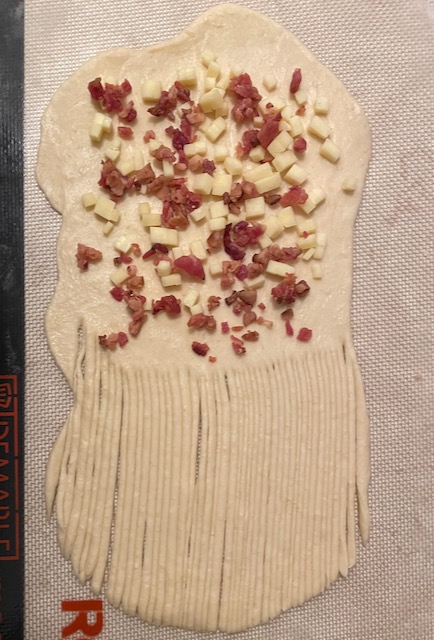
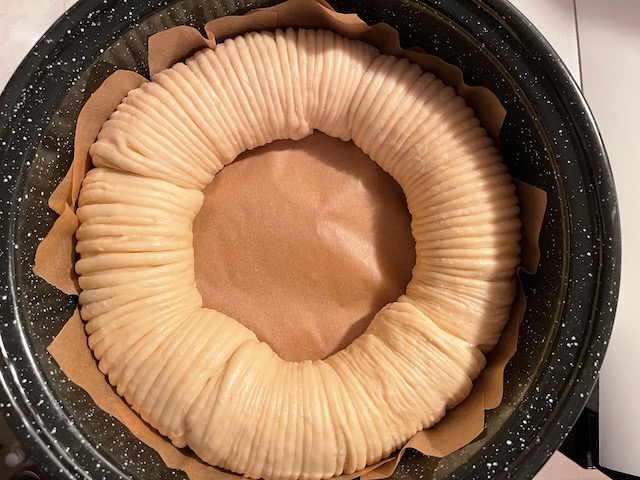

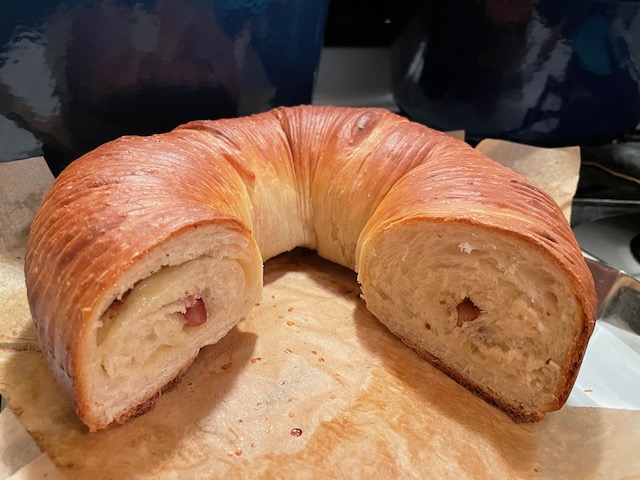
One key change I made was to make this a savory loaf rather than sweet. The recipe allows for this. Instead of cream cheese, sugar, and raspberries, I went with sharp cheddar and crumbled bacon. It was basically wonderful, and I happily ate every bit of it. It was easy to make the woolly strands, and the effect was pretty.
One thing that I noticed with this loaf, though, is that making regular yeast-raised bread (as opposed to sourdough), while faster and easier, is just not as flavorful. My sourdough isn’t particularly sour, but it just has a more interesting dimension to it that I miss when it’s not there. That realization is motivating me to try using sourdough as the leavening in some recipes that call for yeast. I basically don’t know what I’m doing, but it’s fun to try.
I wonder if this loaf would have benefited from throwing some spices into the dough… cracked pepper, cayenne, something… ?
As Christine likes to say, though, “I managed to choke it down”. 😋
-
(click to view mochi machine video) 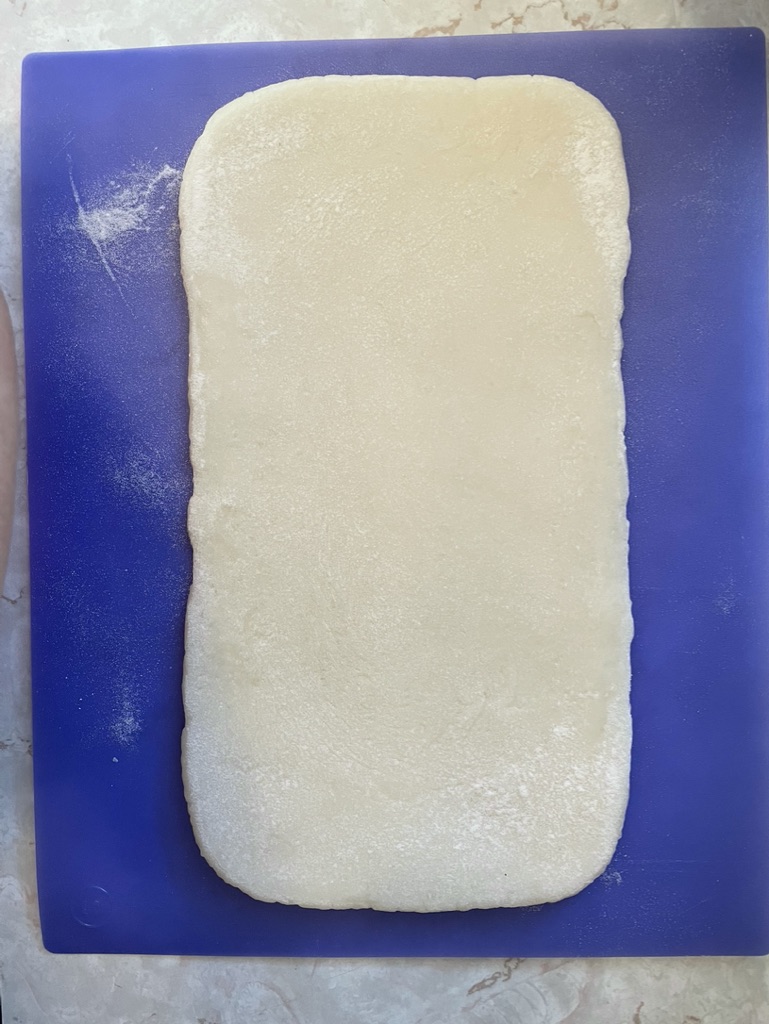
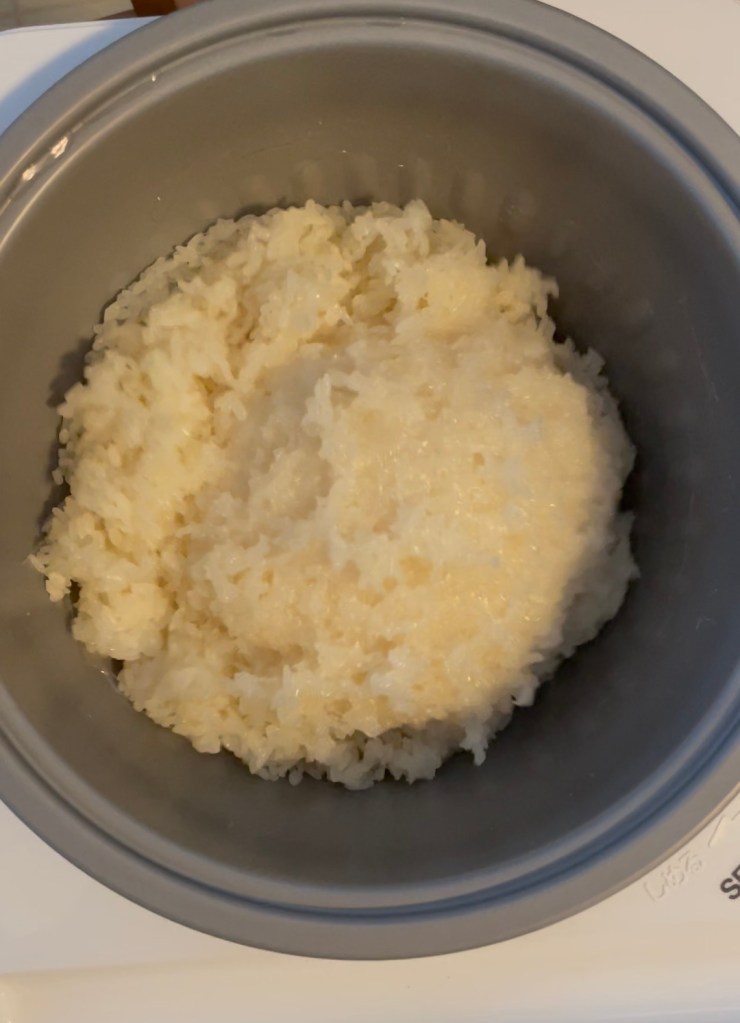
mochi slab 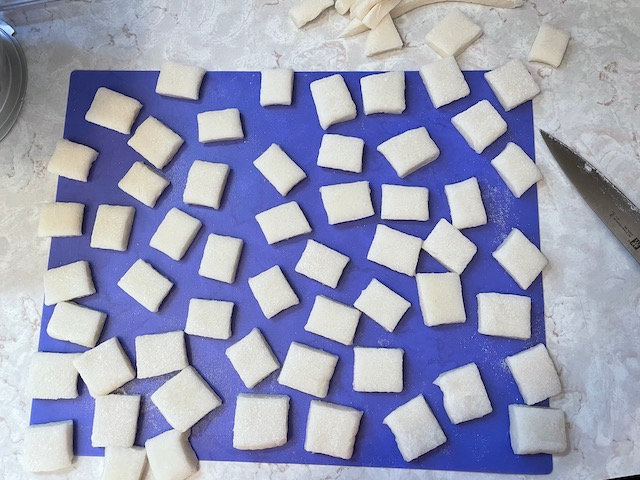
mochi pieces In the few weeks since my last post, my primary food-generating focus has been on mochi. I suspect that this post will essentially not make sense to, or have meaning for, anyone other than my sisters, but… I also suspect that my sisters comprise a large percentage of my overall readership, so this is probably OK! 😬
yummy arare! I have been making mochi at home since 2017, when I acquired this miraculous invention (a mochi machine). For many years, growing up in Westport, CT, our parents purchased the annual New Year’s fresh mochi at a Japanese market (Nippon Daido) in White Plains, NY. Their trips to this market were always a happy event for us, as it meant that we’d get to have fresh mochi (if around New Year’s) and arare (Japanese rice crackers). These are the kinds of treats that we loved so much they needed to be rationed out to us.

toasted mochi Many people think of mochi as the pink, orange, or green ice cream filled stuff, but for us “mochi” was always the simple, white slabs of still-warm, just-pounded sweet rice that came wrapped in plastic from Nippon Daido. Mom or dad would cut the slabs into little rectangular pieces and we’d try to grab bits of it out from under their noses. When just-made, eating plain and still-warm mochi is a very special treat. Later, as the mochi dries out a little, or is frozen to keep it from getting moldy, a few minutes in the toaster oven produces wonderfully puffy, oozy, gooey blobs of yumminess.
:max_bytes(150000):strip_icc():format(webp)/Norimaki-Mochi---1-56a541673df78cf77287599b.jpg)
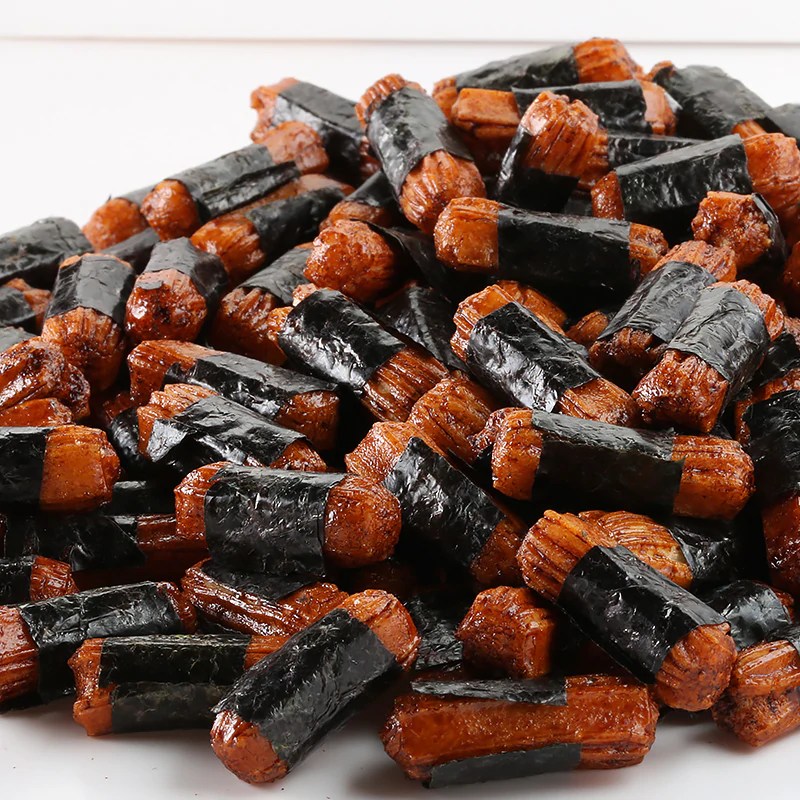
We had a couple of favorite ways of eating mochi. My favorite was always coating the little squares of mochi in soy sauce then wrapping each one in a piece of seasoned nori. Another favorite was making a syrup by stirring sugar into soy sauce, then dipping the mochi in the syrup. Another was immersing the mochi in warm milk.
When I moved to Boston, I sought out the markets where I could buy fresh mochi, but was distressed to learn the fresh mochi was all frozen. Then, the Japanese markets gradually closed or stopped carrying the fresh stuff at all (instead opting for a shelf-stable version, blah). Meanwhile, my parents had started spending winters in Florida where it was also not easy to find fresh mochi. So, Louise got them a mochi machine, and our lives were transformed! The machine is a blast… first it steams the rice, then it agitates/pounds it into a big, sticky blob. Mom would make big batches of it and give packages of it to each of us to take home. Nom nom nom.
Eventually, of course, I got my own machine. I’ve had various adventures making the mochi. There was this time (last year) when the machine’s agitating caused stuff to crash off my table. Then there were issues I had because the stuff is SO STICKY. My first attempt at making mochi resulted in this quote in my notes: “They are NOT KIDDING when they say to handle the mochi ONLY with wet (or floured) hands. I screwed this up and the result basically looked like a murder scene, but with mochi and flour instead of blood.”
My recent process improvements are:
- I wear (FDA food-rated) vinyl gloves to handle the hot mochi so there’s no sticking to my hands
- I use a silicone pan liner on the counter with a generous dusting of rice flour to avoid sticking to the counter
- After spreading out the hot mochi into a slab of the desired thickness (about ½”) on the silicone liner, I wait a few minutes for the mochi to cool a little and form a bit of a “skin” on top, then very lightly dust the top surface with rice flour and flip the slab onto a lightly dusted cutting board for chopping into the rectangular pieces
- Any amount that I’m not eating the same day gets immediately put into the freezer, portioned into containers of about 10-15 pieces. I’ve found that thawing a container takes about an hour on the counter, and then the mochi tastes and feels just like the freshly-made stuff… no baking required
-

Those who know me well know that I’m not a big vegetable eater. I’ve at least evolved to the point where I do happily eat some vegetables, but they’re still not the most-coveted items on my grocery list. One illustration: I recently signed up for a local meat share, but don’t imagine that I’d ever enroll in a farm/vegetable share. I suppose if there were such a thing as a flour share I might consider that, but I’ve been happily buying King Arthur all-purpose flour in 25-pound sacks at Costco and storing it in an 18-quart bin.
So, I had a very small taste of what I imagine it must be like for people who are in a CSA: A couple of weeks ago I did a curbside-pickup order from a nearby supermarket (for Bonne Maman preserves, Hershey’s milk chocolate bars, and Jet-Puffed marshmallows — yes, s’mores were part of the plan, and yes, this was a ridiculous grocery order) and the person who picked my order mixed up mine with someone else’s order. They had loaded the bags in the back of my car and I drove off, so I didn’t figure this out until I got home and looked in the bags. Of course, I called the store right away and they promptly delivered my stuff, but they didn’t want me to bother bringing back the wrong stuff. That left me with a couple of bags of someone else’s food order.
Let’s end this already too-long story by saying that the wrong order had actual fresh fruits and vegetables in it, including two bunches of bananas. I actually can’t stand eating bananas. I spent my first couple decades of adulthood buying bananas and trying to convince myself to eat them, but at some point I accepted that it was futile. I just don’t like them. I happily eat my way through apples, oranges, peaches, pineapples, and grapes, but bananas are just non-starters for me. This meant that I needed to do some banana-based baking.
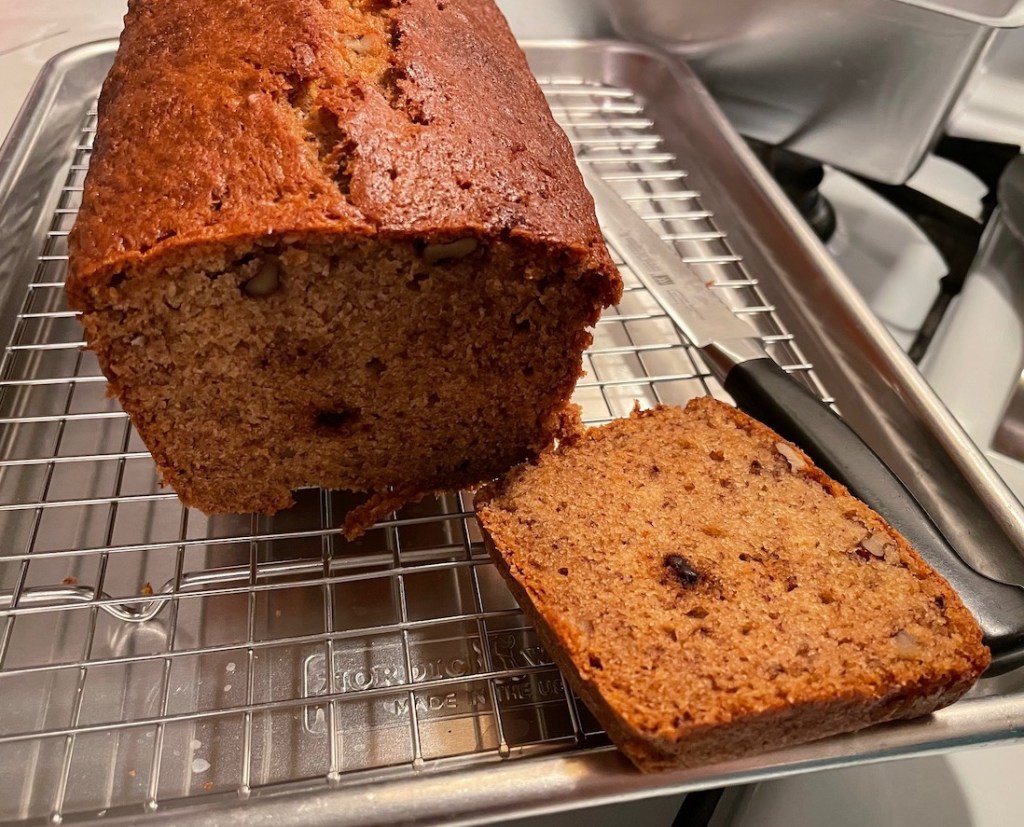
Here’s the first installment. The recipe (provided below), from a 1965 cookbook published by the Salisbury, NH Congregational Church, was made frequently by my mother. It was so popular in our house that I had to check with my sister, Jennifer, to find out if the recipe name (“Dad’s Banana Bread”) came from us or from the cookbook (answer: the cookbook).
It couldn’t be easier. My mom simplified the steps so that much of the work is done by a food processor, and the whole thing comes together in minutes. I’ve been using parchment for everything lately, even things baked in loaf pans and springform pans, and this was no exception. I’m glad I did. The loaf slipped easily out of the pan and I very much like the crust that formed.
This bread is delicious. Spreading butter on it makes it even more delicious. Apparently, this is the way to get me to eat bananas!
I have two baggies in the freezer, each filled with 510g of mashed banana in anticipation of making this recipe (“Ultimate Banana Bread“) from Smitten Kitchen, possibly twice. I wanted to start with the OG banana bread that mom always made, but I am interested in comparing it with the SK version. So now you know the fate of the unexpected two bunches of bananas.
Here’s the recipe for Dad’s Banana Bread, from the 1965 Salisbury, NH Congregational Church Cookbook:
1 stick of butter, softened (I used salted)
1 C sugar (200g)
1 egg
3 ripe bananas (I used 3½ which came to 440g, not including peels)
¼ C chopped walnuts2 C all-purpose flour (I used 260g of King Arthur All-Purpose)
1 tsp. baking soda
1 tsp. salt (I used fine sea salt)In a food processor, process the butter and sugar, then add the egg and process. Add the bananas and process, then add the walnuts and process. Whisk the dry ingredients together, then fold the wet mixture into the dry mixture only until blended. Pour the batter into a buttered loaf pan (I used a parchment-lined 4″ x 10″ x 3″ pan, which is just under 7 cups). Bake at 350°F for 45 minutes (see note below). Remove promptly from pan and let cool on a rack.
Note on bake time: It took me 65 minutes to get a clean cake tester inserted into the center of the loaf. The bread was not overbaked, so maybe the bake time is just low on the recipe. I would use a cake tester to decide when it’s finished, and also lightly press on the top of the bread in the middle to see if the middle feels as stable as the ends. I used an unusual loaf pan size (4″ x 10″) that is slightly narrower and longer than a typical loaf pan, so it’s possible that this impacted the baking time. Anyway, the cake tester method worked.
-
Subscribe
Subscribed
Already have a WordPress.com account? Log in now.
