Gnocchi Class

Another really fun online class with King Arthur Baking Company, courtesy of Christine and Mike!

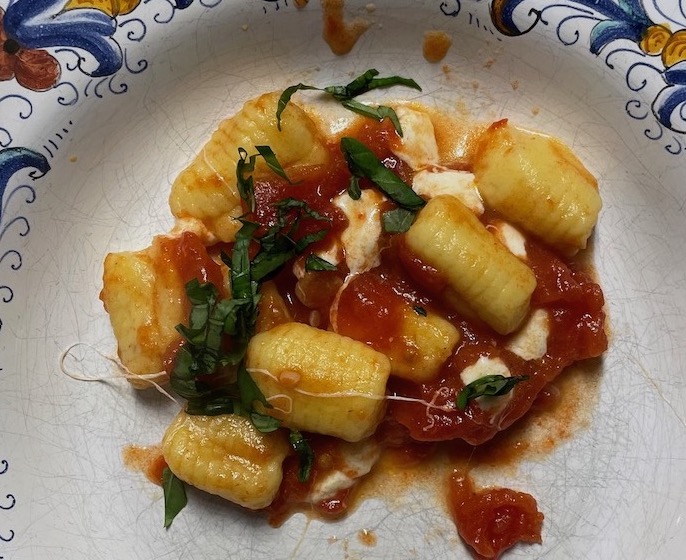
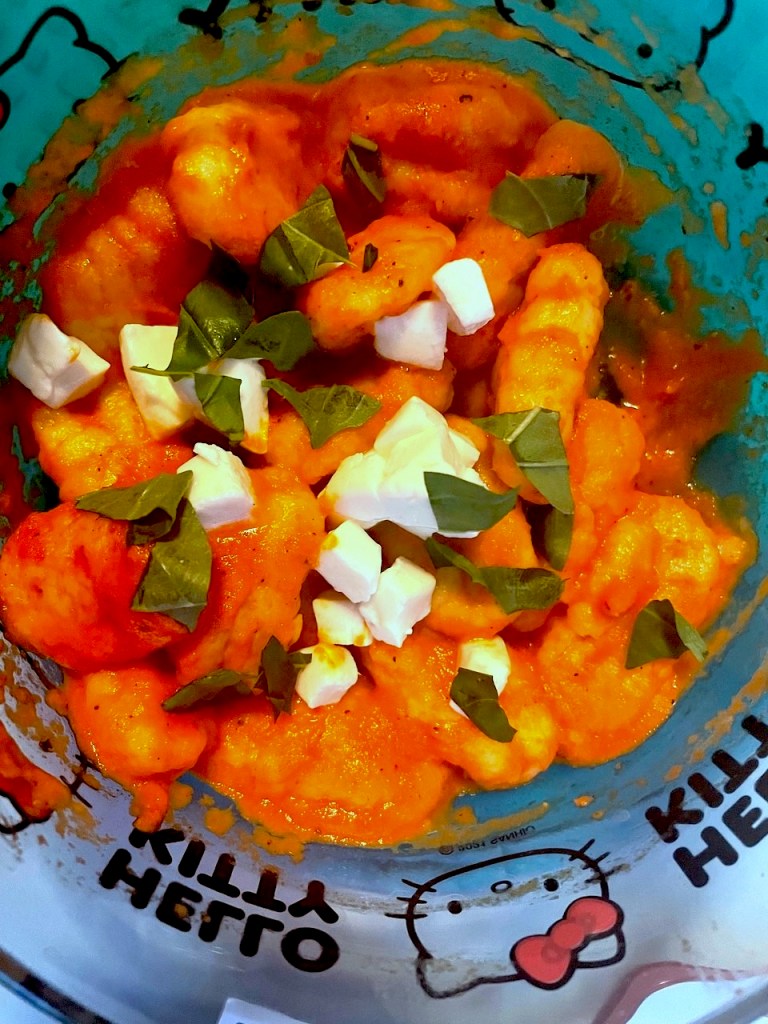
This time, it was potato gnocchi with a simple tomato sauce, mozzarella, and basil. Their blog post here has basically the same gnocchi recipe, but the recipe in class used just egg yolks rather than whole eggs. Chris also made a lovely roasted red pepper pesto, shown as my next-day leftovers on the right.

Mike did the work of making the mashed potatoes in advance. So, the recipe itself was very easy. Chris has a gnocchi board, which produced the lovely, finely-ridged gnocchi you can see in the left-hand photo. I used a fork, and the result (which isn’t obvious, but is just visible in the right-hand photo) was gnocchi with fewer, deeper ridges.

We were happy to have the teacher demonstrate the technique of forming the gnocchi. Photos and words wouldn’t be enough information. Their blog post has a video, but it’s broken, so I found this video that matches our instructor’s technique, using a gnocchi board. The technique is the same with a fork. The part that’s hard to describe with words is that you have to kinda “schmear” the dough piece along the board as opposed to just rolling it. The schmear creates the ridges, but also causes the piece to kinda roll on itself, creating a concave, curled shape. It’s not log-shaped, concave and somewhat curled.

We had some trouble with the gnocchi sticking to themselves and the parchment, causing their nice shape to collapse before being cooked. Following the instructions of the teacher, we held back some of the flour to avoid making dry gnocchi, but we wished we had used recipe’s the full flour amount, theorizing that a slightly drier dough would have allowed the gnocchi to hold more of their shape and ridges.

It’s also a fair bit of work to form each piece (“gnoccho”? “gnocche”?), sort of like forming fussy cookies (who would do that?!?). We enjoyed imagining the Italian grandmas making these very quickly and beautifully in their kitchens while gossiping together.

Sourdough Pita x2

I have been feeling, in general, that I prefer the flavor of bread made with sourdough over that made with yeast. So, I’ve been experimenting with replacing yeast with sourdough in some recipes, and here are a couple of attempts.

The basic idea for both attempts is to make half of the King Artur pita recipe from the class I took last week with Chris and Mike, but replace the yeast with a couple of tablespoons of sourdough starter. The rising time was extended as long as was necessary to get the dough to double. Everything else was the same as the recipe.

The first set was challenged primarily (I think) by the fact that my sourdough starter hadn’t been used in at least three months, so it was pretty “sleepy”. I left the dough to rise for 12 hours, and it did rise, but I didn’t get the impressive pillowy puffing-up that we got with the yeast version. It had air bubbles, but not one big pillowy pocket. It was soft, airy, and wonderful, and did have much more flavor than the yeast variety.

Then I tried again a week later and got the pillowy result I was hoping for!

This time, I let the dough rise for 6 hours (I think?). The only difficulty I had was that the big air pocket inside didn’t happen evenly between the top and bottom layers of the pita. You can kinda see it in the photo on the right side… the top layer is thin and the bottom layer is thicker. Some research on the interwebs seems to hint that this could be because of a temperature differential between the top and bottom (baking stone) in the oven. I dunno, maybe?

Last thoughts on these:

  • Because i feed my sourdough starter with 50% whole wheat flour and 50% white bread flour, I wonder if part of what I prefer about sourdough bread flavor is the whole wheat (in addition to the flavor that the sourdough itself provides). In this recipe, the sourdough starter was just two tablespoons, but you can see that the color of the resulting bread shows some flecks of whole wheat.
  • This recipe really is easy, and the results really are better than store-bought. But, I have to put in a plug for the pita from Cafe Barada. I don’t know for sure that they make it themselves, but I think so. It’s wonderful, and during the pandemic they were selling it in large quantities as a grocery item. Anytime I order their hoummos (which is the best hoummos I’ve had, anywhere, ever) I always buy extra pita.

Pita Bread and Man’oushe

I got to take another online baking class with Christine and Mike, and it was really fun and yielded much yumminess! The basic recipe was similar to this one, but without the “dough improver” (what’s up with that?) and replacing the sugar with honey. The same dough was used for both the pita and the man’oushe.

The difference was only whether the dough is baked plain (and allowed to pillow) or baked with toppings, like a Lebanese pizza. You can see in the first two photos above that the pita is popped onto the baking stone completely flat, then it puffs up in the hot oven (500°F) — like magic! It’s really fun to watch that happen.

For the man’oushe, the dough is also rolled flat, but it is then topped with za’atar mixed with olive oil, and whatever additional toppings you like. The class recipe suggested mozzarella cheese and also an egg, so you can see both options in the photos.

A beautiful meal (pitas under the purple towel)!

Chris and Mike made a lovely ground pork dish and carrot salad (I think both from an Ana Sortun cookbook), and it all went perfectly with the freshly-baked pita bread. All of the results were amazingly yummy. As Chris said: It makes one never want to buy another pita in the grocery store. The recipe is very easy and very fast. She has a point!

Also, I went out the next day to buy a robust amount of za’atar from Penzey’s.

Final thoughts: I’m so grateful to be able to join in for these classes! And, I want to try making the pita with sourdough. Watch this space…

Flatbreads Baking Class

I was fortunate to be able to join in on a King Arthur baking class with Christine. The class covered fougasse and focaccia, and was a remote, interactive class. It was really fun, and we learned how to make these two lovely breads. I forgot to take a post-bake focaccia photo, so here’s a pre-bake one.

I wished that I had put more asiago cheese on/in the fougasse, and I wished that I had put more salt on/in the focaccia (also, all that rosemary fell off!).

The two loaves are very different, with the focaccia being a much lighter and more tender loaf and the fougasse being more robust. Both were wonderful!