More Banana Bread!

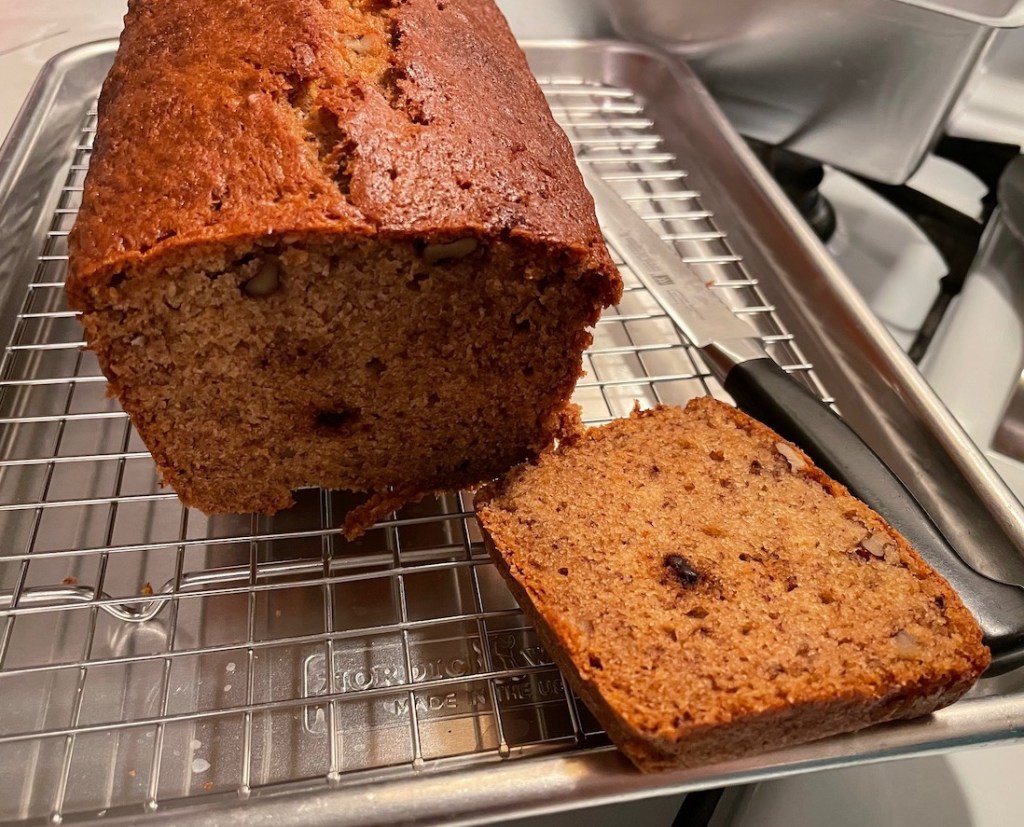
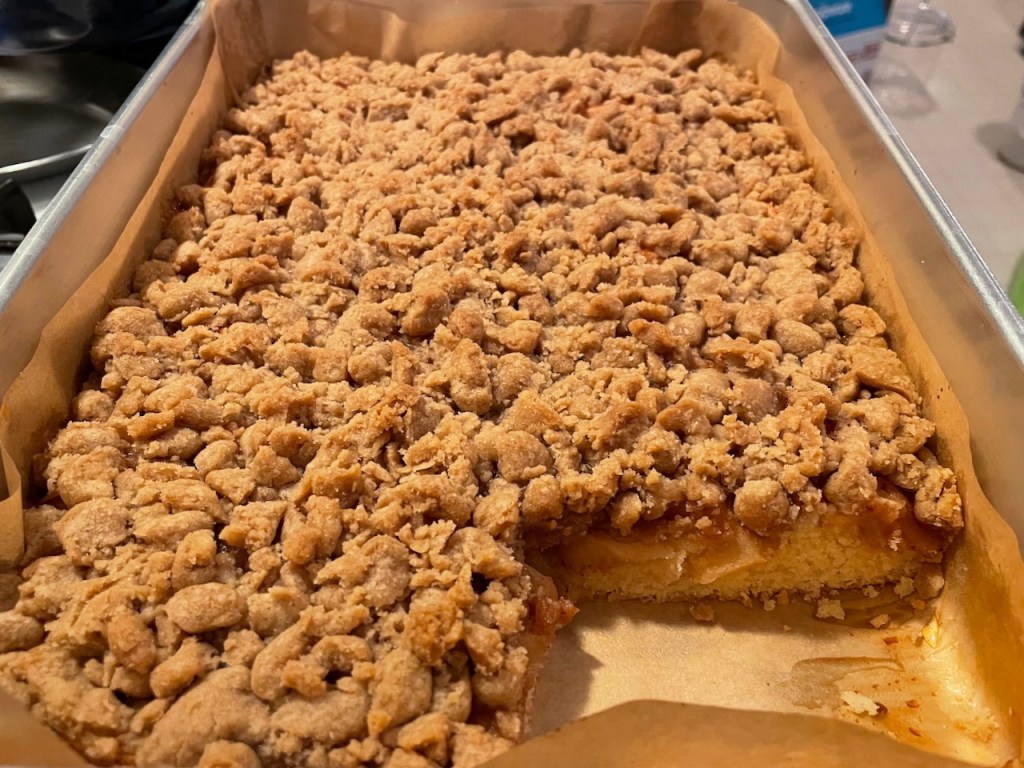
When I wrote this previous post about Dad’s Banana Bread (and the messed-up grocery order), I hinted at my intention to make this recipe from Smitten Kitchen: Ultimate Banana Bread. Because I already had the requisite 510g of mashed banana in the freezer, I only had to thaw it and was good to go.

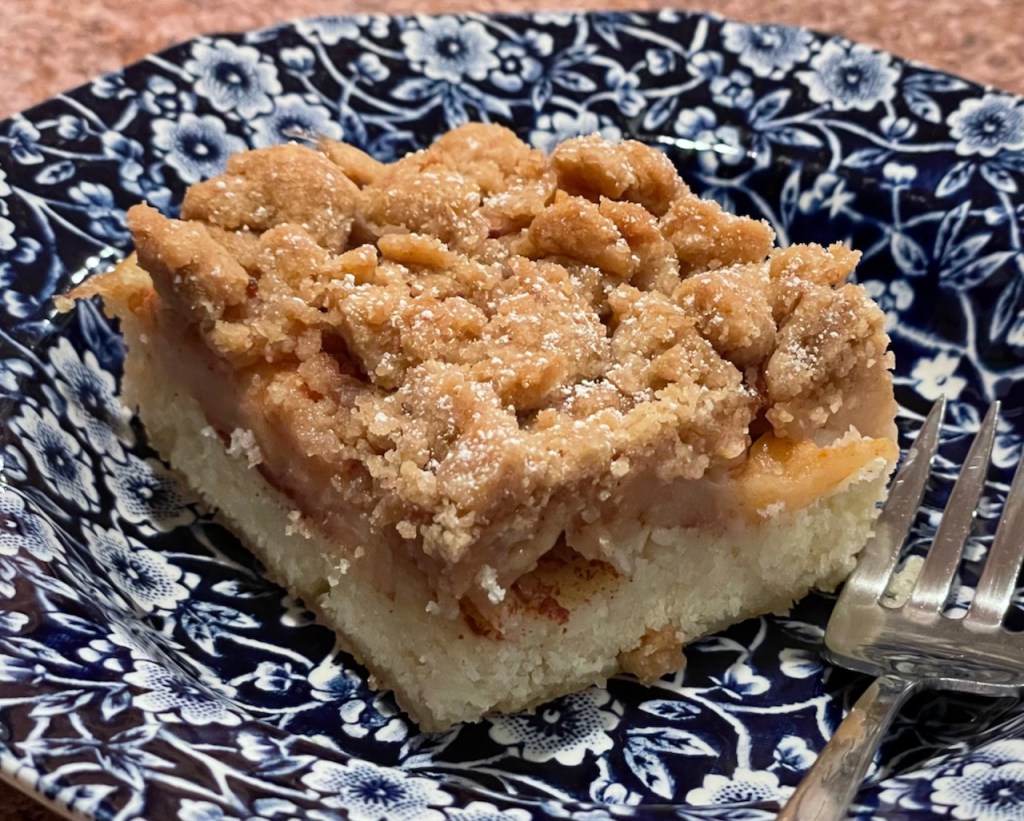
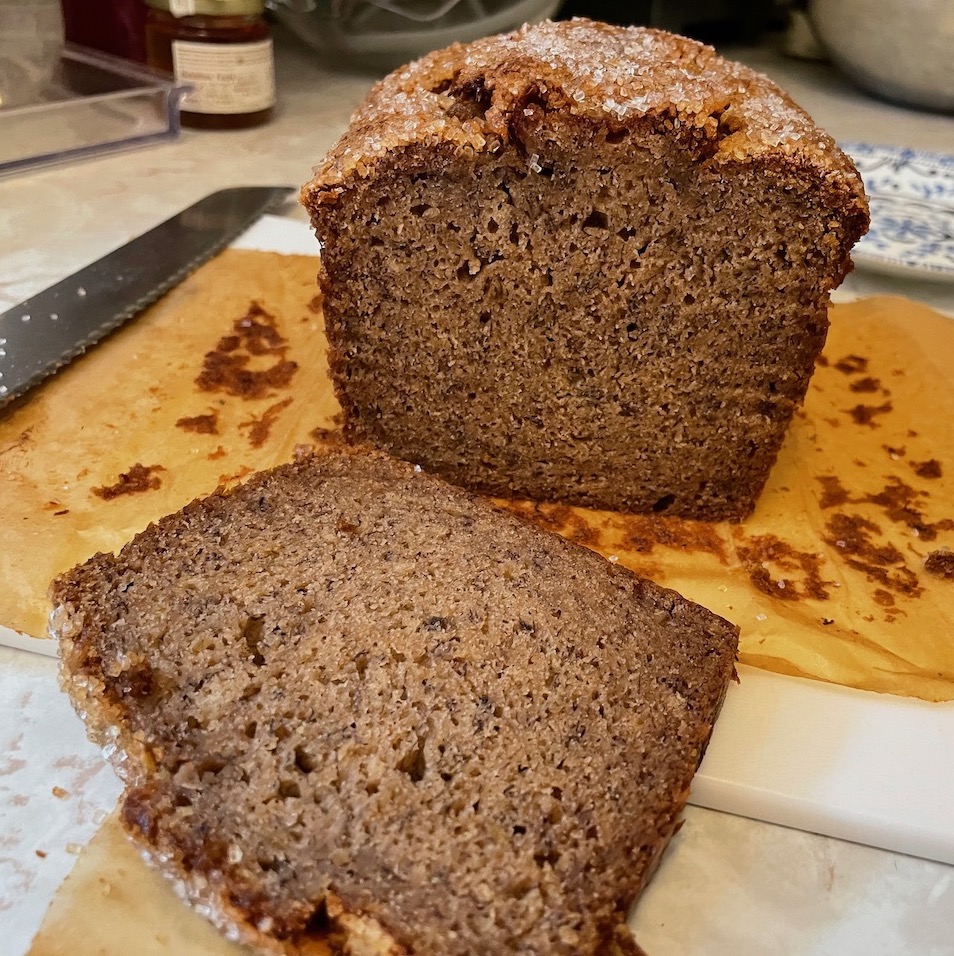
This is a completely different banana bread, at a different scale, and is wonderful. This version is moister, darker, and sweeter. More leaning towards cake than bread, but still less sweet than a typical cake. I thought I’d miss the walnuts, and almost added them off-recipe. I think it wouldn’t be bad to throw some in, but I think I agree with the recipe… this is really nice without the nuts, maybe because of the leaning-towards-cake thing.

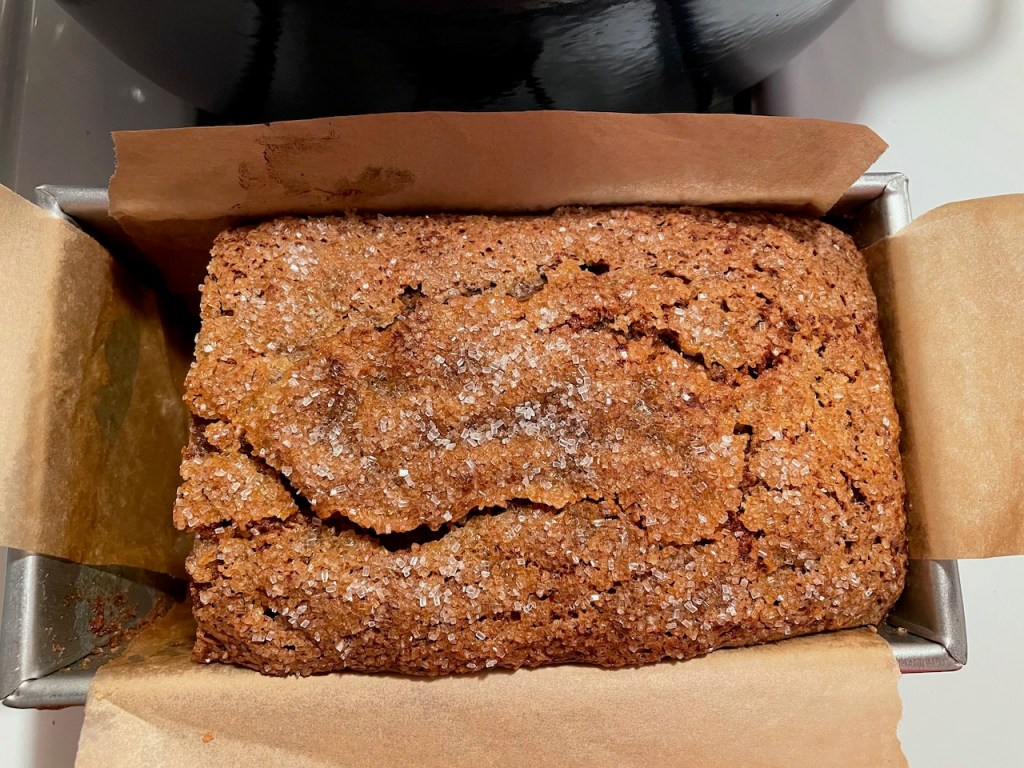
The headnote in the recipe makes a point of the loaf pan size. The author describes a specific size (9″x5″ at the top and 8″x4″ at the bottom) and volume capacity (6-cups) to get a loaf with a nice dome that grows beyond the pan. But, I suspect her measurements were taken to the outsides of a pan with a rolled edge, because the pan I have that came the closest is a half-inch shorter in each dimension (8½”x4½” at the top and 7½”x3½” at the bottom, measured from inside edge to inside edge*), yet came out to the exact right capacity (key recipe information: The batter “should come to just over ½-inch from the top rim”).

Normally, I just try to make sure my pans have at least as much volume capacity as a recipe calls for with whatever pan size they specify, and approximately the same shape. I don’t usually worry that much if my pan varies somewhat from the recipe. But, this recipe seemed specific for a reason, so I went with the closest thing I had. I think this wouldn’t have worked quite as nicely with the longer, thinner loaf pan that I have, and I like the loaf shape for this recipe.

The recipe insists on two tablespoons of turbinado sugar to contribute to the nice, crunchy top, but for me it was too much. I used sparking sugar (because I like the crunch of the big crystals), and next time I will cut this in half to one tablespoon, or just enough to sprinkle over the whole top. [Chris reports that she doesn’t think there was too much sugar on top!]

I still have one more 510g bag of mashed banana in the freezer, so the gift of the mis-delivered groceries keeps on giving!

*footnote: I wrote – and then decided to spare you from – a several-paragraphs geeky digression about pan dimensions. The bottom line is that pan dimension should be measured on the inside, because that’s where the baked product will be. Thick pan walls or rolled edges shouldn’t increase a pan’s baking capacity, right? But, of course, no normal person or company measures this way (I am, if not patently obvious to you by now, not normal). Smitten Kitchen already charmed me by providing both the dimensions at the top of the pan and the dimensions at the bottom, which very few recipe authors bother to do, so I forgive her the inside vs. outside measurement thing. ❤️☺️

Dad’s Banana Bread

Those who know me well know that I’m not a big vegetable eater. I’ve at least evolved to the point where I do happily eat some vegetables, but they’re still not the most-coveted items on my grocery list. One illustration: I recently signed up for a local meat share, but don’t imagine that I’d ever enroll in a farm/vegetable share. I suppose if there were such a thing as a flour share I might consider that, but I’ve been happily buying King Arthur all-purpose flour in 25-pound sacks at Costco and storing it in an 18-quart bin.

So, I had a very small taste of what I imagine it must be like for people who are in a CSA: A couple of weeks ago I did a curbside-pickup order from a nearby supermarket (for Bonne Maman preserves, Hershey’s milk chocolate bars, and Jet-Puffed marshmallows — yes, s’mores were part of the plan, and yes, this was a ridiculous grocery order) and the person who picked my order mixed up mine with someone else’s order. They had loaded the bags in the back of my car and I drove off, so I didn’t figure this out until I got home and looked in the bags. Of course, I called the store right away and they promptly delivered my stuff, but they didn’t want me to bother bringing back the wrong stuff. That left me with a couple of bags of someone else’s food order.

Let’s end this already too-long story by saying that the wrong order had actual fresh fruits and vegetables in it, including two bunches of bananas. I actually can’t stand eating bananas. I spent my first couple decades of adulthood buying bananas and trying to convince myself to eat them, but at some point I accepted that it was futile. I just don’t like them. I happily eat my way through apples, oranges, peaches, pineapples, and grapes, but bananas are just non-starters for me. This meant that I needed to do some banana-based baking.

Here’s the first installment. The recipe (provided below), from a 1965 cookbook published by the Salisbury, NH Congregational Church, was made frequently by my mother. It was so popular in our house that I had to check with my sister, Jennifer, to find out if the recipe name (“Dad’s Banana Bread”) came from us or from the cookbook (answer: the cookbook).

It couldn’t be easier. My mom simplified the steps so that much of the work is done by a food processor, and the whole thing comes together in minutes. I’ve been using parchment for everything lately, even things baked in loaf pans and springform pans, and this was no exception. I’m glad I did. The loaf slipped easily out of the pan and I very much like the crust that formed.

This bread is delicious. Spreading butter on it makes it even more delicious. Apparently, this is the way to get me to eat bananas!

I have two baggies in the freezer, each filled with 510g of mashed banana in anticipation of making this recipe (“Ultimate Banana Bread“) from Smitten Kitchen, possibly twice. I wanted to start with the OG banana bread that mom always made, but I am interested in comparing it with the SK version. So now you know the fate of the unexpected two bunches of bananas.


Here’s the recipe for Dad’s Banana Bread, from the 1965 Salisbury, NH Congregational Church Cookbook:

1 stick of butter, softened (I used salted)
1 C sugar (200g)
1 egg
3 ripe bananas (I used 3½ which came to 440g, not including peels)
¼ C chopped walnuts

2 C all-purpose flour (I used 260g of King Arthur All-Purpose)
1 tsp. baking soda
1 tsp. salt (I used fine sea salt)

In a food processor, process the butter and sugar, then add the egg and process. Add the bananas and process, then add the walnuts and process. Whisk the dry ingredients together, then fold the wet mixture into the dry mixture only until blended. Pour the batter into a buttered loaf pan (I used a parchment-lined 4″ x 10″ x 3″ pan, which is just under 7 cups). Bake at 350°F for 45 minutes (see note below). Remove promptly from pan and let cool on a rack.

Note on bake time: It took me 65 minutes to get a clean cake tester inserted into the center of the loaf. The bread was not overbaked, so maybe the bake time is just low on the recipe. I would use a cake tester to decide when it’s finished, and also lightly press on the top of the bread in the middle to see if the middle feels as stable as the ends. I used an unusual loaf pan size (4″ x 10″) that is slightly narrower and longer than a typical loaf pan, so it’s possible that this impacted the baking time. Anyway, the cake tester method worked.

Checkerboard Cookies

I’m getting a very late start on Christmas Cookies, and I’ll post more about them later, but I wanted to post about this year’s addition to the rotation: Checkerboard Cookies! I don’t mess with the cookie lineup lightly, but these are a complete winner and have permanently replaced the previous Zebra Icebox Cookies (from Jann Johnson’s The Art of the Cookie).

I have had good luck with Smitten Kitchen’s Apple Crumb Cake recipe, so when I read this cookie article, I knew I wanted to give it a try. Also, her photos are great!

I decided to make a double batch, and you gotta love a cookie project that involves starting with a pencil and paper to work out the math of doubling the recipe. It was complicated by the very smart twist in the recipe to hold back some of the flour so that after the dough is divided in half (to make the chocolate part by adding cocoa powder) the vanilla part gets an analogous addition of flour — so that the consistencies remain the same. (The issue of unequal consistencies was the biggest flaw in the Zebra cookie recipe, btw.)

Having worked it all out (answer: 2C of flour for the vanilla, 1½C of flour + ½C of cocoa powder for the chocolate) it was a relatively simple dough to make. The recipe describes this as a “sable” cookie, which includes a raw egg yolk. Also, this recipe uses both granulated and confectioner’s sugar, which I’m guessing contributes to the lovely, fine-grained, melt-in-your-mouth texture. These really are lovely-looking and lovely-tasting cookies!

Rainbow Wreaths

I have to confess that I described these to my sister as “fussy”, but she’s right that anyone who spends the hours that I do making these (→) diabolical cuties (using a lab-quality balance to make them consistent in size; 3.4g each, if you’re curious) has no right to call any cookie “fussy”. I mean, really. I think what I meant, rather than “fussy”, was: “I have no earthly clue what I’m doing with these”. One illustration of this statement: My ratio of “presentable” checkerboard cookies to ones that are “just for the cook” was about 2:1, so there’s definite room for improvement!

I tried to form the checkerboards in two rounds, and there were big improvements between rounds 1 and 2, so this seems like something I can get more comfortable with over time. Basically, there couldn’t be a more perfect addition to the Ikeda Christmas Cookie lineup: A delicious and beautiful cookie that requires maniacal and compulsive perfectionism to get just right — and takes a lifetime to master. Uh huh. Guilty as charged.

Apple Crumb Cake: Third Time’s the Charm

This was my third go at this cake, but this time I decided to completely follow the Smitten Kitchen recipe. I’d been gravitating in this direction, so it made sense. The first attempt was made using the Milk Street Plum Cake recipe, but altered to work for apples. The second attempt tried to walk a middle ground between the two recipes. Those were fine, but this is better. As the Smitten Kitchen description says, the cake has a wonderful crumb-to-cake ration (essentially 1:1), and this makes all the difference.

The only significant change that I had to make to the recipe was to scale it up for a 9″ x 13″ pan rather than 9″ square. This meant increasing everything by ~50%. Of course, I didn’t want to deal with 1½ eggs, so I used the biggest egg I could find in my fridge, and upped the sour cream by a few grams to add some extra moisture.

The other change I made was to invoke Milk Street’s recommendation to freeze the crumb topping before applying it to the cake. The idea is that this helps to make the topping be “pebbly” rather than melting in and/or being more granular or sandy. Smitten Kitchen said just to squeeze the topping into blobs, and I wonder if that would have worked just as well. The freezing method adds extra work, because it’s fussy to have to break apart the frozen topping into various pebble sizes and scatter them about the cake. Next time I want to try comparing the two methods.

I also baked this in a parchment-lined metal 9″ x 13″ pan rather than the Pyrex I had used the previous times. The metal pan had the major downside of not letting me see how the bottom was doing, but I think the cake baked more evenly, overall. The doneness check in the recipe is to make sure the apples don’t have any more crisp spots. But, because of my history of overbaking this cake (and everything), I worried about what was going on “below decks”. I did bake at the recipe’s advised 325°F for 60 minutes, which is what it took to get all the apples to be soft, but for the final 10 minutes I put the cake on the AirBake cookie sheet to protect the bottom.

As soon as I took the cake out of the oven, I removed a corner piece to check for doneness, and it was perfect. There was just a bit of browning on the bottom and sides, the cake was light and fluffy, and the apples were nice and soft. I’m not sure how one is supposed to do this without taking a chunk out of the cake, but at least this worked! (And, yes, I proceeded to eat quite a large corner of the cake… as you can see above 😬)

Overall, this cake was a big success and I’m very happy with it (I don’t think I’ve ever written these words before!). My only complaint is that it took me several hours to make, though it seems like it should be easy to throw together (I mean, it’s just cake, apples,and a topping). I know I tend to be a rather slow baker, but this felt especially time-consuming.

I used up some of the lovely apples that I got in October at Shelburne Farm. I included some Winesap, Macoun, and Pink Lady apples. I didn’t love any of these as eating apples, so I think the cake was just the right use for them.

Apple Crumb Cake, Take 1 and Take 2

This cake was inspired by a Milk Street article about a Plum Crumb Cake from Greg and Lucy Malouf’s book “Suqar”. Since it’s October, it’s more apple season than plum, so I changed the recipe into an apple crumb cake by:

  • switching the plums out for apples
  • switching the cardamom/coriander/allspice out for cinnamon
  • switching the almonds out for walnuts
  • eliminating the almond extract (just used vanilla)

Overall, this worked. I liked the proportion of crumble to cake, and the technique of freezing the crumble and applying it partway through baking was brilliant. But then, I saw Stef and she gave me a piece of her Smitten Kitchen Apple Crumb Cake, and it put mine to shame! It was so much better. It had a higher proportion of crumb topping to cake and the topping was just better.

So, for Take 2, I used the Smitten Kitchen proportions for the crumb topping (no nuts, more butter, more flour) while still using the Milk Street / Malouf technique of freezing the crumble and adding it partway through baking. You can see I also added parchment. This cake was more successful overall, but, here’s a shocker: I overbaked it and the bottom became too dry.

I suppose this is as good a place as any to note that, through my sourdough bread adventures, I have found a solution for the problem of baked goods getting too dark on the bottom before they’re ready overall. The bread community recommends putting the bread pan on top of a broiler pan (the two-part kind that has a top layer with slots and a bottom pan to catch drippings), essentially adding an “air gap” between the baking item and the heat. Instead of using a roasting pan, I have been using an old “AirBake” cookie sheet, which I otherwise never use (I really hate this pan for baking as it intentionally screws up browning). So, when the bottom is getting done but the top isn’t ready, I just slide the AirBake underneath and the problem is solved.

Of course, one needs to recognize that one needs to do this, or it isn’t helpful. Sigh.

I should put a little information here about the apples. In Take 1, I tried three different kinds of apples (McIntosh, Fuji, and Gala) to see what I liked. In the end, it didn’t matter so much. What mattered more is that I wished I had peeled the apples. The original plum cake recipe had beautiful color from the plum skins, but this didn’t translate well to apples, whose skins are more tough. In Take 2, I peeled some McIntosh and that worked. Unlike with a pie, it was actually nice for the apples to get mushy in the cake.

Cinnamon Roll Fail

I’m of the opinion that it’s important for scientists to publish studies that are “failures” (for many reasons, but that would be a different kind of blog post, right?), and I have to face that the same principle applies to my baking failures. I made these cinnamon rolls today, based on this Smitten Kitchen article and recipe (which, in turn, is based on a Bon Appetit 2008 issue). Through no fault of the recipe, I seriously overbaked these. I mean, they were just completely hammered. I can hear Paul Hollywood saying, “Overworked, overbaked, dry as a bone.” Of course, I still ate them, and they were still delicious, but definitely an overall failure.

Here’s what I learned and what I want to remember for next time:

  • I think they could have come out as much as 10 minutes earlier
  • I used a non-cream-cheese glaze, which I happen to like, but was necessitated by my not having cream cheese and my not wanting to run out to get it (side note: I haven’t been going to any grocery stores during the pandemic, preferring instead to have necessities delivered)
  • I believe the technique of using a thread (or dental floss) to cut these is a seriously bad idea. It seemed, as I was doing it, that bits of filling were somehow jumping all over the kitchen. I didn’t think I was applying that much tension, but I kept hearing sounds of flying cinnamon sugar all over the kitchen. On the other hand, I don’t know how much better or worse it would be to try to cut them, so that remains to be determined.

[Lastly, I’m happy to have a reason to post a photo of the beautiful baking dish that Stef gave me from Bennington Potters!]