-
I love baking. A big part of that enjoyment is the analysis and thinking about what I’ve made and how it could be done differently and better. Of course, I love eating what I produce, too, but really I like to learn how to make things better and better.
Some people think that this analysis takes away from the enjoyment of the effort and product, but for me the analysis is part of the enjoyment and takes away nothing. Yes, I’m thinking about ways that something can be better, but for me this is a positive and hopeful process, and in no way is it negative or discouraging.
I can happily scarf down a croissant (or two!) while making a long mental list of all the things I want to try to do better with the next batch. Most people will want to just enjoy the croissants without the analysis. A very few people might want to think about these things with me. This blog is for us.
-

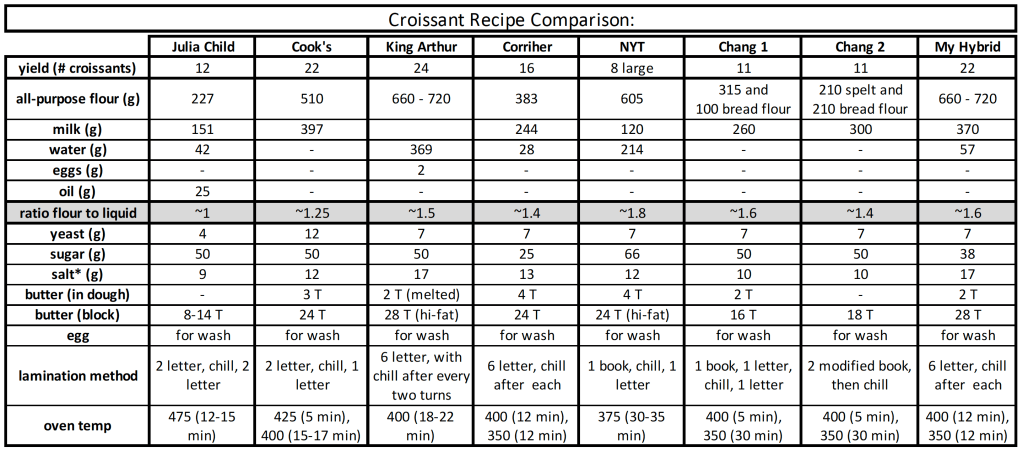
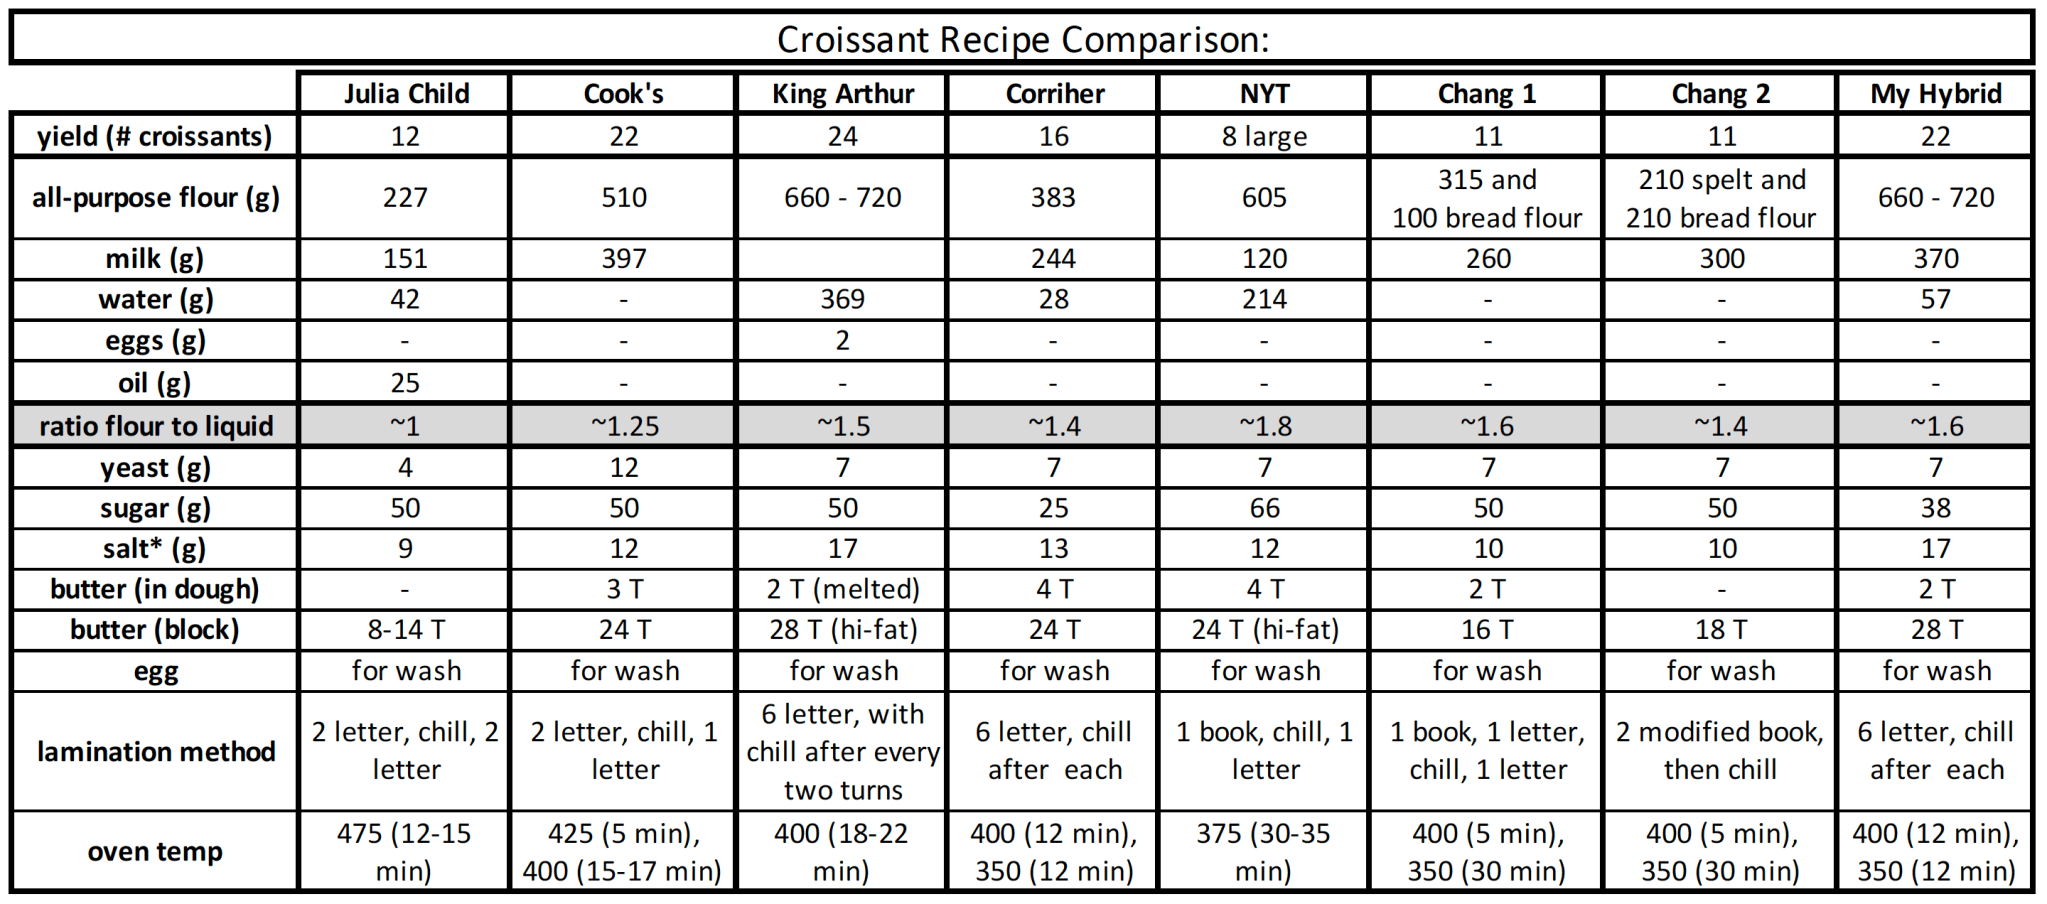
If you check out the comparison chart that I made to identify differences between various croissant recipes, you’ll see the wide variety in lamination methods (in the 2nd to last row). For my attempt last week, I wanted to try Shirley Corriher’s lamination method, because I figured: the more lamination = the more better. She also had this peculiar technique of brushing each rolled layer with ice water, and I wanted to see if this worked.
But, I wasn’t convinced by that experience. As I wrote in that prior post, I had big problems with the butter breaking apart after being chilled, and things just kinda went off the rails from there. Yes, I was able to do the 6 turns, and yes the results were great. But, I remained curious whether other techniques could solve some of the logistical problems.
For instance, I found it really hard to roll things out into rectangular form. The cumulative effect of a seemingly small issue of “roundness” (as opposed to “squareness”) was pretty horrible as the turns increased. It seemed that there were big blobs of unlaminated dough extending off the ends of the dough packet, and these appendages just kept getting bigger and bigger. And, it irked me that the scientific-minded Corriher hadn’t accounted for the butter breakage or rolling technique in her recipe.
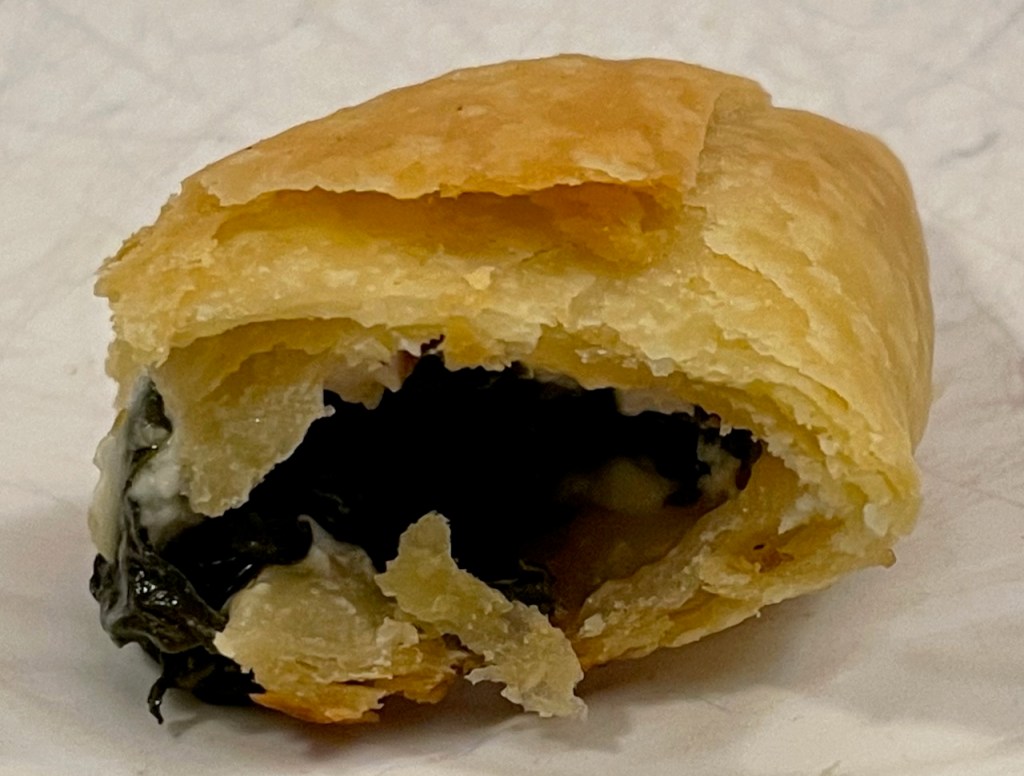
So, I tried again, but this time I went 100% with the Joanne Chang recipe. This attempt faithfully follows the recipe from her first book, Flour, which is referred to as “Chang 1” in my comparison chart. Notably, this method has only three folds (or “turns”), where the first two (one book and one letter fold*) occur before any chilling, then there’s one more letter fold after chilling. This, compared with Shirley Corriher’s six letter folds, each interspersed with chilling!
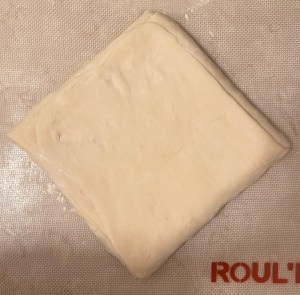
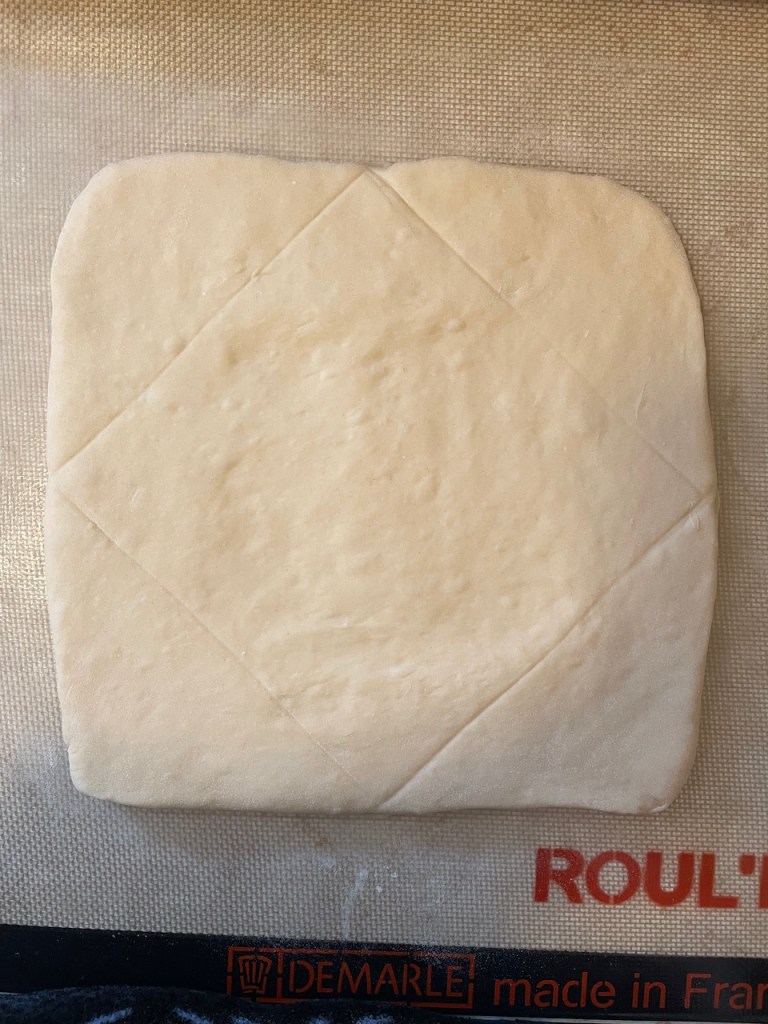
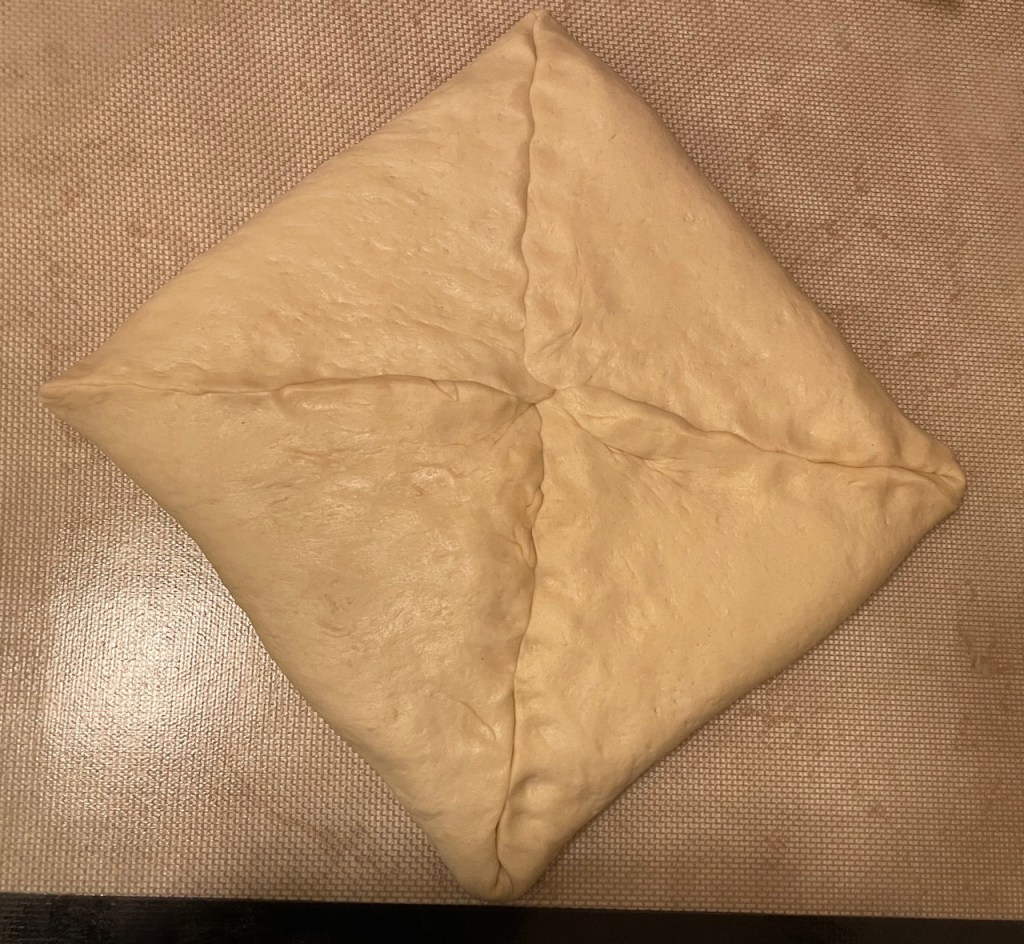
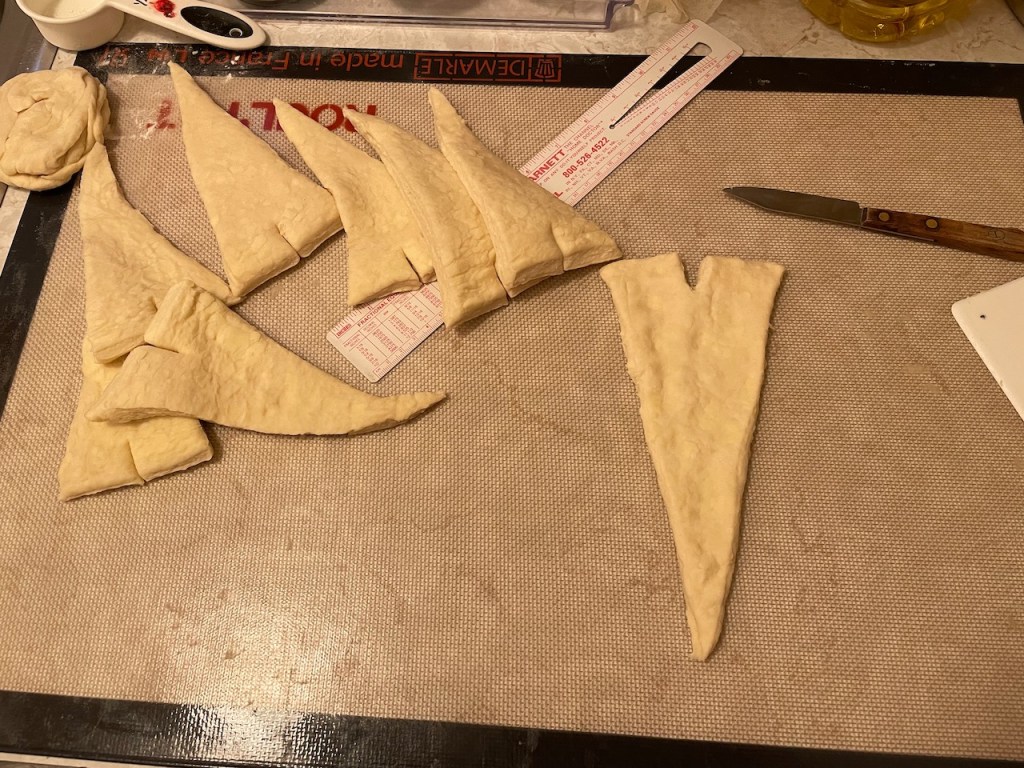
Another difference that I didn’t think would matter, but did, was the method that is used to encase the butter at the outset. I am now convinced that this makes quite a big difference. If you look at my first photo above you’ll see that I’ve marked the dough per Joanne’s instructions. Her technique says to place the butter block on the dough so that the dough’s corners are exposed (actually, so does Shirley, see this photo). The part that is really different is that Joanne says to then flatten out the four exposed dough corners – to the extent that each corner will fully cover the entire butter block. So, the butter is enclosed on one side by at roughly 3/4″ layer of dough and on the other side by four flattened out layers of dough (the parts that were the dough corners). Here’s mine after flattening and folding in the corners so that the butter is fully encased.
The reason this turned out to be better for me is that it helped to establish a shape and structure that rolls out to be more square than round. It avoids putting large blobs of unlaminated dough in the middle or edges of the dough packet, instead establishing a more even, rectangular shape from the beginning.
A few more notes to add:
- Joanne addresses the butter-breaking issue by suggesting that you first use the rolling pin to press on the dough layers up and down the dough, and only afterwards roll out the resulting ridges. She explains that the goal is to get the dough and the butter to form even layers, without any one part extending beyond any other part.
- I’ve taken to thinking of the lamination rolling step as, actually, rolling out the butter — where the dough is just along for the ride. The butter is really the important layer to get thinned and extended before folding.
- I don’t think there was a loss with the fewer folds compared to last week’s attempt. Theoretically, six letter folds makes more than 700 layers where a book fold and two letter folds makes 36. In fact, this King Arthur article addresses why fewer turns actually makes a better result.
* If you’re not familiar with terms “book” and “letter” fold, you can see a primer here. The basic difference is that a book fold creates four layers and a letter fold creates three.
-


This is actually my third try at baklava. I didn’t take any photos of the first two, because they were generally awful. The whole process was awful, and apparently I didn’t want any evidence of their existence.
The problem with the first two attempts was that I tried to make it inside of a rectangular pyrex dish. Maybe for someone who knows what they’re doing this would have been fine. But for me, I had major problems getting the thinly-rolled dough to behave properly in the dish. It tended to contract or otherwise not behave when buttered, yielding an ugly mess. I think it was a mistake to trim the rolled dough before trying to place it in the dish? Maybe having extra would have helped. I don’t know
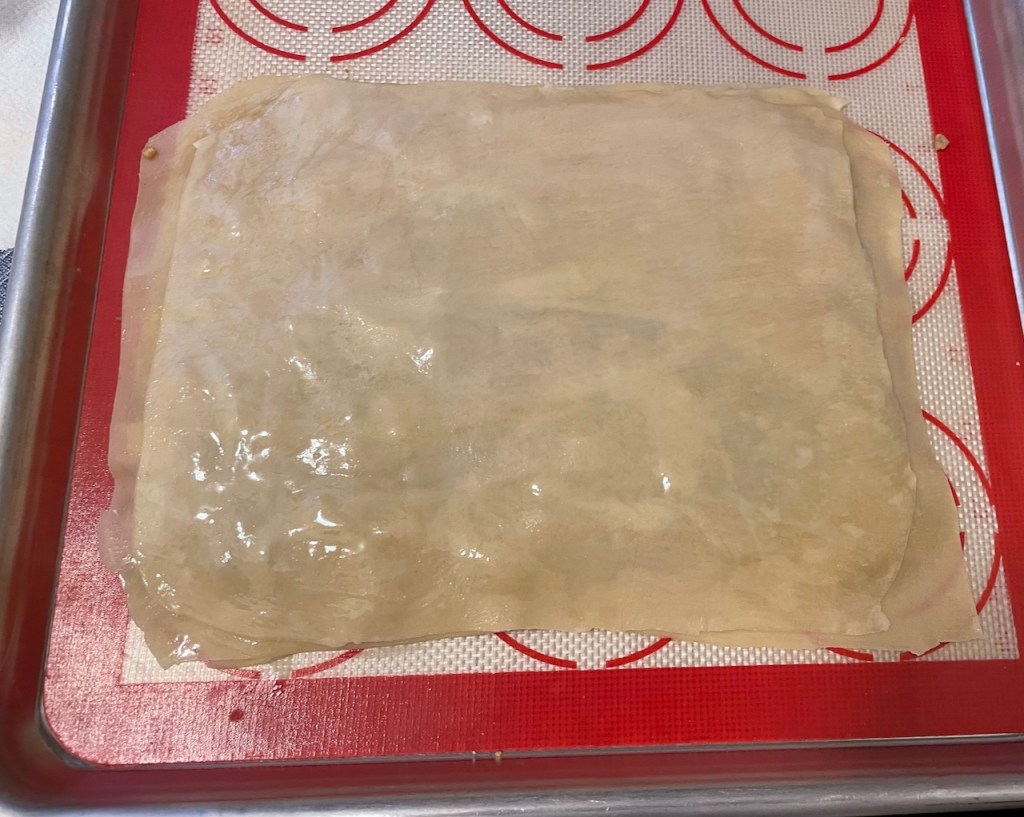
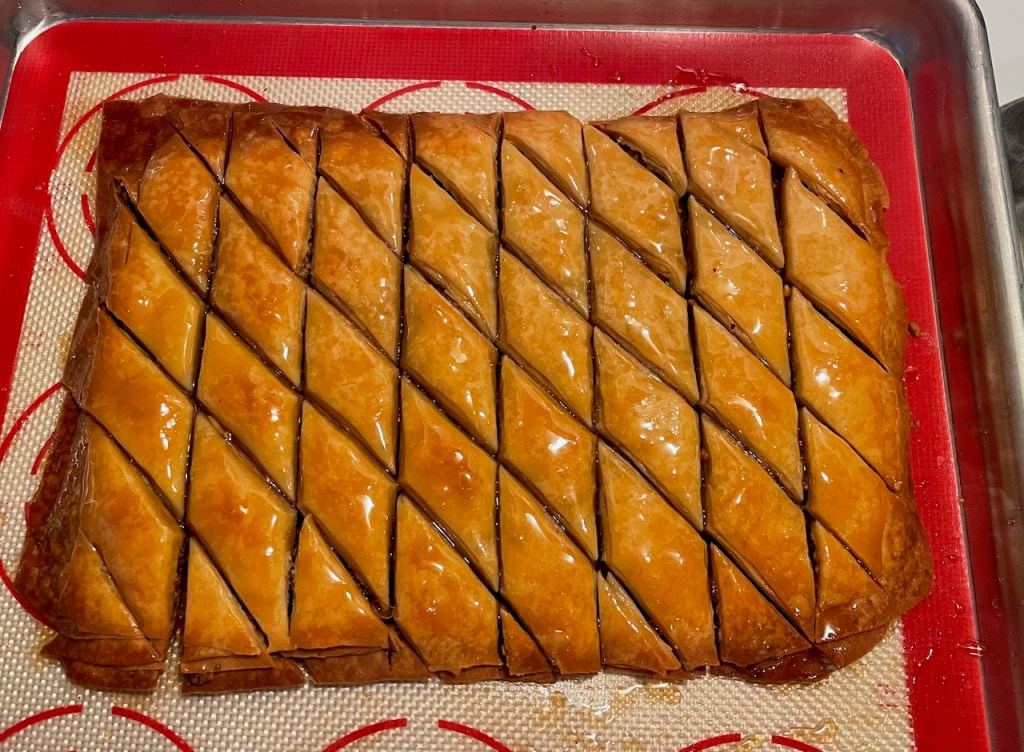
Anyway, this third attempt was more successful because I ditched the pyrex dish in favor of a sheet pan. I rolled the phyllo sheets out and just built the baklava layers on the pan. The dough behaved better and stayed thin, and I was still able to pour the syrup on and have most of it stay within the pastry. One downside was that I couldn’t use a knife to cut the diamond pattern, because I didn’t want to cut the silicone pad. Instead, I used my plastic bench scraper to make the cuts. In hindsight, I could have built the baklava on parchment and then used a knife.
TBH, my conclusion from all this is that, for baklava, I don’t think it’s worth making the phyllo dough. Baklava really needs the paper-thin sheets that you get with the bought stuff. No matter what, mine weren’t going to be that thin!
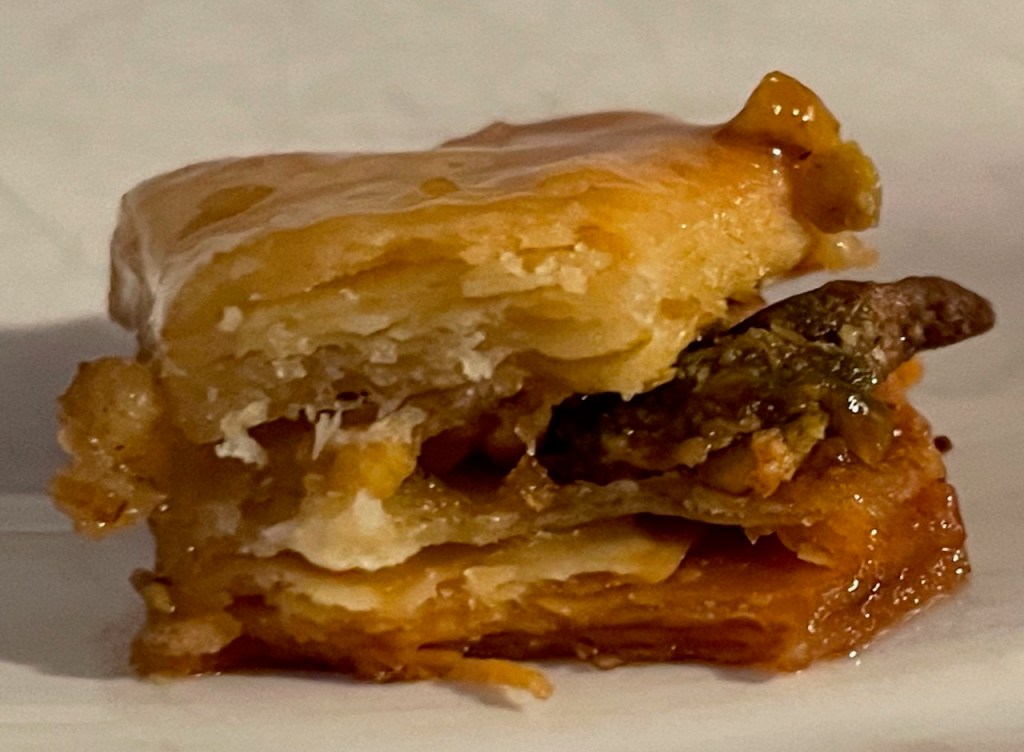
I do wonder if the Paul Hollywood cornflour method would work. I’m tempted to try, but maybe not motivated enough. Here’s why: I bought a piece of baklava from Cafe Barada a few days ago, and it was just sublime. I mean, it was light, delicate, only gently sweet. Just perfect. Why work hard to make something so inferior? This is Cafe Barada’s baklava. I mean, look at this thing of beauty…
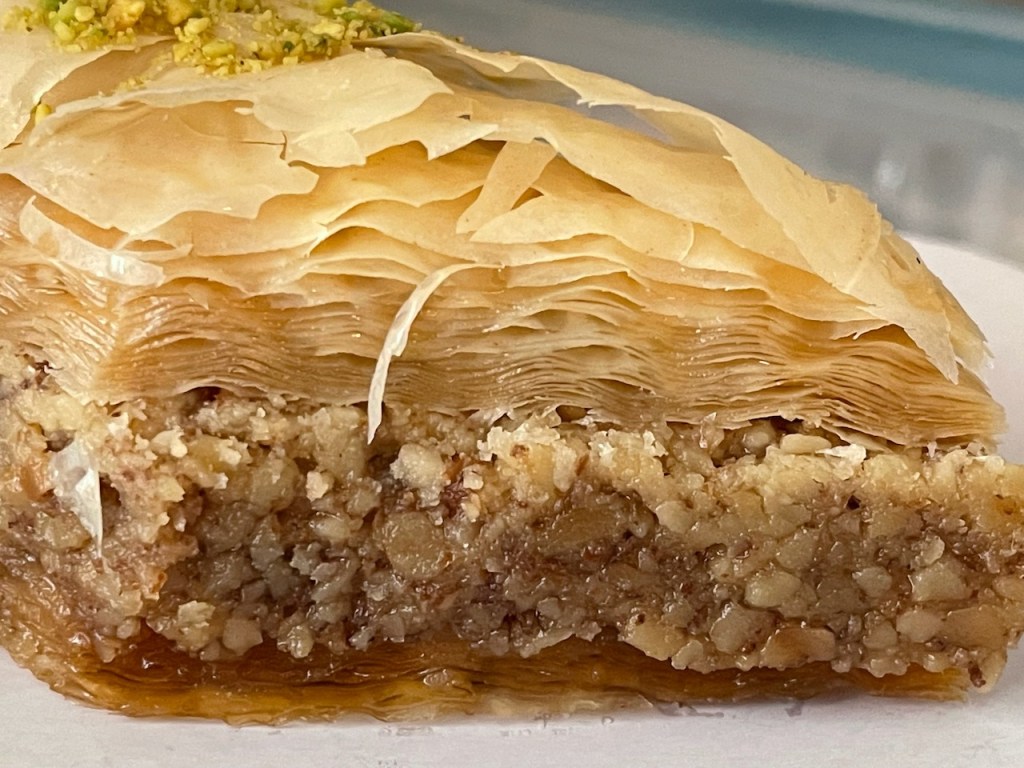
Cafe Barada’s baklava Maybe it’s worth it to make homemade spanakopita triangles, but not baklava.
-
Making the Kouign Amann and the phyllo pastry pointed me towards making croissants. I have made them once (years ago), but I wanted to try again. I started by doing some research and comparing recipes and techniques from: Julia Child (Mastering the Art of French Cooking, Vol. 2), Cook’s Illustrated (Jan/Feb 2012), King Arthur Baking Company (Baker’s Companion), Shirley Corriher (BakeWise), The New York Times (recipe with link to helpful video), and two versions from Joanne Chang (one from her first cookbook, Flour, and another from a later cookbook, Pastry Love). It surprised me how varied these all were. I decided to try making a hybrid version, mostly based on the King Arthur proportions and overall volume, but using the Shirley Corriher lamination method because it had the most folds. [You can click on the table below to enlarge it.]
My biggest problem with this batch came with the second turn (after the first chill). As with the Kouign Amann, the butter got too cold and when I tried to roll out the “packet”, the butter inside broke into pieces rather than spreading out. I decided to let the dough sit and warm up before proceeding, and for the 3rd through 6th letter folds I did not chill the bundle between the folds. Instead, I let the dough sit on the counter in my cool (60°F) kitchen.
I think the lamination was OK, but that broken-butter 2nd turn wasn’t pretty.
Surprisingly, only Julia Child and Joanne Chang even raise the topic of the butter possibly breaking apart and how to avoid that. It seems to me that, given this and my previous experience with the Kouign Amann, this is a common problem. Or, is my fridge colder than most?
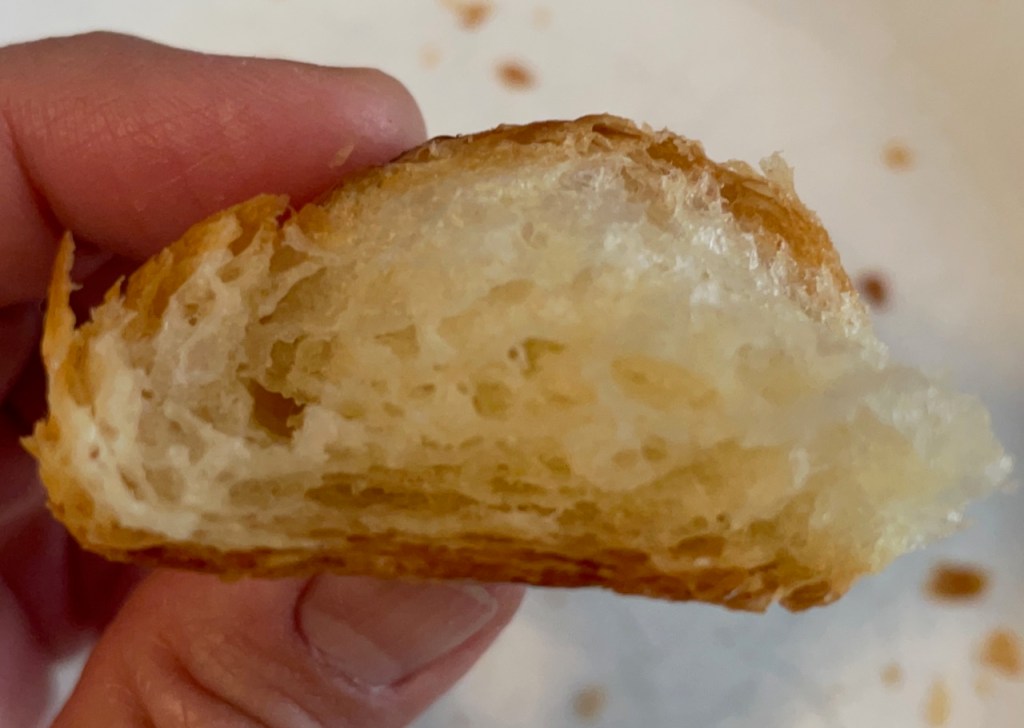
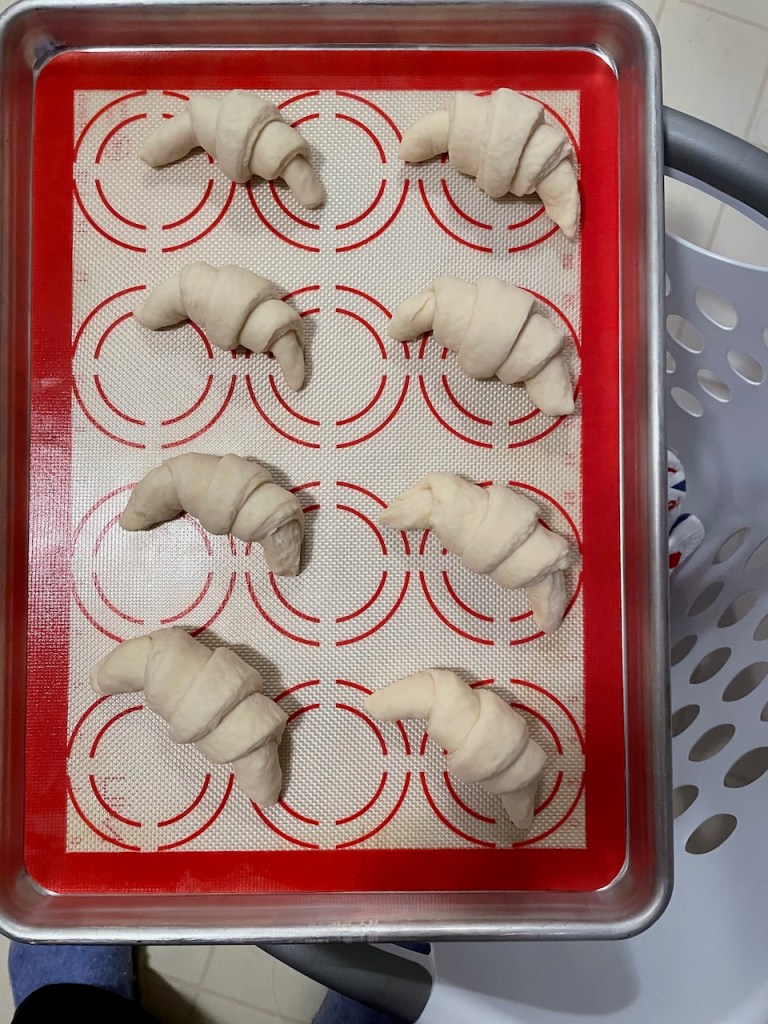
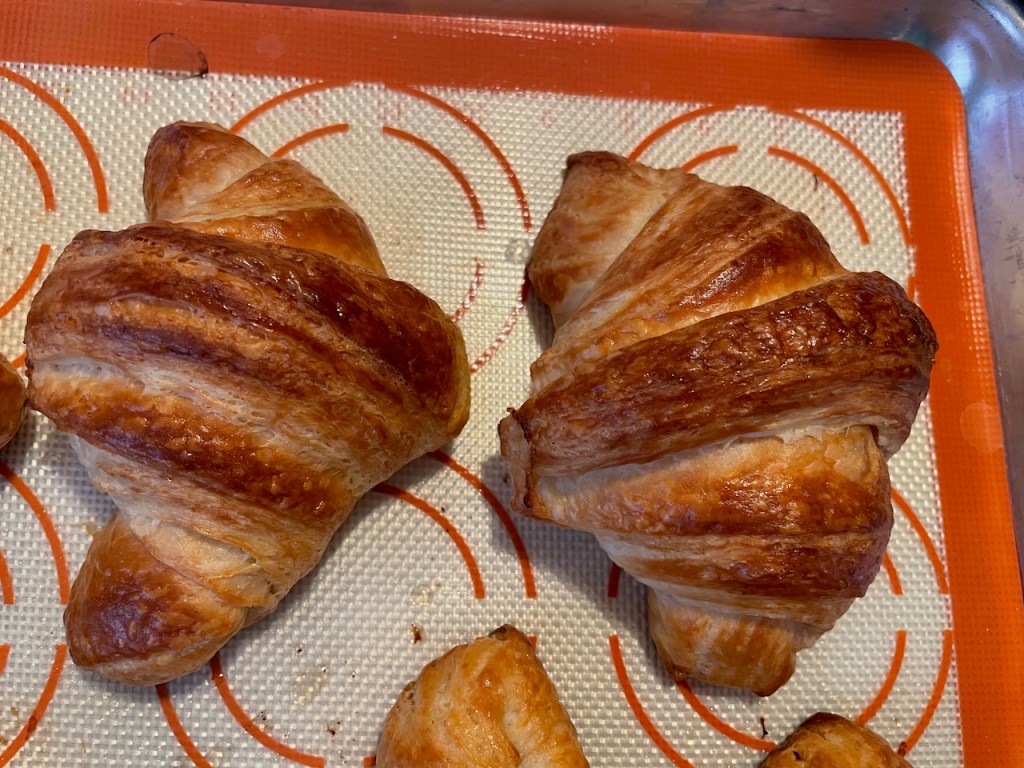
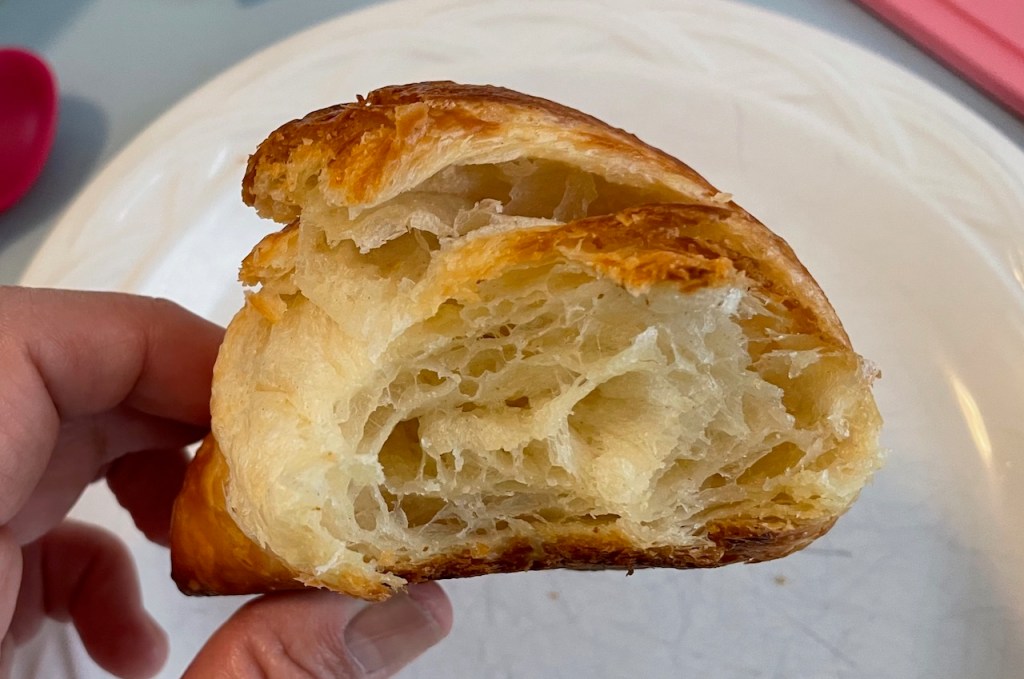
Anyway, the result was still wonderful. I ended up with a big pile of crispy, flaky, buttery croissants, and though my math says that each one was about 300 calories, I ate lots of them! I did freeze eight of them before the final proof, which worked well. The frozen ones just have to thaw and then rise, which means sitting out overnight (“Just like the Trader Joe’s croissants”, as Christine pointed out!), then bake them as with the others.
This experience made me want to make more croissants. Stay tuned!
[Yes, this is evidence that up to the posts in early December 2021, this blog was written far after-the-fact. I mean, during World War I, nobody referred to it as “World War I”, right?]
-
I think this one can be blamed on the Great British Baking Show, whose current season had a “technical challenge” that involved making baklava, including making the phyllo dough from scratch. But, I think also I was motivated by a big pile of fresh spinach that Chris gave me from a huge bag that she had bought at Wilson’s Farm.
I started doing some research online about it, and was frustrated by the lack of clear instructions. The New York Times has a recipe for phyllo dough, but stops before saying what to do with the dough. There is one use for it that they show (something called Hortopita), but I wanted to get into more options.
Of course, I did also check out the Paul Hollywood baklava recipe that was used for the GBBS technical challenge, but was thrown a bit by the use of “corn flour” as a separator between the layers.
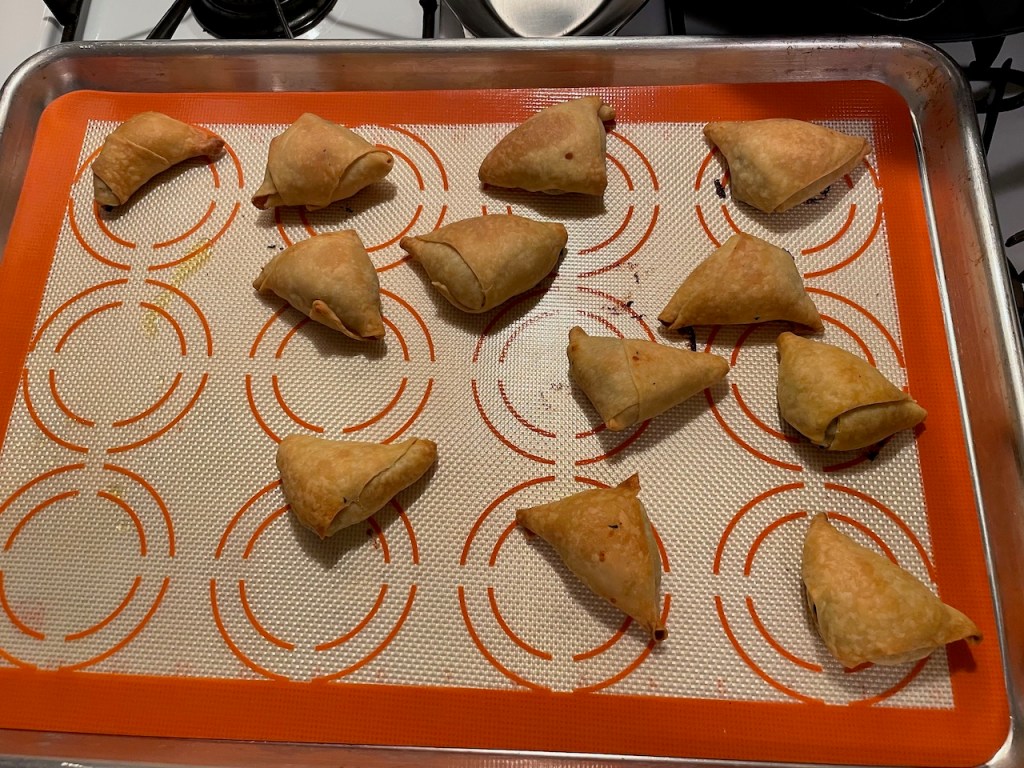
So, I did a bit of “winging it” and made spanakopita triangles. I cleaned and de-stemmed the spinach, then cooked it with diced shallot, garlic, and olive oil. When it was cooled to room temperature, I squeezed out any liquid, drained it on some paper towels to get out any remaining liquid, and stirred in some crumbled feta.
I made the phyllo dough using the NYT recipe, which involved ordering “finely ground durum flour” from King Arthur online. I rolled the dough as thin as I could, cut it into strips, buttered the strips, and then put a blob of spinach on each strip of dough and folded it up into little triangles.
These were great!I wondered if I would have better luck using a pasta roller, so my next batch (I don’t have photos, alas) went through the pasta roller and yielded thinner strips. Of course, I first experienced the sad fiasco where I rolled some dough thinner and thinner, only to then have it merge back into a blob because I hadn’t floured it enough as I went! I’m basically a pasta machine noob, and it showed. Once I got the hang of it, things went better.
The next phyllo project would be baklava, but first the croissant adventures begin…
-
Take 1 (10/5/2021) 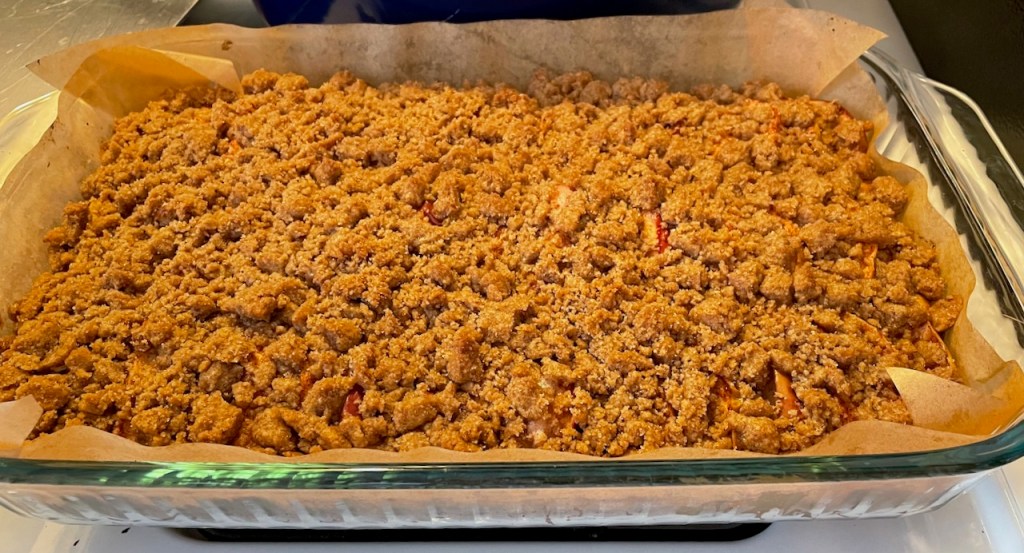
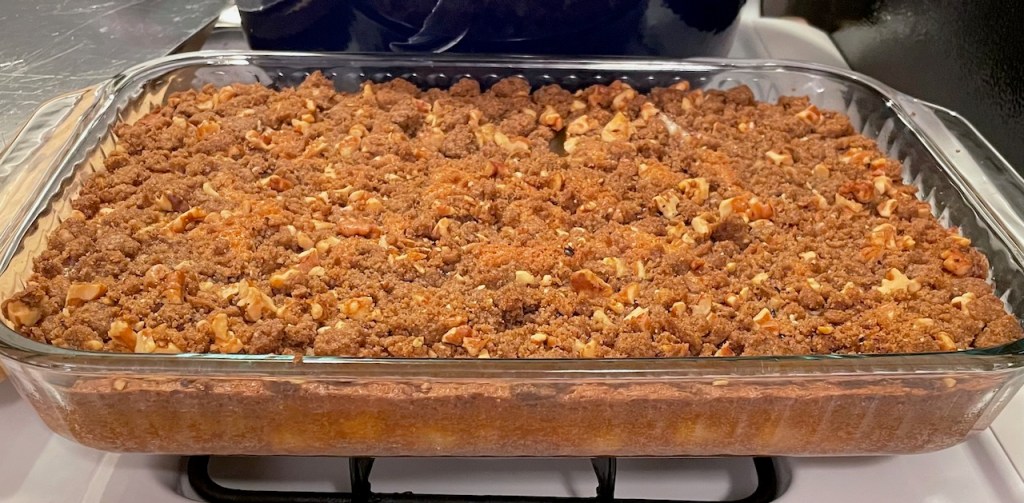
Take 2 (10/21/2021) This cake was inspired by a Milk Street article about a Plum Crumb Cake from Greg and Lucy Malouf’s book “Suqar”. Since it’s October, it’s more apple season than plum, so I changed the recipe into an apple crumb cake by:
- switching the plums out for apples
- switching the cardamom/coriander/allspice out for cinnamon
- switching the almonds out for walnuts
- eliminating the almond extract (just used vanilla)
Overall, this worked. I liked the proportion of crumble to cake, and the technique of freezing the crumble and applying it partway through baking was brilliant. But then, I saw Stef and she gave me a piece of her Smitten Kitchen Apple Crumb Cake, and it put mine to shame! It was so much better. It had a higher proportion of crumb topping to cake and the topping was just better.
So, for Take 2, I used the Smitten Kitchen proportions for the crumb topping (no nuts, more butter, more flour) while still using the Milk Street / Malouf technique of freezing the crumble and adding it partway through baking. You can see I also added parchment. This cake was more successful overall, but, here’s a shocker: I overbaked it and the bottom became too dry.
I suppose this is as good a place as any to note that, through my sourdough bread adventures, I have found a solution for the problem of baked goods getting too dark on the bottom before they’re ready overall. The bread community recommends putting the bread pan on top of a broiler pan (the two-part kind that has a top layer with slots and a bottom pan to catch drippings), essentially adding an “air gap” between the baking item and the heat. Instead of using a roasting pan, I have been using an old “AirBake” cookie sheet, which I otherwise never use (I really hate this pan for baking as it intentionally screws up browning). So, when the bottom is getting done but the top isn’t ready, I just slide the AirBake underneath and the problem is solved.
Of course, one needs to recognize that one needs to do this, or it isn’t helpful. Sigh.
I should put a little information here about the apples. In Take 1, I tried three different kinds of apples (McIntosh, Fuji, and Gala) to see what I liked. In the end, it didn’t matter so much. What mattered more is that I wished I had peeled the apples. The original plum cake recipe had beautiful color from the plum skins, but this didn’t translate well to apples, whose skins are more tough. In Take 2, I peeled some McIntosh and that worked. Unlike with a pie, it was actually nice for the apples to get mushy in the cake.
-
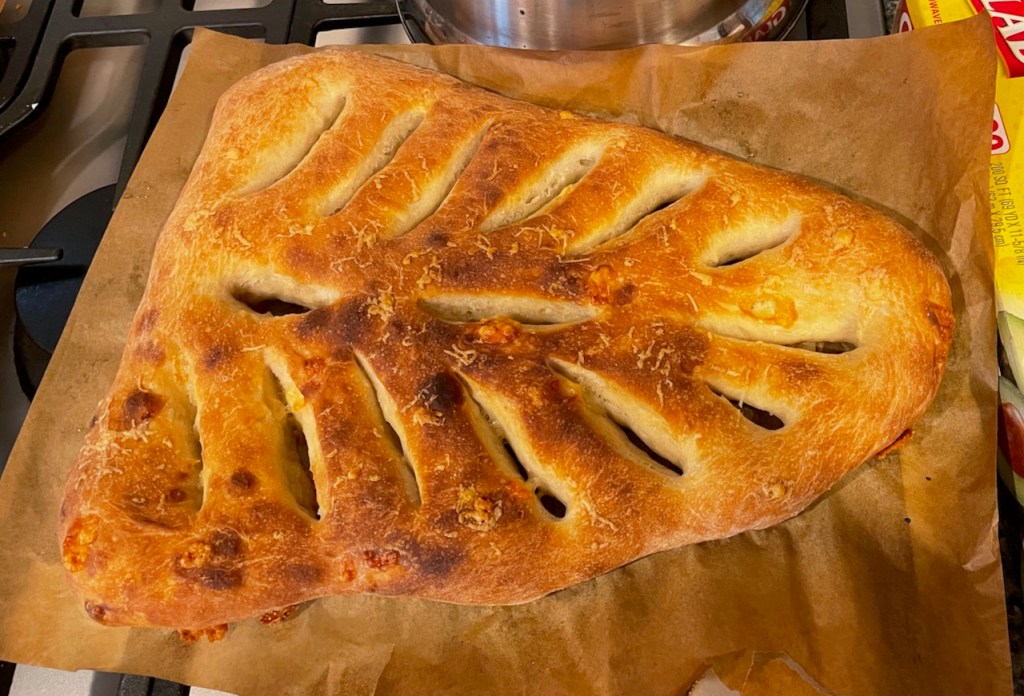
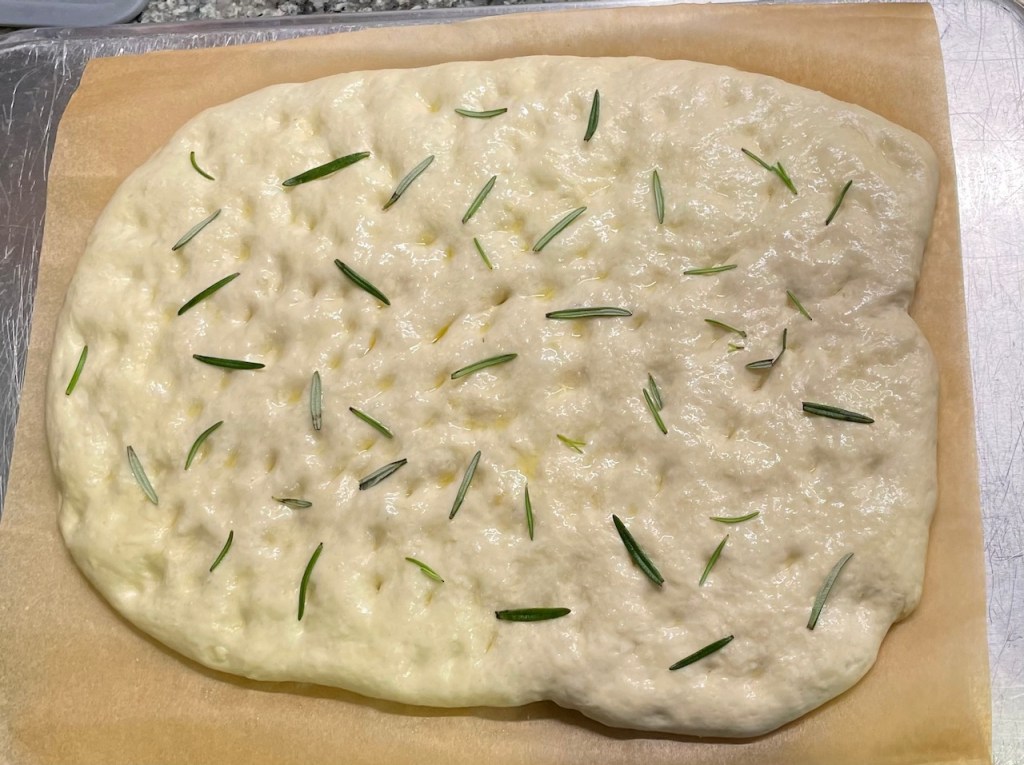
I was fortunate to be able to join in on a King Arthur baking class with Christine. The class covered fougasse and focaccia, and was a remote, interactive class. It was really fun, and we learned how to make these two lovely breads. I forgot to take a post-bake focaccia photo, so here’s a pre-bake one.
I wished that I had put more asiago cheese on/in the fougasse, and I wished that I had put more salt on/in the focaccia (also, all that rosemary fell off!).
The two loaves are very different, with the focaccia being a much lighter and more tender loaf and the fougasse being more robust. Both were wonderful!
-

Suffice to say that my Spring and Summer became… er… busy. And, perhaps that busy-ness left me somewhat broken in spirit by the end of the summer. It wasn’t until late-September that I even felt like baking. I mean, it took until late-September for me to pick myself off of the floor enough to actually do laundry and eat something other than matzoh spread with peanut butter (both of which happened to already be lying about the house). (Actually, I ran out of peanut butter at some point and resorted to smearing butter on the matzoh.)
This recipe is the one that drew me back. Cook’s Illustrated does it again with a lovely article about Kouign Amann, and I felt motivated enough to both thaw butter and wake up my sourdough starter. Both a Kouign Amann and a sourdough loaf were produced on the same day. And maybe some laundry got done too.
I’m a noob with laminated dough, so this was the start of a learning curve that I’m still climbing. Some notes from this first attempt:
- I could tell that the butter broke into pieces within the dough on some of the earliest turns. The instructions to chill the dough/butter packet is complicated to me, because this instruction consistently causes the butter to get too cold to roll out. It took several weeks to find some solutions to this, but that story is for other posts.
- For this first attempt, you can see in the photo that I didn’t get the pretty scored diamonds that Cook’s has in their photo. This is because my dough became, essentially, butter-fried brioche, with the butter all mixed in and melting out into the pan. I mean, “butter-fried brioche” is still a wonder to eat, but it wasn’t what this recipe was going for.
- The dough in this recipe is rather high hydration, so it’s more liquid-y than dough-y. I would have been happier if they would have said so in the recipe instead of using words like “smooth and elastic” and “roll out” as opposed to “soft and bubbly” and “stretch out”. Their comments on their website clarified that it’s a liquid-y dough. BTW, this dough consistency adds to the problem with the butter breaking. The chilled butter is just too different in texture from a liquid-y dough. In my view, the butter needs to be rather soft to be folded with the high-hydration dough.
-
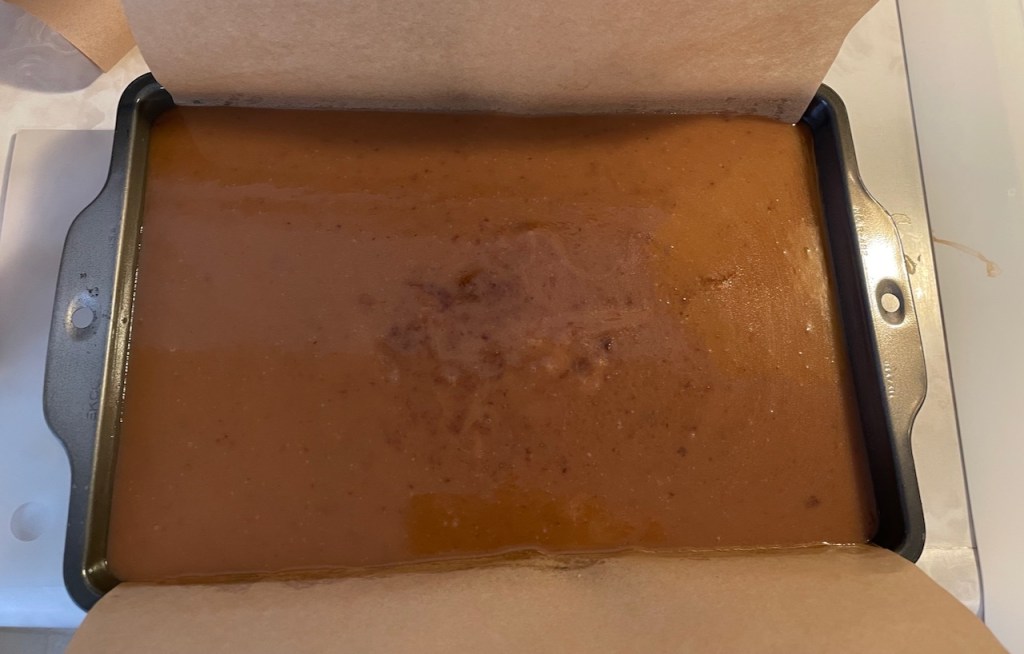
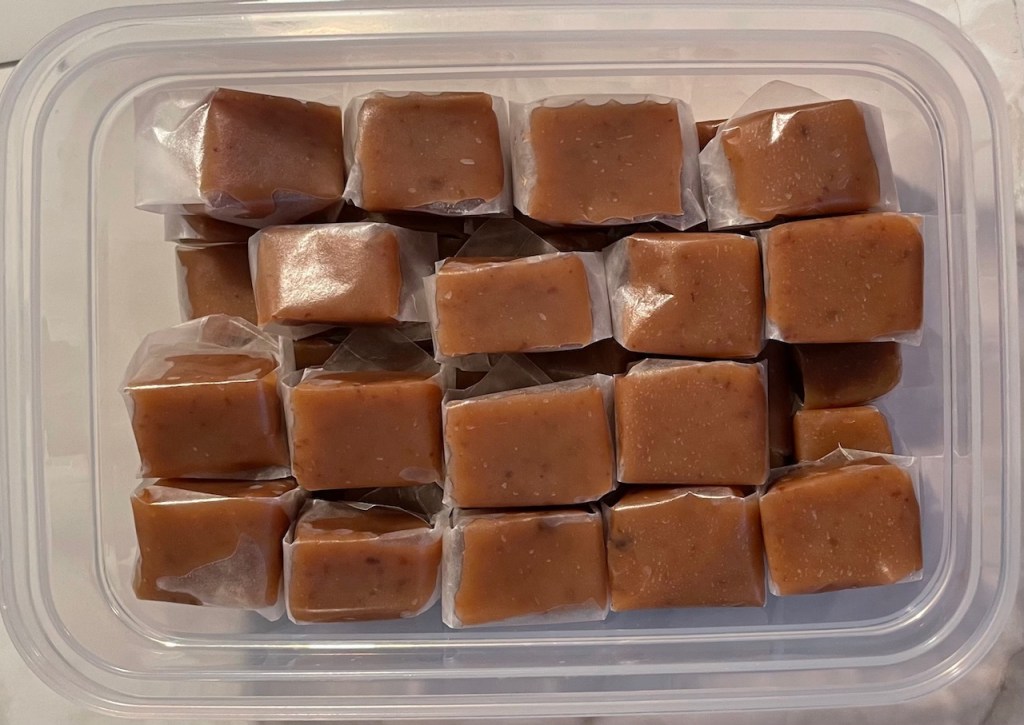
Bev and Ray generously sent me a tin of their amazing handmade caramels, and were additionally generous in sharing the recipe with me. I haven’t tried anything in the candy-making arena in over 15 years, since before I had a gas stove. In my prior residence, I did try to make caramel frosting on an electric stove and was constantly frustrated by the temperature bouncing up and down with the electric stove coil cycling on and off. These caramels were a good incentive to try again with the gas stove (and the amazing ChefAlarm thermometer, which Bev also uses and recommends!)
First observation is that this recipe calls for many, many, forms of sugar (and why shouldn’t it?). Second observation is that absolutely no-one will be surprised to hear that I somehow managed to overcook these. There was a little bit of burnt caramel on the bottom of the pan and I mistakenly scraped that up and it got mixed in. You can see the patch of dark stuff in the middle of the pan. I actually liked the addition of the burnt caramel flavor, but the issue is that the burnt part was also a bit harder, so the texture was off. I managed to contain the burnt part to one area of the finished product, so there were many caramels that were fine.
So, in my mental list of things that really don’t work with my tendency towards “bien cuit”, caramels are now included.
-
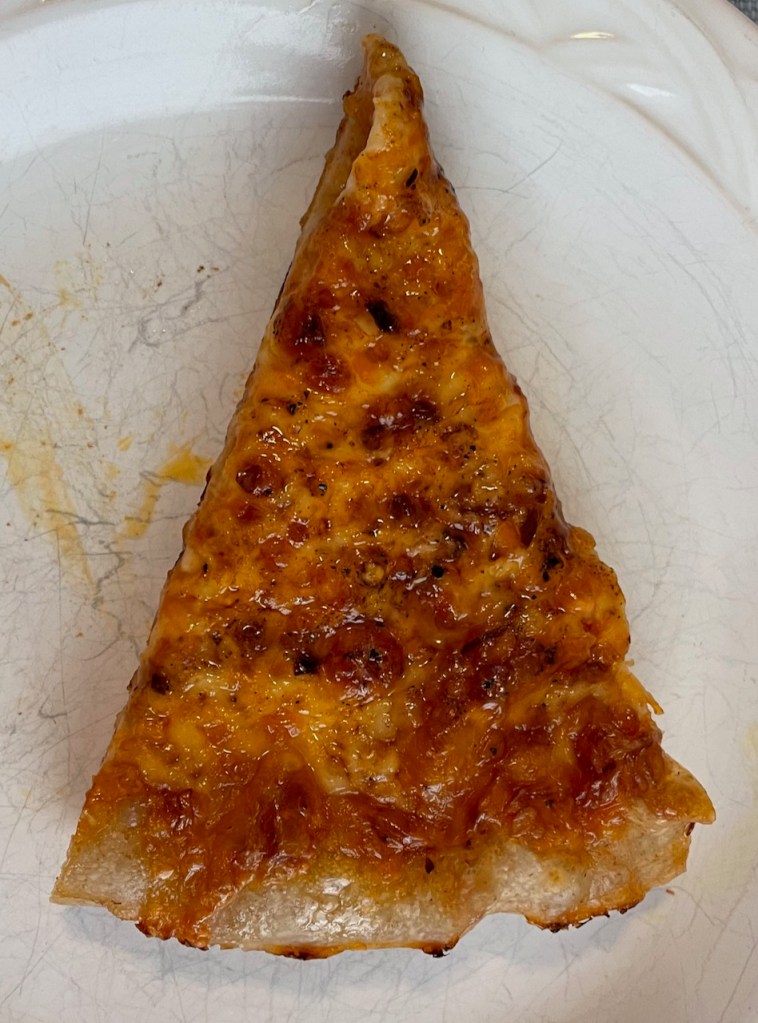
Inspired by several things, notably: Cook’s Illustrated article/recipe about Cast Iron Pan Pizza, and Dan’s adventures with “South Shore Bar Pizza” (and his amazing Facebook photos!), I decided to wing it and try to make a sourdough version.
I started with a one-loaf batch of Tartine bread, but increased the proportion of bread flour slightly (+25g), then divided it into two parts to make two pan pizzas.
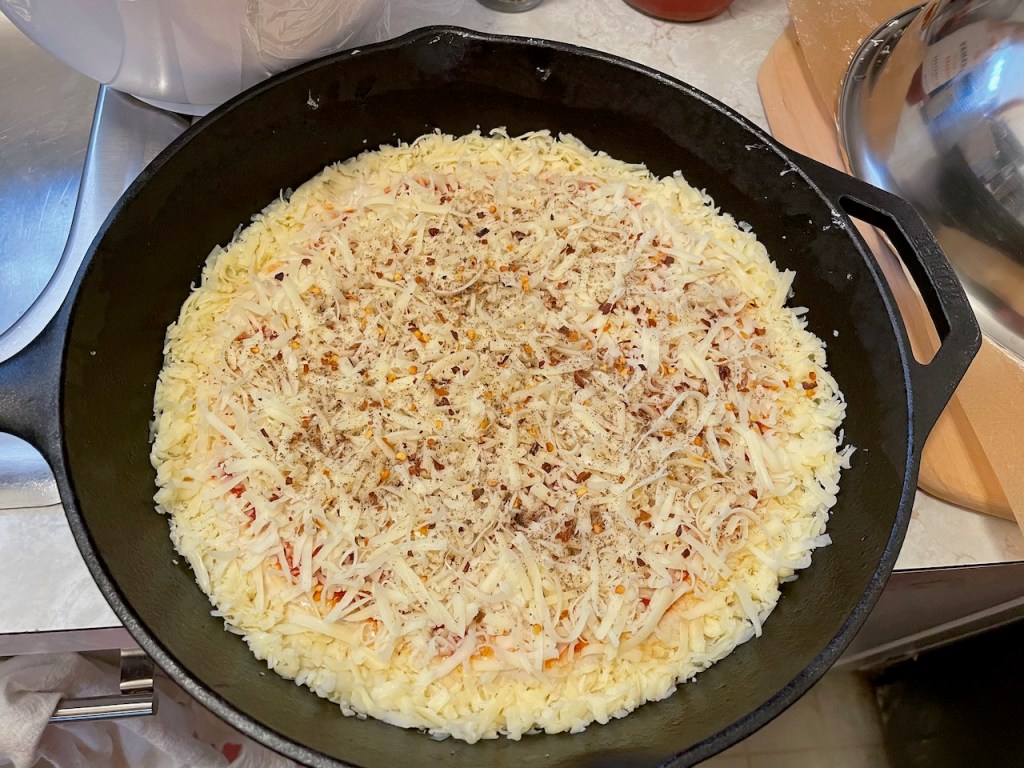
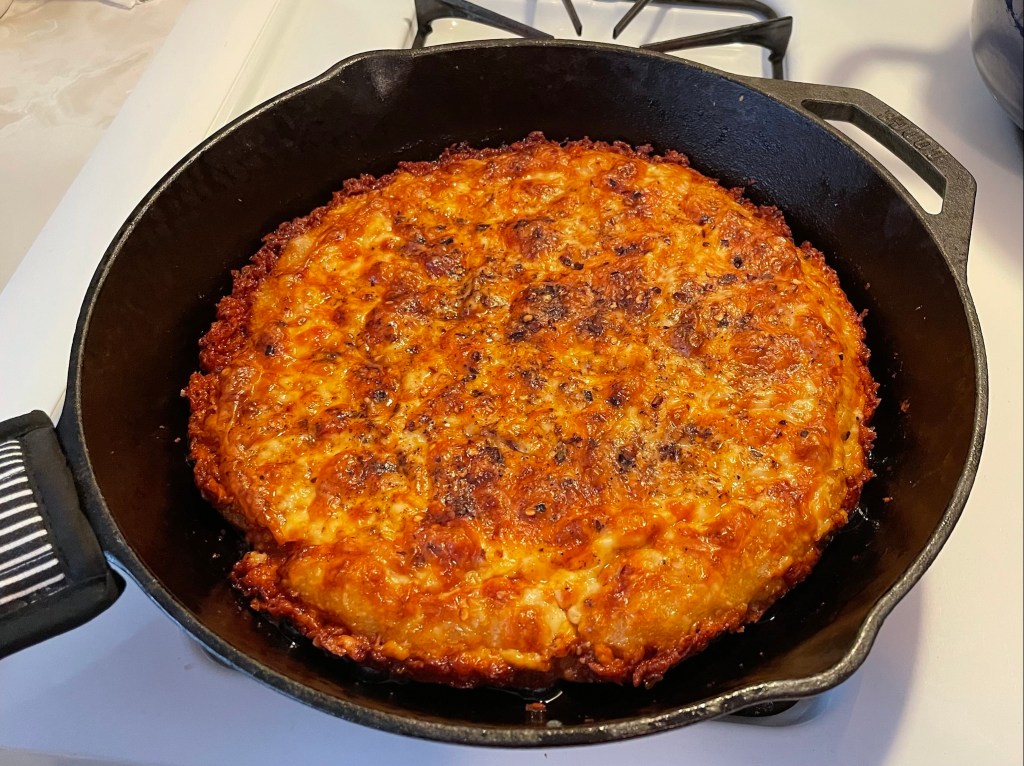
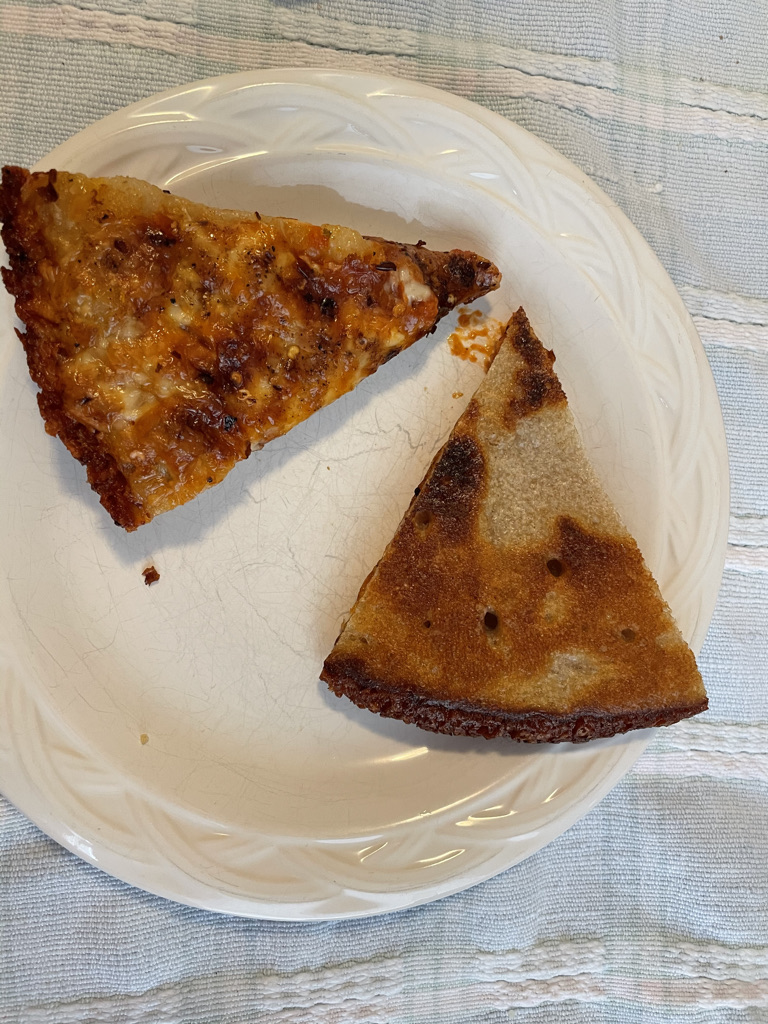
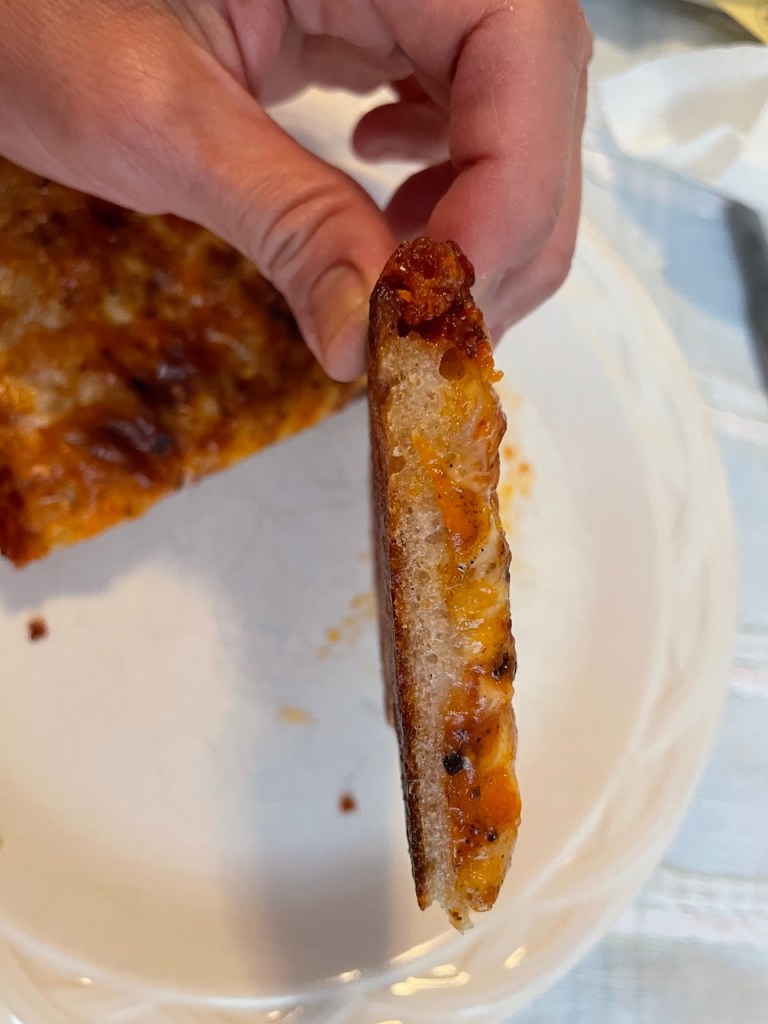
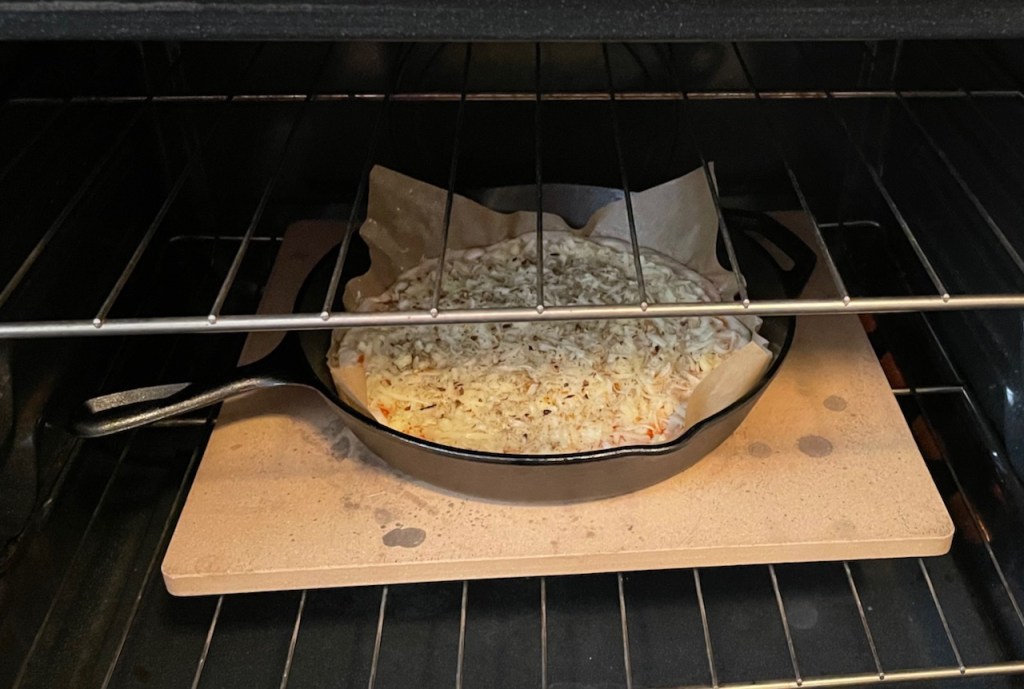
I was interested in Cook’s Illustrated’s suggestion to build the pizza in an unheated cast iron skillet and had received conflicting advice from a friend that the pan should be preheated, so I handled the two pizzas differently to see what would happen. Here’s the first one, built in an unheated pan then baked with the pan placed directly on the preheated baking stone. For both pizzas, I followed the Cook’s advice to finish the bottom of the pizza by placing the pan (with pizza in it, of course) on the stovetop for 1-2 minutes. Note the frico cheese edge, which was excellent, but I overbaked this by about 5 minutes (anyone else sensing that this is a theme for me??) so the frico got a little crunchier than would be ideal.

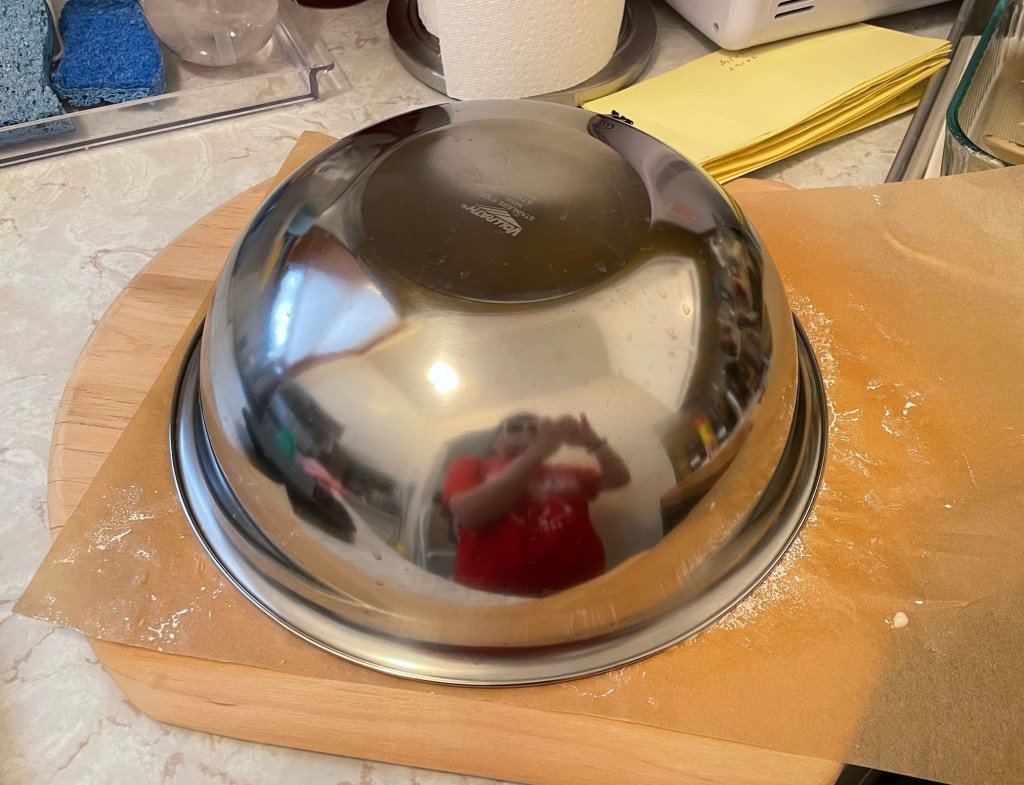
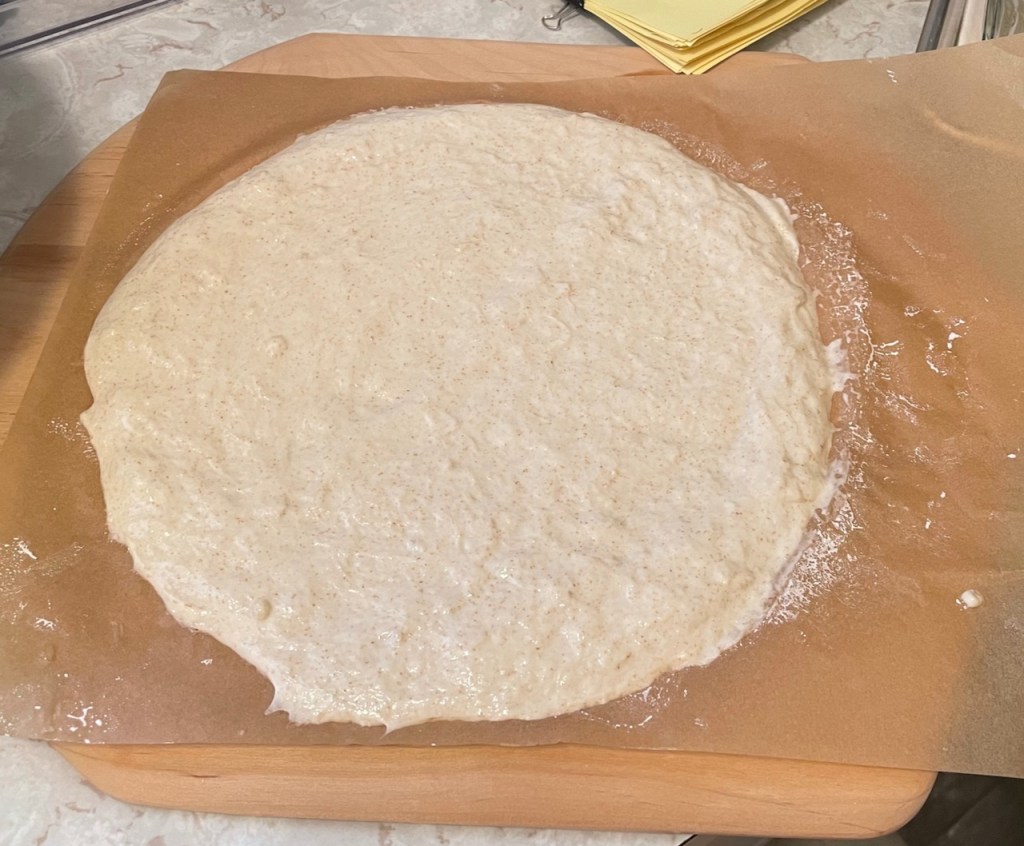
And here’s the second pizza. I built it on a piece of parchment on a pizza peel. I was just barely able to fit it under my largest bowl for the rest, and this was the exact size of the cast iron pan. The high-hydration dough definitely adheres to the parchment, but since the whole thing (including parchment) will get transferred to the cast iron skillet, the sticking doesn’t matter at this point. The parchment was easy to remove before putting the pizza on the stovetop for finishing. I decided not to make the frico on this one, but I guess I could have. It might be a little perilous to put the cheese around the edge with the pan already really hot, but it should be possible.

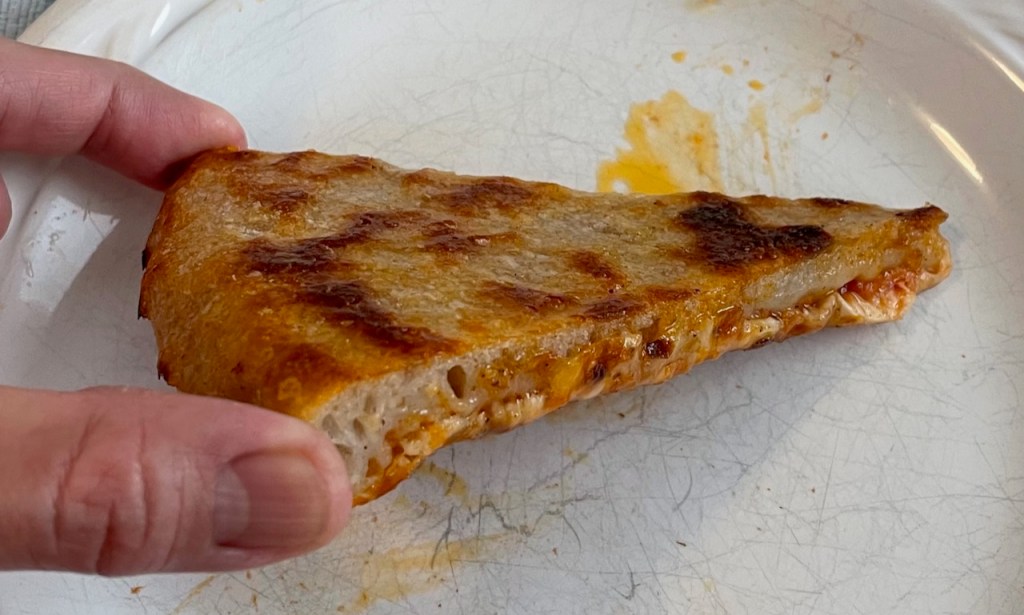
So the bottom line is that both methods worked! And, making two pizzas kinda dictates that a mixed method is necessary (since the cast iron pan will be cool for the first one and already hot for the second one).
Throughout my Tartine Sourdough Bread adventure it has proven consistently true that whenever I start to get confident that I might know what I’m doing, something happens to remind me that I really don’t. Winging it on pizza made with sourdough but without a recipe was pretty bold, but it seems I got away with it this time!
-
Pate a choux (profiteroles) 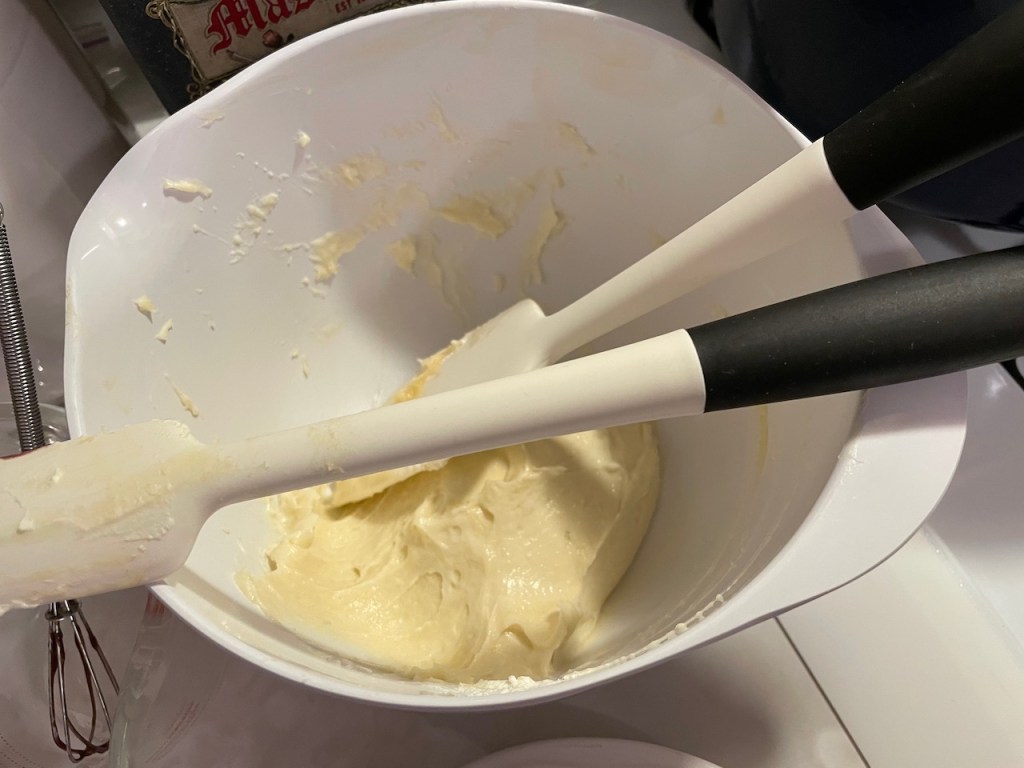
Pastry cream 
Ganache 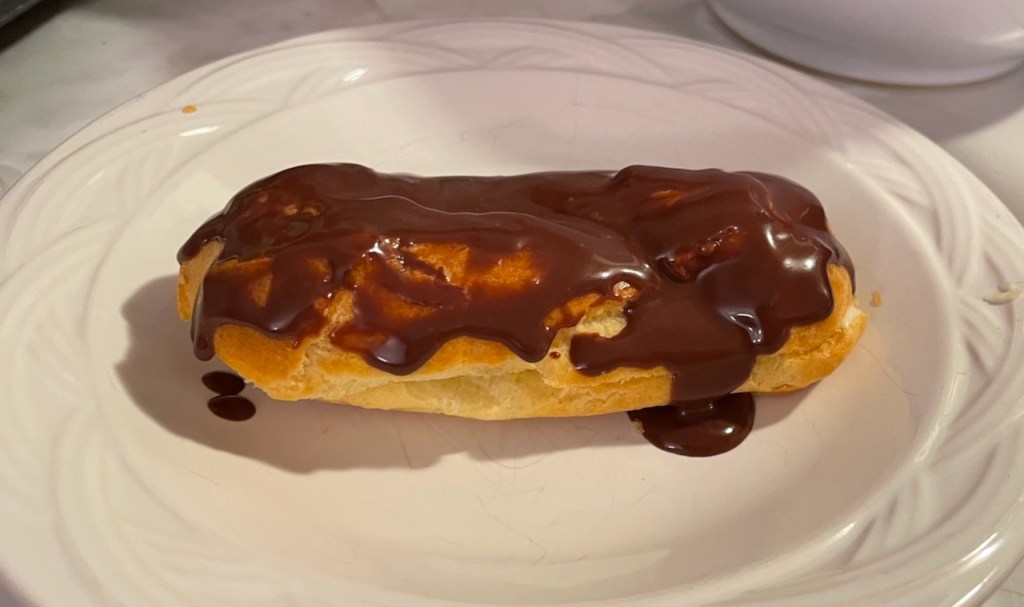
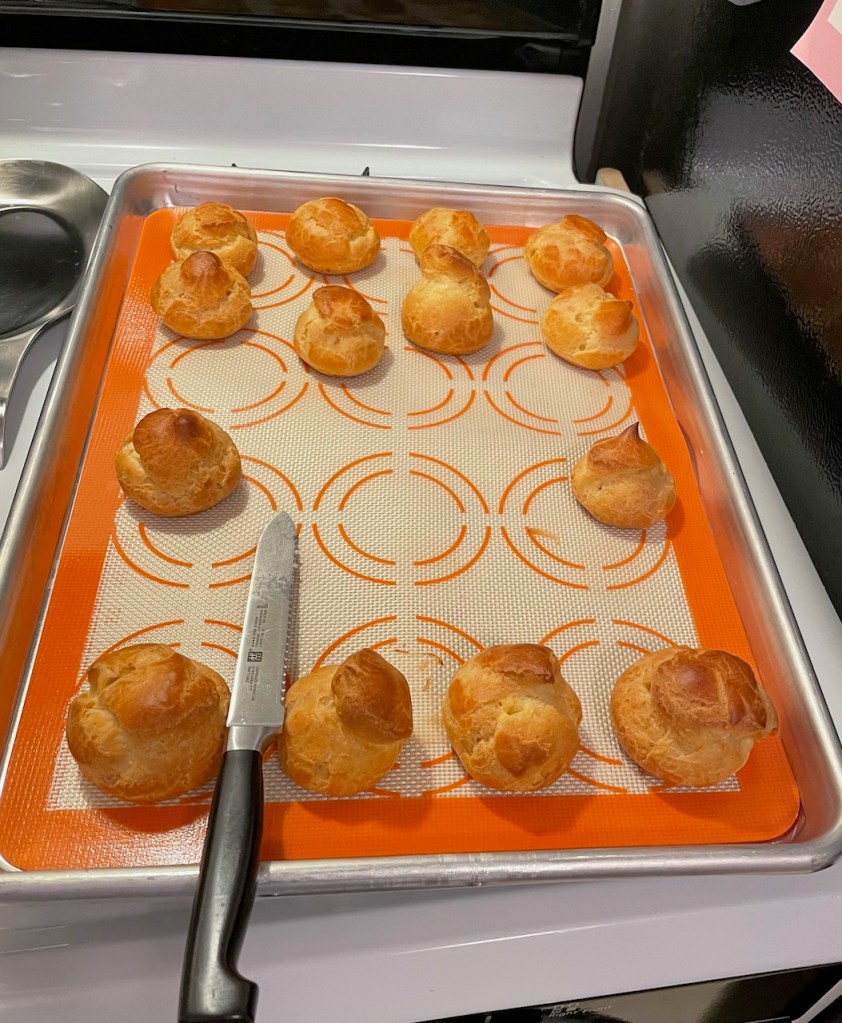
Eclair It’s really just not possible to watch the Great British Baking Show at any length and not want to make choux buns. Especially in the earlier seasons, one could easily conclude that choux pastry held the keys to the kingdom. On TV, the stuff really does look magical. It goes into the oven looking like little kiss-shaped things, but it come out looking like big, puffy balloons. Pastry magic!
Also, Cook’s Illustrated ran an article about Choux au Craquelin that pushed me over the edge. Choux had to happen.
I’ve made choux before, and have even taken a one-day pastry class from the queen herself (Joanne Chang) which included choux. It never struck me as that difficult, but it seems that the GBBS contestants are often asked to make choux without the benefit of an actual recipe. For me, and for pretty much any typical home cook, this would not be possible.
I forgot to take notes on these, but I did take pictures (not usually this careless!). I hazily recall being irked that whatever recipe I used called for a 1″ piping tip, but I found that there really is no such thing for the home baker. I have since managed to find one, but it can’t be used with most couplers. This launched a whole piping tip buying project that I won’t bore you with. Another project that I wouldn’t normally have time for.
I note that my eclair looks “informal”, as Prue Leith might say. Paul Hollywood would say that it looks like it’s been dropped on the floor. Nonetheless, I do remember that it was very satisfying to eat.
-
Subscribe
Subscribed
Already have a WordPress.com account? Log in now.
